The New Drawing on the Right Side of the Brain (43 page)
Read The New Drawing on the Right Side of the Brain Online
Authors: Betty Edwards

BOOK: The New Drawing on the Right Side of the Brain
7.81Mb size Format: txt, pdf, ePub
These special perceptions, like all drawing skills, are easy to attain once you have made a cognitive shift to the artist’s mode of seeing. Research on the brain indicates that the right hemisphere, as well as being able to perceive the shapes of particular shadows, is also specialized for deriving meaning from patterns of shadows. Apparently, this derived meaning is then communicated to the conscious verbal system, which names it.
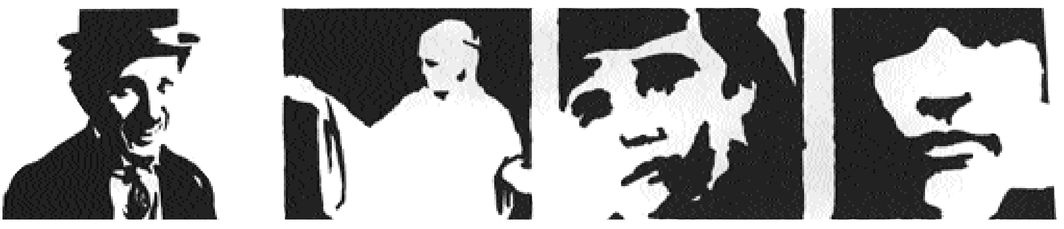
Fig. 10-4.
How does R-mode accomplish the leap of insight required to know what these patterns of light and dark areas mean? Apparently R-mode is able to extrapolate from incomplete information to envision a complete image. The right brain seems undeterred by missing pieces of information and appears to delight in “getting” the picture, despite its incompleteness.
Look, for example, at the patterns in Figure 10-4. In each of the drawings, notice that you first see the pattern, then you perceive it as a gestalt, and then you name it.
Patients with right-hemisphere injuries often have great difficulty making sense of complex, fragmentary shadow patterns such as those in Figure 10-4. They see only random light and dark shapes. Try turning the book upside down to approximate seeing the patterns as these patients do—as unnamable shapes. Your task in drawing is to see the shadow-shapes in this way even when the image is right side up, while holding at arm’s length, so to speak, knowledge of what the shapes mean.
This “trick of the artist” is great fun. I’m sure you will enjoy these last exercises in which you will put together all of the basic skills—edges, spaces, relationships, lights and shadows, and, finally, expressing your unique response to the gestalt—the “thingness of the thing.” In this chapter, we’ll work with the remaining two of the three basic portrait poses.
The three basic portrait posesIn portrait drawing, artists have traditionally posed their models (or themselves in self-portraits) in one of three views:
• Full face: The model faces the artist directly with both sides of the model’s face fully visible to the artist.
• Profile: The view you drew in the last exercises. The model faces toward the artist’s left or right and only one side (one half) of the model’s face is visible to the artist.
• Three-quarter view: The model makes a half-turn toward the artist’s left or right, making visible to the artist three-quarters of the model’s face—the profile (one half) plus one quarter of the remaining half-face.
Note that the full-face and profile views are relatively invariant, while the three-quarter view can vary from an almost profile to an almost full-face pose and still be called a “three-quarter view.”
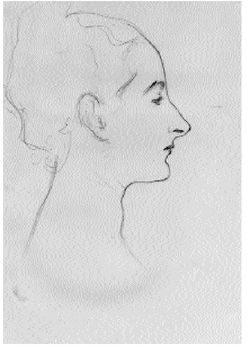
John Singer Sargent, 1856-1925.
Study for “Madame X.”
Courtesy of The Metropolitan Museum of Art, Gift of Mrs. Frances Ormond and Miss Emily Sargent, 1931
Study for “Madame X.”
Courtesy of The Metropolitan Museum of Art, Gift of Mrs. Frances Ormond and Miss Emily Sargent, 1931
John Singer Sargent, 1856-1925.
Olimpio Fusco,
c. 1905-15? Courtesy of The Corcoran Gallery of Art, Washington.
Olimpio Fusco,
c. 1905-15? Courtesy of The Corcoran Gallery of Art, Washington.
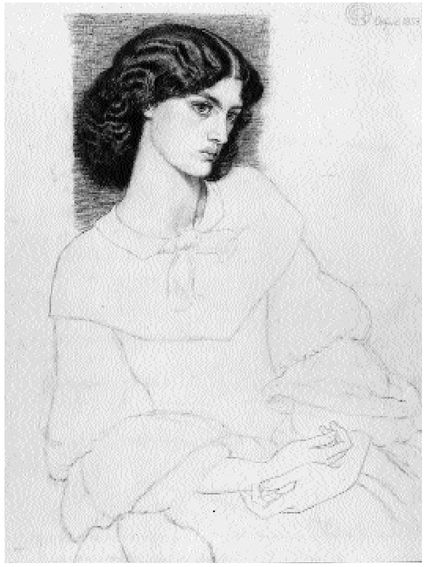
Dante Gabriel Rossetti, 1828-82.
Jane Burden, Later Mrs. William Morris, as Queen Guinevere.
Courtesy of The National Gallery of Ireland, Dublin.
Jane Burden, Later Mrs. William Morris, as Queen Guinevere.
Courtesy of The National Gallery of Ireland, Dublin.
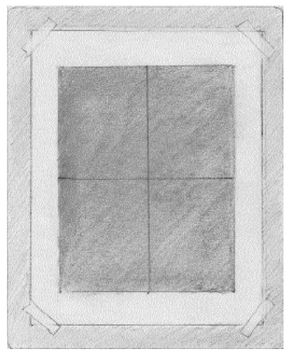
Fig. 10-5.
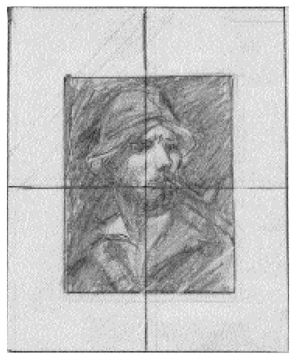
Fig. 10-6.
A warm-up exercise: A copy of the Courbet self-portraitImagine that you are honored by a visit from the nineteenth-century French artist, Gustave Courbet (pronounced goos-tav koorbay), and that he has agreed to sit for a portrait drawing, wearing his jaunty hat and smoking his pipe. The artist is in a rather serious mood, quiet and thoughtful. See Figure. 10-3, page 197.
Imagine further that you have arranged a spotlight so that it shines from above and in front of Courbet, illuminating the top of his face but leaving the eyes and much of the face and neck in rather deep shadow. Take a moment to consciously see how the lights and shadows logically fall relative to the source of light. Then turn the book upside-down to see the shadows as a pattern of shapes. The wall behind is dark, silhouetting your model.
What you’ll need:1. Your #4B drawing pencil
2. Your eraser
3. Your clear plastic Picture Plane
4. A stack of three or four sheets of drawing paper
5. Your graphite stick and some paper napkins
What you’ll do:Please read through all of the instructions before starting.
1. As always, draw a format edge on your drawing paper, using the outside edge of one of your Viewfinders. This format is in the same proportion, width to height, as the reproduction.
2. Tone your paper with a rubbed graphite ground to a medium-dark silvery gray—about the tone of the wall behind Courbet. Lightly draw the crosshairs as shown in Figure 10-5. You may wish to copy this drawing upside down.
3. Set your Picture Plane on top of the reproduction of the Courbet drawing. The crosshairs on the plastic Picture Plane will instantly show you where to locate the essential points of the drawing. I suggest that you work upside down for at least the first “blocking in” of the lights and shadows (Figure. 10-6).
4. Decide on a Basic Unit, perhaps the light-shape from the center of the hat brim to the top of the upper lip, or perhaps the pipe stem, or you may decide on another Basic Unit. Remember that everything in Courbet’s drawing is locked into a relationship. For this reason, you can start with any Basic Unit and end up with the correct relationships. Then, transfer your Basic Unit to the drawing paper, following the instructions on page 130 and in Figures 8-11 and 8-12, page 146.
Note: The step-by-step procedure I offer below is only a suggestion about how to proceed. You may wish to use an entirely different sequence. Also note that I am naming parts of the drawing only for instructional purposes. As you draw, try your best to see the shapes of lights and darks wordlessly. I realize that this is like trying not to think of the word “elephant,” but as you continue to draw, thinking wordlessly becomes second nature.
5. You will be “drawing” with an eraser. Sharpen your eraser into a drawing tool by cutting one end into a wedge shape as shown in Figure 10-7.
Begin by erasing out the major shapes of light, on the face, hat, and shirtfront, always checking the size and position of those shapes against your Basic Unit. You might think of these light-shapes as negative shapes that share edges with the dark forms. By correctly seeing and erasing the light shapes, you’ll have the dark shapes “for free.”
6. Next, carefully erase the lightest parts of the hat, the side of the neck, and the coat. Your toned ground supplies the middle value of the hat and coat (Figure. 10-8).
7. Using your #4B pencil, darken in the area around the head, the shadow under the hat brim, the shadows below the eyebrows, under the nose, under the lower lip, the beard, the shadow of the beard, and the shadows under the shirt collar and the coat collar. Carefully observe the shapes of these shadows. Keep your tones quite smooth, either crosshatching or working a continuous tone or combining the two. Ask yourself: Where is the darkest dark? Where is the lightest light?
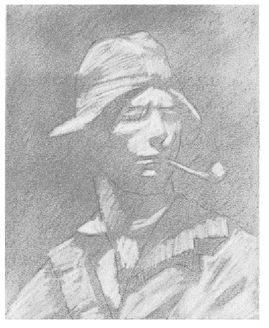
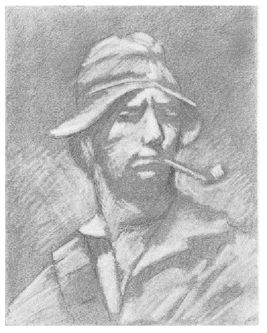
Fig. 10-7. Drawing with an eraser.
a. A rubbed graphite ground of middle value
b. An eraser trimmed for precise erasing of light areas. Then use a #4B or #6B pencil to darken shadowed areas
Fig. 10-8.
Fig. 10-9.
Notice also that there is almost no information in the shadowed areas. They are nearly uniform tones. Yet, when you turn the book right side up, the face and features emerge out of the shadows. These perceptions are occurring in your own brain, imaging and extrapolating from incomplete information. The hardest part of this drawing will be resisting the temptation to give too much information! Let the shadows stay shadowy, and have faith that your viewer will extrapolate the features, the expression, the eyes, the beard, everything (Figure. 10-9).
Other books
Lucas by Kelli Ann Morgan
White Flock: Poetry of Anna Akhmatova by Anna Akhmatova
Cleopatra Confesses by Carolyn Meyer
Winning the Wallflower: A Novella by Eloisa James
Sentence of Marriage by Parkinson, Shayne
Lord of the Blade by Elizabeth Rose
Now and Forever 4, The Renovated Heart by Joachim, Jean C.
The Training (Book 3: The Submissive Trilogy) by Tara Sue Me
Unfinished Hero 01 Knight by Kristen Ashley
Deadly Desserts (Sky High Pies Cozy Mysteries Book 6) by Mary Maxwell