The New Drawing on the Right Side of the Brain (41 page)
Read The New Drawing on the Right Side of the Brain Online
Authors: Betty Edwards

BOOK: The New Drawing on the Right Side of the Brain
9.84Mb size Format: txt, pdf, ePub
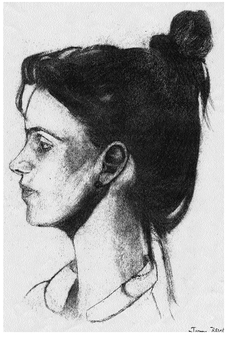
But it really isn’t necessary to draw every hair and every curl. What your viewer wants is for you to express the character of the hair, particularly the hair closest to the face. Look for the dark areas where the hair separates and use those areas as negative spaces. Look for the major directional movements, the exact turn of a strand or wave. The right hemisphere, loving complexity, can become entranced with the perception of hair, and the record of your perceptions in this part of a portrait can have great impact, as in the portrait of
Proud Maisie
(Figure 9-36). To be avoided are the thin, glib, symbolic marks that spell out h-a-i-r on the same level as if you lettered the word across the skull of your portrait. Given enough clues, the viewer can extrapolate and, in fact, enjoys extrapolating the general texture and nature of the hair. See the demonstration drawings at the end of this chapter for examples.
Drawing hair is largely a light-shadow process. In the next chapter, we’ll take up the perception of lights and shadows in depth. For now, I’ll set down some brief suggestions. To draw your model’s hair, gaze at it with your eyes squinted to obscure details and to see where the larger highlights lie and where the larger shadows fall. Notice particularly the characteristics of the hair (wordlessly, of course, though I must use words for the sake of clarity). Is the hair crinkly and dense, smooth and shiny, randomly curled, short and stiff? Take notice of the overall shape of the hair and make sure that you have matched that shape in your drawing. Begin to draw the hair in some detail where the hair meets the face, transcribing the light-shadow patterns and the direction of angles and curves in various segments of the hair.
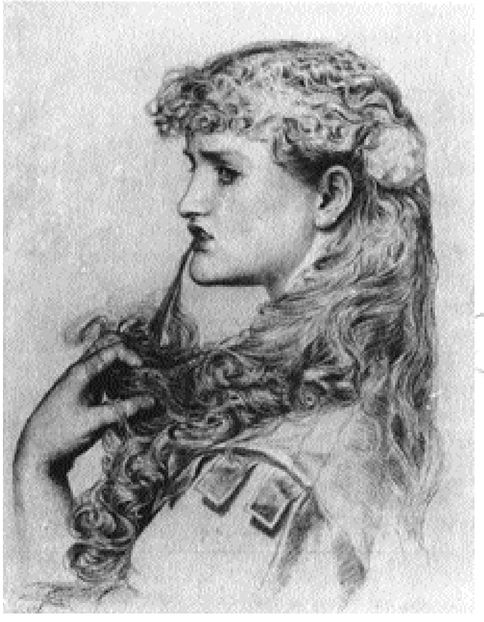
Fig. 9-36. Anthony Frederick Augustus Sandys (1832-1904),
Proud Maisie.
Courtesy of the Victoria and Albert Museum, London.
Proud Maisie.
Courtesy of the Victoria and Albert Museum, London.
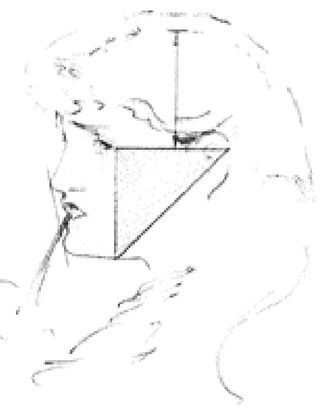
Fig. 9-37. Note the position of the ear. The placement fits our mnemonic for locating the ear in profile view: Eye level-to-chin equals back-of-the-eye to the back-of-the-ear.
20. Finally, to complete your profile portrait, draw in the neck and shoulders, which provide a support for the profile head. The amount of detail of clothing is another aesthetic choice with no strict guidelines. The major aims are to provide enough detail to fit—that is, to be congruent with—the drawing of the head, and to make sure that the drawing of details of clothing adds to, and does not detract from, your drawing of the head. See Figure 9-36 for an example.
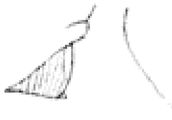
Fig. 9-38.
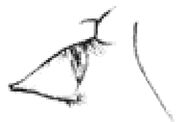
Fig. 9-39.
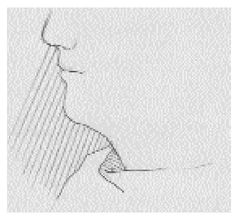
Fig. 9-40.
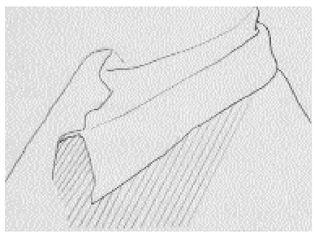
Fig. 9-41.
Some further tipsEyes:
Observe that the eyelids have thickness. The eyeball is behind the lids (Figure 9-38). To draw the iris (the colored part of the eye)—don’t draw it. Draw the shape of the white (Figure 9-39). The white can be regarded as negative space, sharing edges with the iris. By drawing the (negative) shape of the white part, you’ll get the iris right because you’ll bypass your memorized symbol for iris. Note that this bypassing technique works for everything that you might find “hard to draw.” The technique is to shift to the next adjacent shape or space and draw that instead. Observe that the upper lashes grow first downward and then (sometimes) curve upward. Observe that the whole shape of the eye slants back at an angle from the front of the profile (Figure 9-38). This is because of the way the eyeball is set in the surrounding bony structure. Observe this angle on your model’s eye—this is an important detail.
Observe that the eyelids have thickness. The eyeball is behind the lids (Figure 9-38). To draw the iris (the colored part of the eye)—don’t draw it. Draw the shape of the white (Figure 9-39). The white can be regarded as negative space, sharing edges with the iris. By drawing the (negative) shape of the white part, you’ll get the iris right because you’ll bypass your memorized symbol for iris. Note that this bypassing technique works for everything that you might find “hard to draw.” The technique is to shift to the next adjacent shape or space and draw that instead. Observe that the upper lashes grow first downward and then (sometimes) curve upward. Observe that the whole shape of the eye slants back at an angle from the front of the profile (Figure 9-38). This is because of the way the eyeball is set in the surrounding bony structure. Observe this angle on your model’s eye—this is an important detail.
Neck:
Use the negative space in front of the neck in order to perceive the contour under the chin and the contour of the neck (Figure 9-40). Check the angle of the front of the neck in relation to vertical. Make sure to check the point where the back of the neck joins the skull. This is often at about the level of the nose or mouth (Figure 9-22).
Use the negative space in front of the neck in order to perceive the contour under the chin and the contour of the neck (Figure 9-40). Check the angle of the front of the neck in relation to vertical. Make sure to check the point where the back of the neck joins the skull. This is often at about the level of the nose or mouth (Figure 9-22).
Collar:
Don’t draw the collar. Collars, too, are strongly symbolic. Instead, use the neck as negative space to draw the top of the collar, and use negative spaces to draw collar points, open necks of shirts, and the contour of the back below the neck, as in Figures 9-40 and 9-41. (This bypassing technique works, of course, because shapes such as the spaces around collars cannot be easily named and have generated no preexisting symbols to distort perception.)
After you have finished:Don’t draw the collar. Collars, too, are strongly symbolic. Instead, use the neck as negative space to draw the top of the collar, and use negative spaces to draw collar points, open necks of shirts, and the contour of the back below the neck, as in Figures 9-40 and 9-41. (This bypassing technique works, of course, because shapes such as the spaces around collars cannot be easily named and have generated no preexisting symbols to distort perception.)
Congratulations on drawing your first profile portrait. You are now using the perceptual skills of drawing with some confidence, I feel sure. Don’t forget to practice seeing the angles and proportions you have just sighted. Television is wonderful for supplying models for practice, and the television screen is, after all, a “picture-plane.” Even if you can’t draw these free models because they rarely stay still, you can practice eyeballing edges, spaces, angles, and proportions. Soon, these perceptions will occur automatically, and you will be really seeing.
Showing of profile portraitsStudy the drawings on the following pages. Notice the variations in styles of drawing. Check the proportions by measuring with your pencil.
In the next chapter, you will learn the fourth skill of drawing, the perception of lights and shadows. The main exercise will be a fully modeled, tonal, volumetric self-portrait and will bring us full-circle to your “Before Instruction” self-portrait for comparison. Your “After Instruction” self-portrait will be either a “three-quarter” view or a “full-face” view. I’ll define the three portrait views for you before we turn to lights and shadows.
Another example of two styles of drawing. Instructor Brian Bomeisler and I sat on either side of Grace Kennedy, who is also one of our instructors, and drew these demonstration drawings for our students. We were using the same materials, the same model, and the same lighting.
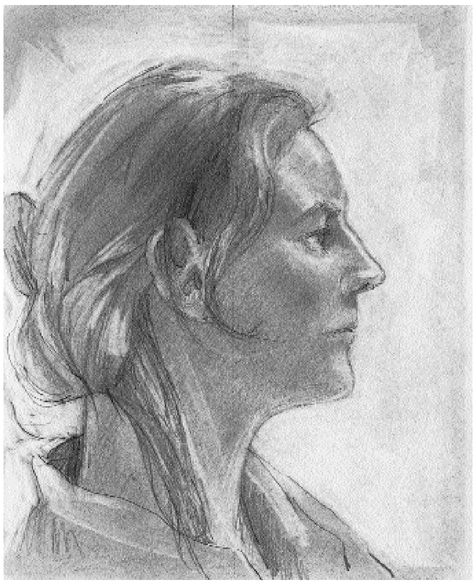
Demonstration drawing by the author.
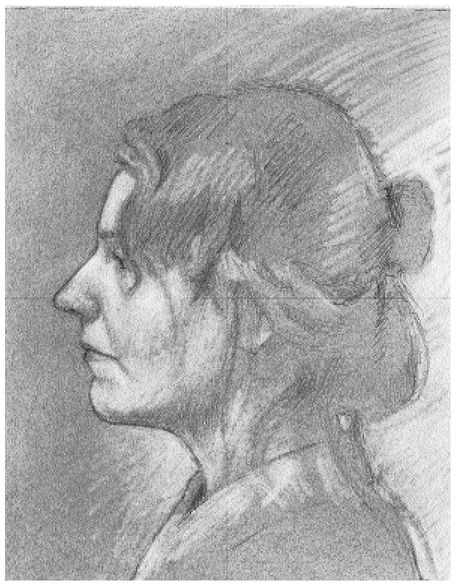
Demonstration drawing by instructor Brian Bomeisler.
Other books
Hero Unmasked: 3 (Heroes of Saturn) by Anna Alexander
The Secret of Skeleton Reef by Franklin W. Dixon
The Rainbow Troops by Andrea Hirata
Montaine by Rome, Ada
Otherwise Engaged by Green, Nicole
Babygirl and the Mean Boss by Pepper Pace
New Species 06 Wrath by Laurann Dohner
The Bellerose Bargain by Robyn Carr
Masks by Evangeline Anderson