Programming Python (68 page)

It’s been said that tkinter’s strongest
points may be itsTextandCanvaswidgets. Both provide a
remarkable amount of functionality. For instance, the tkinterTextwidget was powerful enough to implement the
web pages of Grail, an experimental web browser coded in Python;Textsupports complex font-style settings,
embedded images, unlimited undo and redo, and much more. The tkinterCanvaswidget,
a general-purpose drawing device, allows for efficient
free-form graphics and has been the basis of sophisticated
image-processing and visualization applications.
In
Chapter 11
, we’ll put these two
widgets to use to implement
text editors (PyEdit), paint programs
(PyDraw), clock
GUIs (PyClock), and image programs
(PyPhoto and PyView). For the purposes of this tour
chapter, though, let’s start out using these
widgets
in simpler ways.
Example 9-10
implements a simple
scrolled-text display, which knows how to fill its display with a text
string or file.
Example 9-10. PP4E\Gui\Tour\scrolledtext.py
"a simple text or file viewer component"
print('PP4E scrolledtext')
from tkinter import *
class ScrolledText(Frame):
def __init__(self, parent=None, text='', file=None):
Frame.__init__(self, parent)
self.pack(expand=YES, fill=BOTH)                 # make me expandable
self.makewidgets()
self.settext(text, file)
def makewidgets(self):
sbar = Scrollbar(self)
text = Text(self, relief=SUNKEN)
sbar.config(command=text.yview)                  # xlink sbar and text
text.config(yscrollcommand=sbar.set)             # move one moves other
sbar.pack(side=RIGHT, fill=Y)                    # pack first=clip last
text.pack(side=LEFT, expand=YES, fill=BOTH)      # text clipped first
self.text = text
def settext(self, text='', file=None):
if file:
text = open(file, 'r').read()
self.text.delete('1.0', END)                     # delete current text
self.text.insert('1.0', text)                    # add at line 1, col 0
self.text.mark_set(INSERT, '1.0')                # set insert cursor
self.text.focus()                                # save user a click
def gettext(self):                                   # returns a string
return self.text.get('1.0', END+'-1c')           # first through last
if __name__ == '__main__':
root = Tk()
if len(sys.argv) > 1:
st = ScrolledText(file=sys.argv[1])              # filename on cmdline
else:
st = ScrolledText(text='Words\ngo here')         # or not: two lines
def show(event):
print(repr(st.gettext()))                        # show as raw string
root.bind('', show)                      # esc = dump text
root.mainloop()
Like theScrolledListin
Example 9-9
, theScrolledTextobject in this file is designed to be a reusable component
which we’ll also put to work in later examples, but it can also be run
standalone to display text file contents. Also like the last section, this
script is careful to pack the scroll bar first so that it is cut out of
the display last as the window shrinks and arranges for the embeddedTextobject to expand in both
directions as the window grows. When run with a filename argument, this
script makes the window shown in
Figure 9-17
; it embeds aTextwidget on the left and a cross-linkedScrollbaron the right.
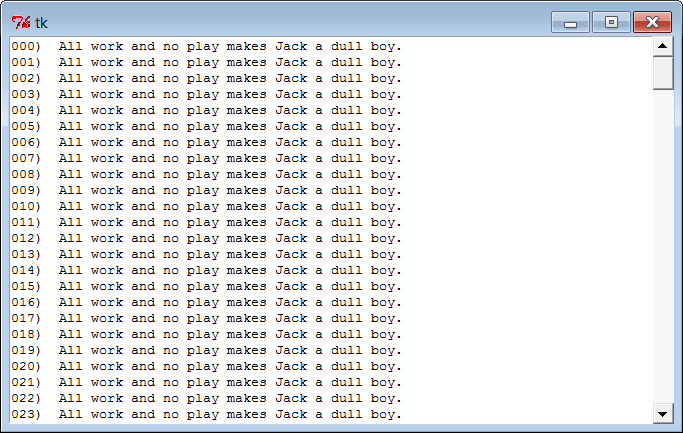
Figure 9-17. scrolledtext in action
Just for fun, I populated the text file displayed in the window with
the following code and command lines (and not just because I used to live
near an infamous hotel in Colorado):
C:\...\PP4E\Gui\Tour>type makefile.pyf = open('jack.txt', 'w')
for i in range(250):
f.write('%03d) All work and no play makes Jack a dull boy.\n' % i)
f.close()
C:\...\PP4E\Gui\Tour>python makefile.pyC:\...\PP4E\Gui\Tour>python scrolledtext.py jack.txtPP4E scrolledtext
To view a file, pass its name on the command line—its text is
automatically displayed in the new window. By default, it is shown in a
font that may vary per platform (and might not be fixed-width on some),
but we’ll pass afontoption to theTextwidget in the next example to
change that. Pressing the Escape key fetches and displays the full text
content of the widget as a single string (more on this in a
moment).
Notice thePP4E scrolledtextmessage printed when this script runs. Because there is also a
scrolledtext.py
file in the standard Python
distribution (in moduletkinter.scrolledtext) with a very different implementation
and interface, the one here identifies itself when run or imported, so you
can tell which one you’ve got. If the standard library’s alternative ever
goes away, import the class listed to get a simple text browser, and
adjust any text widget configuration calls to include a.textqualifier level (e.g.,x.text.configinstead ofx.config; the library version subclassesTextdirectly,
notFrame).
To understand
how this script works at all, though, we have to detour
into a fewTextwidget details here.
Earlier we met theEntryandMessagewidgets, which address a subset of theTextwidget’s uses. TheTextwidget is much richer in both features
and interfaces—it supports both input and display of multiple lines of
text, editing operations for both programs and interactive users,
multiple fonts and colors, and much more.Textobjects are created, configured, and
packed just like any other widget, but they have properties all their
own.
Although theTextwidget is a
powerful tool, its interface seems to boil down to two
core concepts. First, the content of aTextwidget is represented as a string in
Python scripts, and multiple lines are separated with the normal\nline
terminator. The string'Words\ngo here', for instance, represents
two lines when stored in or fetched from aTextwidget; it would normally have a
trailing\nalso, but it doesn’t
have to.
To help illustrate this point, this script binds the Escape key
press to fetch and print the entire contents of theTextwidget it embeds:
C:\...\PP4E\Gui\Tour>python scrolledtext.pyPP4E scrolledtext
'Words\ngo here'
'Always look\non the bright\nside of life\n'
When run with arguments, the script stores a file’s contents in
theTextwidget. When run without
arguments, the script stuffs a simple literal string into the widget,
displayed by the first Escape press output here (recall that\nis the escape sequence for the line-end
character). The second output here happens after editing the window’s
text, when pressing Escape in the shrunken window captured in
Figure 9-18
. By default,Textwidget text is fully editable
using the usual edit operations for your platform.
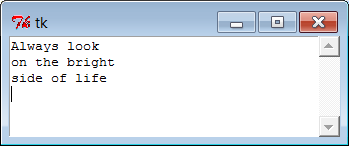
Figure 9-18. scrolledtext gets a positive outlook
The second key to
understandingTextcode has to do with the ways you specify a position in the text
string. Like the listbox,Textwidgets allow you to specify such a position in a variety of ways. InText, methods that expect a
position to be passed in will accept an index, a mark, or a tag
reference. Moreover, some special operations are invoked with
predefined marks and tags—the insert cursor is markINSERT, and the current selection is tagSEL. Since they are fundamental toTextand the source of much of its
expressive power, let’s take a closer look at these settings.
Because it is a
multiple-line widget,Textindexes identify both a line and a
column. For instance, consider the interfaces of the basic insert,
delete, and fetch text operations used by this script:
self.text.insert('1.0', text)             # insert text at the start
self.text.delete('1.0', END)              # delete all current text
return self.text.get('1.0', END+'-1c')    # fetch first through last
In all of these, the first argument is an absolute index that
refers to the start of the text string: string'1.0'means row 1, column 0 (rows are
numbered from 1 and columns from 0, though'0.0'is accepted as a reference to the
start of the text, too). An index'2.1'refers to the second character in
the second row.
Like the listbox, text indexes can also be symbolic names: theENDin the precedingdeletecall refers to the position just
past the last character in the text string (it’s a tkinter variable
preset to string'end').
Similarly, the symbolic indexINSERT(really, string'insert') refers to the position
immediately after the insert cursor—the place where characters would
appear if typed at the keyboard. Symbolic names such asINSERTcan also be called marks, described
in a moment.
For added precision, you can add simple arithmetic extensions
to index strings. The index expressionEND+'-1c'in thegetcall in the previous example, for
instance, is really the string'end-1c'and refers to one character back
fromEND. BecauseENDpoints to just beyond the last
character in the text string, this expression refers to the last
character itself. The−1cextension effectively strips the trailing\nthat this widget adds to its contents
(and which may add a blank line if saved in a file).
Similar index string extensions let you name characters ahead
(+1c), name lines ahead and
behind (+2l,−2l), and specify things such as line ends
and word starts around an index (lineend,wordstart). Indexes show up in mostTextwidget calls.
Besides
row/column identifier strings, you can also pass
positions as names of marks—symbolic names for a position between
two characters. Unlike absolute row/column positions, marks are
virtual locations that move as new text is inserted or deleted (by
your script or your user). A mark always refers to its original
location, even if that location shifts to a different row and column
over time.
To create a mark, call theTextobject’smark_setmethod with a string name and an
index to give its logical location. For instance, this script sets
the insert cursor at the start of the text initially, with a call
like the first one here:
self.text.mark_set(INSERT, '1.0')             # set insert cursor to start
self.text.mark_set('linetwo', '2.0')          # mark current line 2
The nameINSERTis a
predefined special mark that identifies the insert cursor position;
setting it changes the insert cursor’s location. To make a mark of
your own, simply provide a unique name as in the second call here
and use it anywhere you need to specify a text position. Themark_unsetcall deletes marks by
name.
In addition to absolute indexes and symbolic mark
names,
theTextwidget
supports the notion of tags—symbolic names associated with one or
more substrings within theTextwidget’s string. Tags can be used for many things, but they also
serve to represent a position anywhere you need one: tagged items
are named by their beginning and ending indexes, which can be later
passed to position-based calls.
For example, tkinter provides a built-in tag name,SEL—a tkinter name preassigned to string'sel'—which automatically refers
to currently selected text. To fetch the text selected (highlighted)
with a mouse, run either of these calls:
text = self.text.get(SEL_FIRST, SEL_LAST)      # use tags for from/to indexes
text = self.text.get('sel.first', 'sel.last')  # strings and constants work
The namesSEL_FIRSTandSEL_LASTare just preassigned
variables in the tkinter module that refer to the strings used in
the second line here. The textgetmethod expects
two indexes; to fetch text names by a tag, add.firstand.lastto the tag’s name to get its start
and end indexes.
To tag a substring, call theTextwidget’stag_addmethod
with a tag name string and start and stop positions (text can also
be tagged as added ininsertcalls). To remove a tag from all characters in a range of text, calltag_remove:
self.text.tag_add('alltext', '1.0', END)  # tag all text in the widget
self.text.tag_add(SEL, index1, index2)    # select from index1 up to index2
self.text.tag_remove(SEL, '1.0', END)     # remove selection from all text
The first line here creates a new tag that names all text in
the widget—from start through end positions. The second line adds a
range of characters to the built-inSELselection tag—they are automatically
highlighted, because this tag is predefined to configure its members
that way. The third line removes all characters in the text string
from theSELtag (all selections
are unselected). Note that thetag_removecall
just untags text within the named range; to really delete a tag
completely, calltag_deleteinstead. Also keep in mind that these calls apply to tags
themselves; to delete actual text use thedeletemethod shown earlier.
You can map indexes to tags dynamically, too. For example, the
textsearchmethod
returns therow.columnindex of
the first occurrence of a string between start and stop positions.
To automatically select the text thus found, simply add its index to
the built-inSELtag:
where = self.text.search(target, INSERT, END)  # search from insert cursor
pastit = where + ('+%dc' % len(target))        # index beyond string found
self.text.tag_add(SEL, where, pastit)          # tag and select found string
self.text.focus()                              # select text widget itself
If you want only one string to be selected, be sure to first
run thetag_removecall listed
earlier—this code adds a selection in addition to any selections
that already exist (it may generate multiple selections in the
display). In general, you can add any number of substrings to a tag
to process them as a group.
To summarize: indexes, marks, and tag locations can be used
anytime you need a text position. For instance, the textseemethod scrolls the display to make a
position visible; it accepts all three kinds of position
specifiers:
self.text.see('1.0')          # scroll display to top
self.text.see(INSERT)         # scroll display to insert cursor mark
self.text.see(SEL_FIRST)      # scroll display to selection tag
Text tags can also be used in broader ways for formatting and
event bindings, but I’ll defer those details until the end of
this section.