Mac Hacks (25 page)

. Other OSes
Your Mac can do a lot that might not be readily apparent. It can
control all the Apple devices you own, emulate a Wii system, and host a
Minecraft server. Using your Mac for all these nifty things will get you
wondering what other cool and unthought-of uses your Mac might have.
. Run a Minecraft Server on Your Mac
Learn
how to run your own Minecraft server for a select group of
kids (or adults) on your Mac.
Imagine this
purely
hypothetical situation:
you’re a den leader for the Cub Scouts, and you find yourself asking the
kids what they’re interested in. As a good den leader, you listen
intently, and when one of the scouts says that the coolest thing possible
would be a scouts-only Minecraft server, you start to think to yourself,
“Hey, now there’s something I could put in my book!” When every other
scout agrees that that would be the coolest thing ever, and factoring in
that the winter holidays are coming, you realize a Minecraft server
wouldn’t only be fun for the scouts—it would be blessed relief for the
parents, too. So you realize you need to get busy.
The first thing to contemplate when setting up a Minecraft server is
what machine you’re going to run it on. I have a first-generation Intel
MacBook Pro that I decided to donate to the cause. You don’t have to have
a dedicated server—your main Mac can likely run a Minecraft server—but if
you’ve got a spare computer laying around that’s used infrequently, why
not put it to work?
Before
you get started, you might want to check your expectations
against the reality of the
situation. Head to
Can I
Host a Minecraft Server?
and type in how much memory your machine
has (get that figure from the Apple menu by selecting “About This Mac”)
and connection speeds [from
SpeedTest.net
] into the form. The
site will then spit out a result.
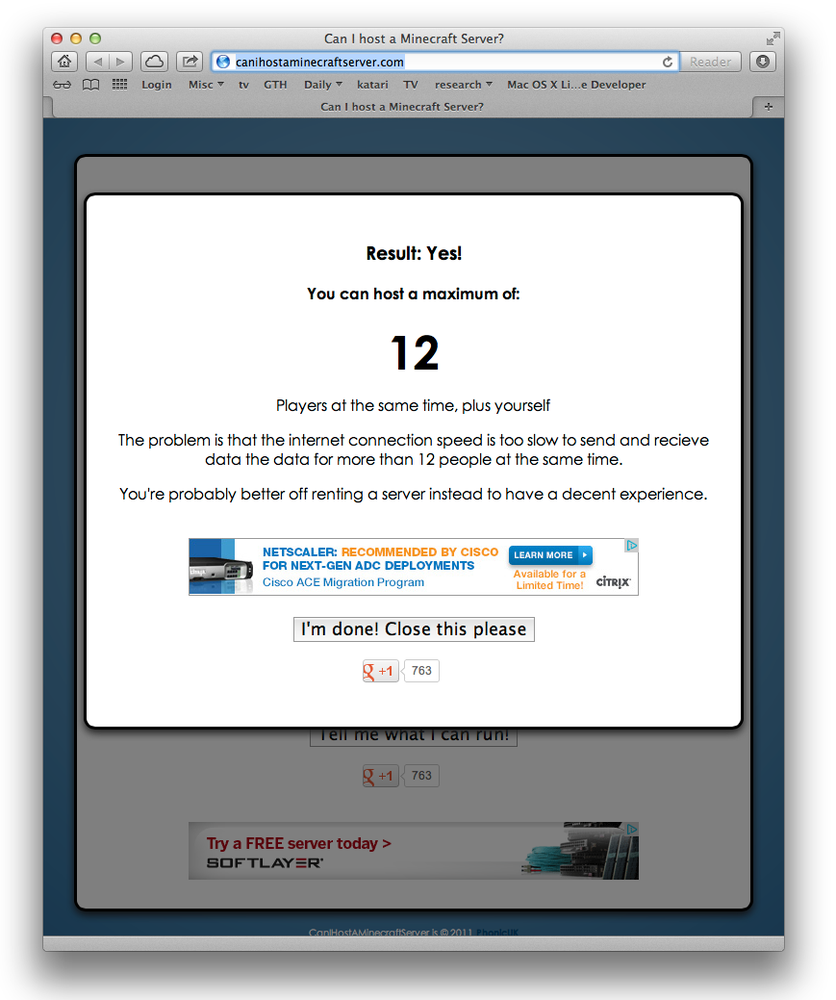
Figure 8-1
shows the results
for the scouts’ server.

the scouts. If you want to go bigger, talk to your ISP or rent a server.
(For the record, a 12-person Minecraft server runs about $13.00 per
month at one place I checked. For that kind of dough, the scouts would
be on their own.)
Armed
with that knowledge, it’s time to start getting things
installed. First, install any updates for your Mac (go to the Apple menu
and choose Software Update). Once your Mac is up to date, it’s time to
make sure your Mac has the language that Minecraft requires: Java. Java
used to be a standard part of an OS X install, but it hasn’t been part of
OS X since Mountain Lion’s summer 2012 update. Since the Mac I’m using for
the server is running OS X Snow Leopard, it has Java, but your situation
might be different. A trip to Terminal should tell which version of Java
your Mac is running (if it’s running one at all)—just type:
java-version
Warning: Java
isn’t secure, which is why it doesn’t ship with Macs and
the Department of Homeland Security recommends deleting it. But they’re
usually talking about running Java in browsers. In the case of a
Minecraft server, Java won’t be running in a browser so you’re a little
safer. This warning may make you not want to install Java at all but if
you want to run a Minecraft server, you’re going to have to put up with
Java.
If
you’re running OS X Mountain Lion and want to join the
Java party, a quick trip to the Terminal will solve your Java-free
lifestyle. In a Terminal window, typejavaand then hit Return. You’ll see a
message telling you Java isn’t on your Mac and then, weirdly, your Mac
will automatically install Java.
The
building blocks are now in place, so it’s time to get a
Minecraft server installed. Head to
the Minecraft download page
and download the multiplayer server file (
minecraft_server.jar
). Next create a folder for
your Minecraft server to live in (name it something creative like
“Minecraft”), move the downloaded file to that folder, and get ready to
have some fun with the shell script.
Open TextEdit and type the following:
!/bin/bash
cd "$(dirname "$0")"
exec jave -Xmx1G -Xms1G -jar minecraft_server.jar
Then save the TextEdit file as
start.command
in the same folder you saved the
Minecraft server software you downloaded earlier. (You may have to hold
down the Option key in order to get the Save As command to appear in
TextEdit’s File menu.)
You’ve created a script, and now that script needs to be made
executable. To do that, open a Terminal window and type:
chmod a+x
Then drag the
start.command
file you just created into the Terminal window and hit Return. This makes
the file executable. Now,
in the folder you created earlier (maybe you called it
Minecraft), double-click the
start.command
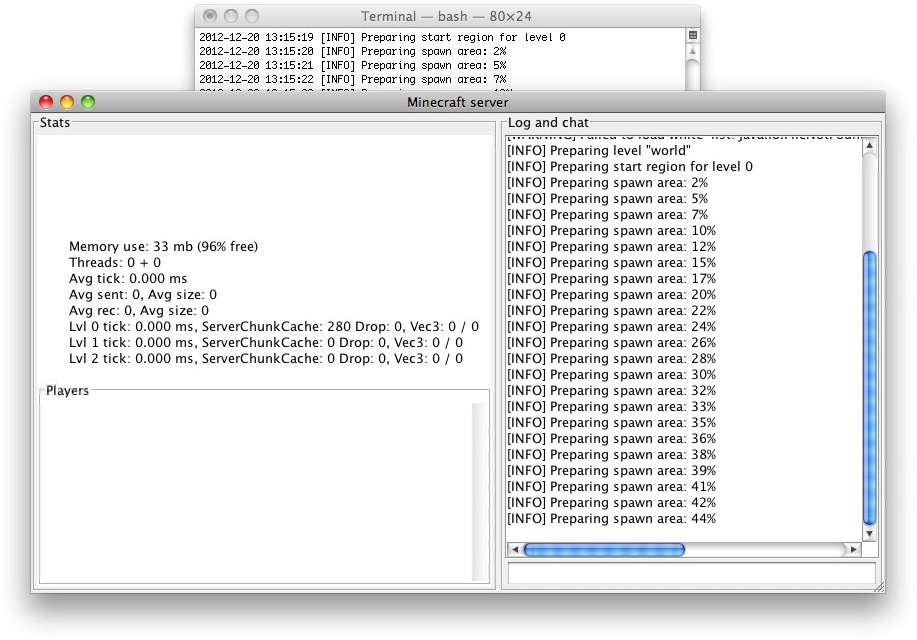
file and watch your new Minecraft
server run—with lots of errors (
Figure 8-2
).

it’s not running very well. To make it useful, you’ll need to configure
it.
You’ve come a long way and the kids are probably screaming at this
point, but there’s not a lot left to do. Quit the Minecraft server
(Command-Q works) and get ready for the last few steps.
The
first thing you have to do is called
port
forwarding
. This lets your Minecraft server see the outside
world and lets the outside world see your Minecraft server. Just how you
do this will vary depending on what kind of router you have, but the
general process is as follows: specify ports, specify protocol, specify
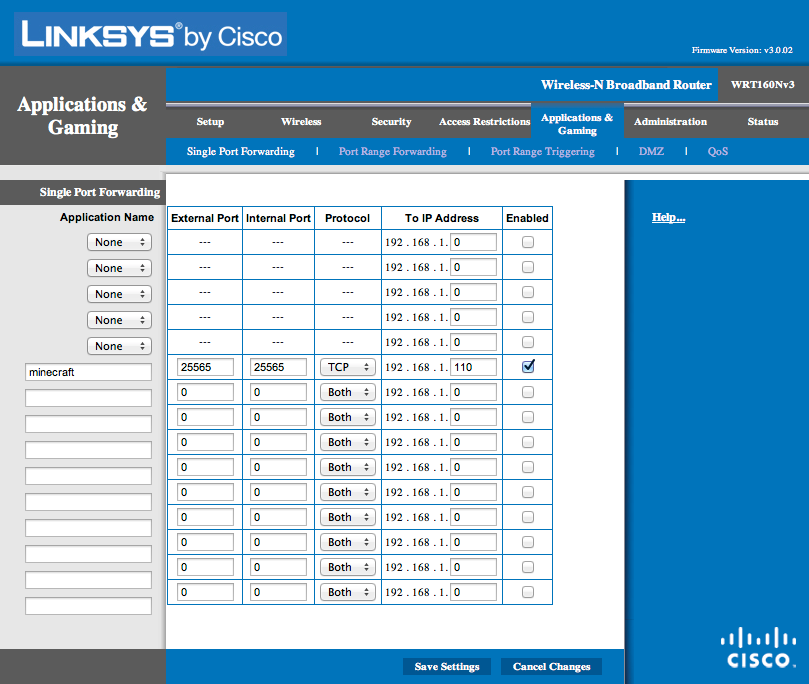
end point, enable all the changes you made. Here’s the specific process I
used on my Cisco router in Knoxville, Tennessee:
Open the router’s configuration page.
Head to the Applications and Gaming tab.
Add Minecraft to the Application name column.
Set External Port to 25565.
Set Internal Port to 25565.
Set Protocol to TCP.
Set IP Address to the address of your sever (found in System
Preferences→Network).Check the box labeled Enabled.
Your process will be different, but the port number will be the
same. When I was finished, the setup on the scouts’ router looked
like
Figure 8-3
.

your server. Well, they could if they knew where to go...
At
this point, you’re actually done—you’ve gone through all the
steps to host Minecraft on your Mac. All you really need now is the
external IP address of your Mac (the address the outside world uses to
find your Mac). You can find this information on your router, or you can
use any number of websites to discover your external IP address. The
easiest way is probably to do a Google search for “external IP
address.”
With
that information in hand, you’re ready to test out your
Minecraft server. Double-click the
start.command
file you created earlier (the
Minecraft folder you created earlier will have a lot more files in it now
than it did before) and wait for the Minecraft server to load. At this
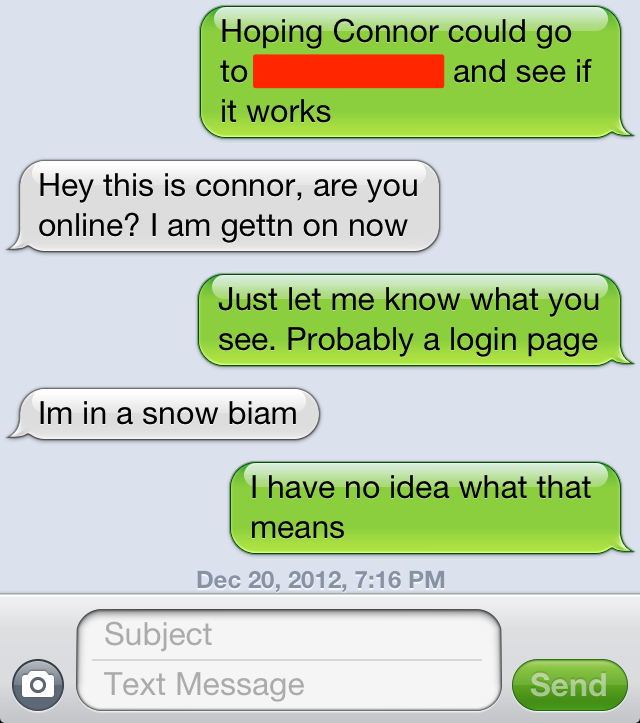
point, a scout was recruited to beta-test the server; I supplied him with
the external IP address and the resulting conversation is shown in
Figure 8-4
.

understandable. Translation for the Minecraft impaired: I’m playing on a
snowy world so the server worked perfectly.
Everything is running perfectly so you can just quit, right? Sure
you
can
, but there’s some stuff you could do to make
everything better. The first time you ran the Minecraft server, a
configuration page was generated, and you’ll get a lot of options when you
open up that file (see the next section to learn how to change some
settings). You’ll also want to consider using a No-IP or similar service
(see
[Hack #15]
) to
convert your IP address to a name and make it easy to find.
What
you want to configure is completely up to you. In this
case of the scouts, there are a few things I configured before turning
the kids loose on the server. To configure the server, you’ll edit the
server.properties
file located in
the
Minecraft
folder you made earlier. Open this
file with a text editor and you can change anything to the right of the
= sign. If you don’t know a setting does, leave it alone. For the
scouts, I changed the following lines:
level-name=worldtolevel-name=Flaming Arrow Patrol(the kids picked the name). Changing that value sets what the world
is called.max-players=20tomax-players=6This limits how many people
can play at one time.white-list=falsetowhite-list=trueThis limits who
can use the server.motd=A Minecraft Servertomotd=Welcome Scouts. Go do someThis value is just a
math
m
essage
o
f
t
he
d
ay (get it?).
The only setting that needs a little more explanation is thewhite-listone. This setting lets you control who’s
allowed to use your server. After you change this setting as described
above, open the
white-list.txt
file
found in the Minecraft folder you created, and type the Minecraft
usernames of the people who are allowed to use the server. Save the file
and if they aren’t on the list, they won’t be playing!