Mac Hacks (21 page)

. Manipulate Images with ImageMagick
If
you followed along with
Install Homebrew
, then you installed ImageMagick. Time
for that hard work (well, okay—that single line of code in Terminal) to
pay off.
ImageMagick is a free, open source image-editing program that has an
amazing amount of power. With minimal effort in the Terminal, you can add
watermarks, resize pictures, create animated GIFs, change file types, and
much, much more. How much more? Even
ImageMagick’s
website
doesn’t list them all.
If you played along with
Install Homebrew
,
you already have ImageMagick installed so there’s no good reason to
talk
about what ImageMagick can do—you can just try
it out! Before you get started, create a folder full of image files. Make
sure these are copies of other files or files that you don’t care if they
get changed permanently, because this hack is here to show you the power
of ImageMagick, not to refine your images to the standards of fine
photographers! (ImageMagick is perfect for fine photography, it’s just
that the
Mac Hacks
folks don’t have the skills of a
fine photographer.)
For the purposes of this hack, I created a folder called
Feed ImageMagick
. Said folder contains a copy of the
all the images from
Mac Hacks
thus far and a bunch of
other pics I had lying about from other projects—around 275 files of mixed
types, with a median file size of about 100 KB, and a max file size of 7
MB. Nothing too troublesome, but still a nice test of ImageMagick.
ImageMagick isn’t a single application that does one or two things;
it’s actually a collection of different applications that each do
something powerful to graphics (these are called
dependencies
, and they’re one of the big reasons
Homebrew is so neat). So while you won’t see the term “ImageMagick”
included in any command in this hack, everything the hack uses depends on
ImageMagick.
To start, you need to launch Terminal and then change the directory
you’re in to the directory with the photos you want to use. In my case,
the folder is on my desktop, so I typed:
cd /Users/cks/Desktop/feed/testpics
Alternatively, you can typecd, then drag the folder into the Terminal
window, and then hit Return to accomplish the same thing.
Now
that we’re in the proper directory, we can use ImageMagick
to create a montage. Type:
montage page41.jpg page42.jpg twopages.jpg
Montagetells your Mac to cram
two pictures together;page41.jpgtells it which pics to use; and
page42.jpgtwopages.jpgtells it what to name the output
file. All this results in
Figure 6-9
, which is a new file
named
twopages.jpg
that’s stored in
the current directory.
faster than doing it by hand.
Let’s spice it up a bit and really challenge the montage function.
Try this:
montage page30.jpg page31.jpg -geometry 500x500 pohno.jpg
In this case,page30.jpgandpage31.jpgare the files we want glued
together;-geometry 500x500is how
large we want the individual pics to be in pixels (montage won’t stretch
them but will, if necessary, shrink them to fit); andpohno.jpgis the file we want the result output
to. The result is a much bigger and better pic.
There are plenty of other things you can do with ImageMagick’s
montage function. You can add borders, control how the images are laid
out, and even add a label to each pic. Let’s try it:
montage -label %f -frame 5 -geometry +4+4 page3.jpg page4.jpg page5.jpg page6.jpg fancy.jpg
-label %ftells montage to add a
label to each pic that’s the same as the pic’s filename;-frame 5tells montage to add a 5-pixel frame
around the combined image;-geometrytells montage the preferred tile and border size; and
+4+4page3.jpg page4.jpg page5.jpg page6.jpgare the source files I want to use. Finally,fancy.jpgis what I want montage to name the
resulting file. The result is shown in
Figure 6-10
.
There’s a lot more you can do with the montage command. Someone
could likely write a book about it, but there’s no better way to learn
about it than playing it. If you ever get confused, remember that typingman montagewill show you the manual
page for the function.
Let’s use montage one more time, just for fun. Montage supports
wildcards, so:
montage *.jpg -geometry 50X50 whathaveidone.jpg
This tells montage to cram every JPEG in the current directory into
a single, um, montage. The resulting abomination looks like
Figure 6-11
.
If all ImageMagick did was make montages, it would be
called
Montage. So let’s check out some of the other cool stuff
ImageMagick can do. Imagine you want to create some thumbnails for your
website. In
that case, mogrify might be your friend. Let’s try it on
all the JPEGs:
mogrify -resize 256x256 *.jpg
This command resizes all the JPEG files in the current directory to
256×256 pixels. (Remember when you were warned to use test pics for this?
It’s a good thing you listened because mogrify just overwrote all the
files it acted on.) You
can also use mogrify to change file types, as in:
mogrify -format jpg *.gif
That command changes all the GIFs in the directory to JPEGs.
Mogrify
is powerful, but many times you
don’t
want to overwrite the images you want to change. In such cases, the
convert tool is useful. It’s nondestructive so try it out! For
example:
convert page31.jpg page31.png
Transforms a JPEG into a PNG. That’s great—but boring. How about
some actual image
manipulation?
convert page31.jpg -resize 50% onehalfpage31.jpg
This
command takes the file named
page31.jpg
, reduces it in size by 50%, and
creates a new file named
onehalfpage31.jpg
that contains the new,
smaller image.
You
can also rotate images with convert:
convert page31.jpg -rotate 25 ropage31.jpg
Which rotates
page31.jpg
25
degrees and outputs the resulting file as
ropage31.jpg
(
Figure 6-12
).

These
are nifty tricks, but how about creating a GIF with
ImageMagick? We’re not talking changing a file’s type—we’re talking about
making
one of those animated GIFs that every site had
in 1998. With ImageMagick, it’s easy.
First we want some numbered GIFs (the numbering makes everything
easier). We already have a bunch of sequentially numbered JPEGs, so let’s
use mogrify to turn them into GIFs:
mogrify -format gif page*.jpg
This command turns JPEGs named
pagesomenumber.jpg
into GIFs. If
you have a lot of files, you can watch mogrify work in the
Finder. Just open up the folder where the images are and select Cover Flow
view. As the file types change, Cover Flow view
updates.
Once the files are converted, let’s animate them:
Convert -delay 20 -loop 0 page*.gif animatespage.gif
If you open the resulting file (
animatepage.gif
) with Preview, you’ll just see
all the frames. But open it with Safari and you’ll have a nice animated
GIF.
All these examples just scratch the surface of what ImageMagick can
do without the overhead of a GUI image editor. For more on what
ImageMagick can do for you,
visit
the
Usage page
. You’ll be
impressed!
. Customize the Dock with Terminal
You
don’t have to put up with the Dock’s default behavior—you
can keep all its functionality (and even add some) while bending the Dock
to your will.
When it was initially introduced, the Dock was controversial. People
have by and large become accustomed to it, but that doesn’t mean they
necessarily like it. If you’re one of the people who grudgingly puts up
with the Dock, you’ve probably already played with the settings in the
Dock preference pane. If you still find the Dock wanting, you might find
it a little more tolerable once you tweak it with Terminal.
When
you open a folder or stack from the Dock, there’s no
visual feedback to tell you what item you’re about to open unless you
use the keyboard. If it’s useful for the keyboard, wouldn’t it also be
useful for your trackpad/mouse? It’s easy to lose the cursor against a
dark background or black icon; this tweak fixes that problem. Launch
Terminal and type:
defaults write com.apple.dock mouse-over-hilite-stack -boolean yes
Hit Return. And as with all of these tips, you have to relaunch
the Dock to get this change to take effect, so follow it with:
killall Dock
In addition to giving you more feedback when working with stacks,
this hack also makes lists and grids easier to navigate, as shown in
Figure 6-13
.
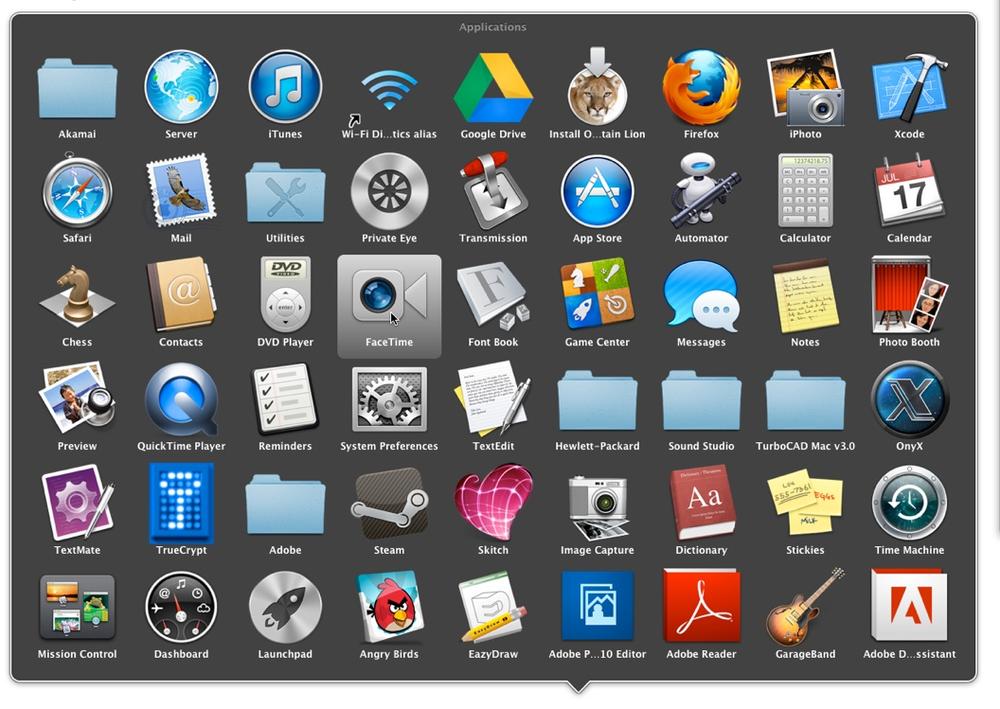
mouse and not the keyboard. (In this case, the cursor is over the
FaceTime icon.)
Was that not for you? Turn it off with:
defaults write com.apple.dock mouse-over-hilite-stack -boolean no
Followed by:
killall Dock
Some
folks find the look of the reflective “glass” used in the
Dock to be overdone and somewhat garish. If you’re one of them, banish
the eyesore with:
defaults write com.apple.dock no-glass -boolean yes
Which is (as you already guessed) followed by:
killall Dock
And the 3-D effect and the glass will be gone, as shown in
Figure 6-14
.

least. This is one change the
Mac Hacks
lab is
keeping.
Want to go back to the windshield look? No problem:
defaults write com.apple.dock no-glass -boolean no
Of course, that command won’t do anything until its partner
command comes along for the ride:
killall Dock
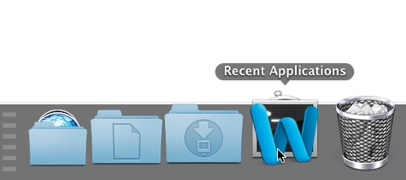
You
know that there’s a nifty and useful Recent Items entry
in the Apple menu, but remembering to use it is a bit of a chore, since
you’re used to using the Dock for launching, right? Turns out you can
add a Recent Applications stack to the Dock and save yourself some time!
In Terminal, type:
defaults write com.apple.dock persistent-others -array-add '{ "tile-data" = { "list-type" = 1; }; "tile-type" = "recents-tile"; }'
Isn’t there something we’re forgetting? Oh yes:
killall Dock
Now you’ll have a Recent Applications stack (
Figure 6-15
)!
time you’ll spend mousing around.
To undo this tweak, we have to use a new technique: drag the stack
to the
trash.
Some
people love organization, but there just isn’t a lot you
can to do organize the Dock. Sure, you can put things in a preferred
order (though the Finder and Trash are exceptions), but that’s only so
interesting. What if you could add empty spaces to your Dock so you
could group similar apps together? Let’s do it. Type:
defaults write com.apple.dock persistent-apps -array-add '{"tile-type"="spacer-tile";}'
Then use that loyal follower:
killall Dock
That’s it. For every space you want to add, simply repeat these
two commands. In
Figure 6-16
two spaces have
been added.
you wish and organize your Dock as you see fit.
To get rid of the spaces, banish them from the Dock by dragging
them to the Trash.
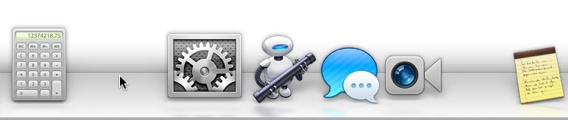
Icons
are on the Dock so you can easily launch the programs
they represent, but if you use an alternative method to launch programs
(such as Spotlight or Quicksilver, then you don’t really need those
icons on the Dock. You can keep the Dock’s clutter to a minimum by
forcing the Dock to only display icons for running applications. In
Terminal, type:
defaults write com.apple.dock static-only -bool true
Look, over there in the bushes! It’s:
killall Dock
Your new, slimmed-down Dock includes only the apps that are
currently running (
Figure 6-17
).

Sounded good on paper but don’t like it in action? Undo it
with:
defaults write com.apple.dock static-only -bool false
And, making its final appearance in this
hack:
killall Dock