Read Stitch 'n Bitch: The Knitter's Handbook Online
Authors: Debbie Stoller
Stitch 'n Bitch: The Knitter's Handbook (16 page)

Start by casting on the requisite number of stitches. Then bring the ends of your circular needles together in front of you, with the first cast-on stitch at the end of the left-hand needle, and the last on the right-hand needle. Then, making sure that none of your stitches is twisted (in other words, all of their butts are hanging down), start knitting in the regular way. You’ll find that your knitting is now joined in a round. Then just keep going, round and round and round. What you’re really doing is more like knitting in a spiral than in the round, but it comes out to pretty much the same thing.
Knitting on double-pointed needles is a bit more complicated, but you don’t need to worry so much about the size, as any sized tube can be knit on any sized needle (unless you’re trying to make a really giant tube on really tiny needles). Begin by casting all the called-for stitches onto a single one of your double-pointed needles. Then, divide the stitches evenly onto three needles, slipping the stitches purlwise from one needle to the next.
Finally, bend the needles into a triangle shape with the open end facing you. Make sure that the first stitch you cast on is at the end of the left-hand needle in front of you, and the last stitch you cast on is on the right-hand needle, and also see to it that none of your stitches are twisted. Then, with the free needlepoints facing you, and the middle needle farther from you, take the fourth needle and begin knitting the stitches off of the left-hand needle. It’s very easy to accidentally do this backwards, knitting with the tips of the needles farthest from you and the middle needle close to you. If you do that, however, you will actually be knitting your tube inside out!
When you finish knitting all of the stitches on the left-hand needle onto the fourth needle, the left-hand needle will suddenly be free. Now you can use it to knit all the stitches off of the next needle, and so on and so forth all the way around.

Ribbed-for-Her-Pleasure Scarf

Here’s another great beginner’s scarf. Done in a knit 2 purl 2 rib, it looks the same on both sides—which is just what you want in a scarf. Plus, making it will really help you learn your purls from your knits.
This scarf takes 2 skeins of Brown Sheep Company’s Lamb’s Pride Bulky yarn in color #M38, Lotus Pink, and a pair of size 10 (6mm) knitting needles. Cast on 32 stitches.
Row 1: Knit 2, purl 2, repeat to end of row. (Your row should end with purl 2).
Repeat that row until you’ve used up both skeins of yarn, then bind off your stitches
in pattern
. When you’re done, your scarf will be about 5" wide and 64½" in length. As you’re knitting, make sure that your ribs are lining up the right way. Remember to knit the knits and purl the purls, and, if you see mistakes, unravel your knitting back to the place where the error is, put all 32 of your stitches back on the needle (be sure to put them on the right way!), and continue on, correctly.
Once you’ve made one of these ribbed scarves, you can get a little fancy. One thing that works well and looks great is to make the scarf using two yarns held together—such as a wool yarn with a mohair yarn, or a sparkly yarn. It’s a classic that you can make over and over again, and an always welcome gift that can be knit up in less than a week.
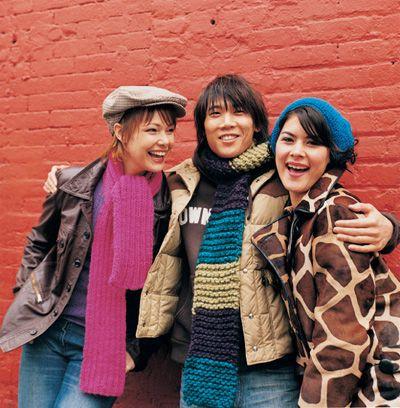
Ribbed-for-Her-Pleasure Scarf
(left)
,
Go-Go Garter Stitch Scarf
(center)
,
Kitschy Kerchief
(right)
LEARNING TO INCREASE AND DECREASE
Once you know how to cast on, bind off, knit, and purl, you can make lots and lots of pieces of knit fabric, but until you learn to increase and decrease, you’ll be stuck making only squares and rectangles. And while that’s great for pillows, blankets, and scarves, it’s not so great for making fabric meant to cover the human body, which is not shaped like a box. For the most part, the human body is tapered and curvy: Your arms are wider at the shoulder than at the wrist, your torso narrows at the waist and gets wider at the chest, your head is bigger around the forehead and gets smaller at the crown (at least, I hope so).
In order to knit clothes to fit around these shapely body parts, you’ll need to create fabric that gets narrower or wider accordingly. When you’re sewing clothes from woven fabric, you simply cut the cloth into the pattern shapes, then sew them together. But can you imagine taking a pair of scissors and cutting into your knit fabric? Even if you’ve been knitting for just a short time, the thought should make you shiver in horror.
Instead, knit pieces are knit right into the shape they need to be. Whether simple or complex, these shapes are all made by increasing stitches at certain points to make the fabric wider, or decreasing stitches at other points to make the fabric narrower. Learning to increase and decrease stitches allows you to make everything from trapezoid-shaped pieces of fabric to be sewn together for sleeves, to scooped-out curves for necklines, to bell-shaped sleeve caps, to dome-shaped hats. In fact, just knowing how to increase and decrease will allow you to make fabric in just about any shape you choose.

How to Increase
There are a few different ways to increase. Increased stitches can be invisible (which is what you usually want) or visible (which can be used for decorative purposes, or because it fits in better with a given stitch pattern).
The Bar Increase
The bar increase makes two stitches out of one, but it leaves a little “bar”—one that’s similar to a purl bump—where the extra stitch was made. Some folks appreciate this fact, because it’s easier to keep track of where they made their increases. Plus, it’s kind of cute-looking. On the other hand, if you make this increase on ribbing or seed-stitch fabric, the bar will blend in with the rest of the purl bumps, and it won’t be as visible. Here’s how to do it:
1
Knit into the next stitch on the needle,
but don’t drop it off the left needle
.

2
Now, knit into the
back leg
of that same stitch, inserting the right needle under it from front to back. This time lift it off the needle; you should now have an extra stitch on your right needle. Knitting twice into the same stitch might stretch that loop out some, but don’t worry about it; it will get its regular shape back as you knit on.

Can you do this on the purl side as well? You betcha. Just purl into the front and the back of the same stitch. Purling into the back leg of a stitch will require a good amount of finagling, and you may have to use your fingers to pull out the stitch so you can get your needle in there. But you can make it happen.
The Make One Increase (M1)
With this method, you will create a new knit stitch in between two already existing knit stitches, and, if you are doing it on stockinette fabric, it won’t even show. This stitch must be done at least one stitch in from the edge. Here’s how:
1
With the right needle, pick up the strand of yarn that lies between the stitch you just knit and the next stitch on the needle. Pick up this strand by inserting the needle under it
from front to back
.
