Programming Python (57 page)

Dialogs are
windows popped up by a script to provide or request
additional information. They come in two flavors, modal and
nonmodal:
- Modal
These dialogs block the rest of the interface until the dialog
window is dismissed; users must reply to the dialog before the
program continues.- Nonmodal
These dialogs can remain on-screen indefinitely without
interfering with other windows in the interface; they can usually
accept inputs at any time.
Regardless of their modality, dialogs are generally implemented with
theToplevelwindow
object we met in the prior section, whether you make theToplevelor not. There are essentially three
ways to present pop-up dialogs to users with tkinter—by using common
dialog calls, by using the now-datedDialogobject, and by creating custom dialog
windows withToplevels and other kinds
of widgets. Let’s explore the basics of all three schemes.
Because standard dialog
calls are simpler, let’s start here first. tkinter comes
with a collection of precoded dialog windows that implement many of the
most common pop ups programs generate—file selection dialogs, error and
warning pop ups, and question and answer prompts. They are called
standard dialogs
(and sometimes
common
dialogs
) because they are part of the tkinter library, and
they use platform-specific library calls to look like they should on
each platform. A tkinter file open dialog, for instance, looks like any
other on Windows.
All standard dialog calls are modal (they don’t return until the
dialog box is dismissed by the user), and they block the program’s main
window while they are displayed. Scripts can customize these dialogs’
windows by passing message text, titles, and the like. Since they are so
simple to use, let’s jump right into
Example 8-6
(coded as a.pywfile here to avoid a shell pop up when
clicked in Windows).
Example 8-6. PP4E\Gui\Tour\dlg1.pyw
from tkinter import *
from tkinter.messagebox import *
def callback():
if askyesno('Verify', 'Do you really want to quit?'):
showwarning('Yes', 'Quit not yet implemented')
else:
showinfo('No', 'Quit has been cancelled')
errmsg = 'Sorry, no Spam allowed!'
Button(text='Quit', command=callback).pack(fill=X)
Button(text='Spam', command=(lambda: showerror('Spam', errmsg))).pack(fill=X)
mainloop()
A lambda anonymous function is used here to wrap the call toshowerrorso that it is passed two
hardcoded arguments (remember, button-press callbacks get no arguments
from tkinter itself). When run, this script creates the main window in
Figure 8-5
.

Figure 8-5. dlg1 main window: buttons to trigger pop ups
When you press this window’s Quit button, the dialog in
Figure 8-6
is popped up by
calling the standardaskyesnofunction in
the tkinter package
’smessageboxmodule.
This looks different on Unix and Macintosh systems, but it looks like
you’d expect when run on Windows (and in fact varies its appearance even
across different versions and configurations of Windows—using my default
Window 7 setup, it looks slightly different than it did on Windows XP in
the prior edition).
The dialog in
Figure 8-6
blocks the program
until the user clicks one of its buttons; if the dialog’s Yes button is
clicked (or the Enter key is pressed), the dialog call returns with a
true value and the script pops up the standard dialog in
Figure 8-7
by callingshowwarning.

Figure 8-6. dlg1 askyesno dialog (Windows 7)
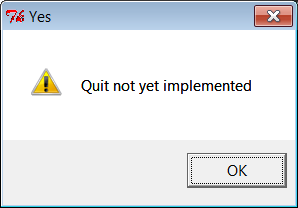
Figure 8-7. dlg1 showwarning dialog
There is nothing the user can do with
Figure 8-7
’s dialog but press OK. If No is
clicked in
Figure 8-6
’s
quit verification dialog, ashowinfocall creates the pop up in
Figure 8-8
instead. Finally, if the Spam button is clicked in the main window, the
standard dialog captured in
Figure 8-9
is
generated with the standardshowerrorcall.

Figure 8-8. dlg1 showinfo dialog

Figure 8-9. dlg1 showerror dialog
All of this makes for a lot of window pop ups, of course, and you
need to be careful not to rely on these dialogs too much (it’s generally
better to use input fields in long-lived windows than to distract the
user with pop ups). But where appropriate, such pop ups save coding time
and provide a nice native look-and-feel.
Let’s put some of
these canned dialogs to better use.
Example 8-7
implements an
attachable Quit button that uses standard dialogs to verify the quit
request. Because it’s a class, it can be attached and reused in any
application that needs a verifying Quit button. Because it uses
standard dialogs, it looks as it should on each GUI platform.
Example 8-7. PP4E\Gui\Tour\quitter.py
"""
a Quit button that verifies exit requests;
to reuse, attach an instance to other GUIs, and re-pack as desired
"""
from tkinter import *                          # get widget classes
from tkinter.messagebox import askokcancel     # get canned std dialog
class Quitter(Frame):                          # subclass our GUI
def __init__(self, parent=None):           # constructor method
Frame.__init__(self, parent)
self.pack()
widget = Button(self, text='Quit', command=self.quit)
widget.pack(side=LEFT, expand=YES, fill=BOTH)
def quit(self):
ans = askokcancel('Verify exit', "Really quit?")
if ans: Frame.quit(self)
if __name__ == '__main__':  Quitter().mainloop()
This module is mostly meant to be used elsewhere, but it puts up
the button it implements when run standalone.
Figure 8-10
shows the Quit
button itself in the upper left, and theaskokcancelverification dialog that pops up
when Quit is pressed.

Figure 8-10. Quitter, with askokcancel dialog
If you press OK here,Quitterruns theFramequit method to end
the GUI to which this button is attached (really, themainloopcall). But to really understand how
such a spring-loaded button can be useful, we need to move on and
study a client GUI in the next section.
So far, we’ve seen a
handful of standard dialogs, but there are quite a few
more. Instead of just throwing these up in dull screenshots, though,
let’s write a Python demo script to generate them on demand. Here’s
one way to do it. First of all, in
Example 8-8
we write a module
to define a table that maps a demo name to a standard dialog call (and
we use lambda to wrap the call if we need to pass extra arguments to
the dialog
function
).
Example 8-8. PP4E\Gui\Tour\dialogTable.py
# define a name:callback demos table
from tkinter.filedialog   import askopenfilename        # get standard dialogs
from tkinter.colorchooser import askcolor               # they live in Lib\tkinter
from tkinter.messagebox   import askquestion, showerror
from tkinter.simpledialog import askfloat
demos = {
'Open':  askopenfilename,
'Color': askcolor,
'Query': lambda: askquestion('Warning', 'You typed "rm *"\nConfirm?'),
'Error': lambda: showerror('Error!', "He's dead, Jim"),
'Input': lambda: askfloat('Entry', 'Enter credit card number')
}
I put this table in a module so that it might be reused as the
basis of other demo scripts later (dialogs are more fun than printing
tostdout). Next, we’ll write a
Python script, shown in
Example 8-9
, which simply
generates buttons for all of this table’s entries—use its keys as
button labels and its values as button callback handlers.
Example 8-9. PP4E\Gui\Tour\demoDlg.py
"create a bar of simple buttons that launch dialog demos"
from tkinter import *              # get base widget set
from dialogTable import demos      # button callback handlers
from quitter import Quitter        # attach a quit object to me
class Demo(Frame):
def __init__(self, parent=None, **options):
Frame.__init__(self, parent, **options)
self.pack()
Label(self, text="Basic demos").pack()
for (key, value) in demos.items():
Button(self, text=key, command=value).pack(side=TOP, fill=BOTH)
Quitter(self).pack(side=TOP, fill=BOTH)
if __name__ == '__main__': Demo().mainloop()
This script creates the window shown in
Figure 8-11
when run as a standalone program;
it’s a bar of demo buttons that simply route control back to the
values of the table in the moduledialogTablewhen pressed.

Figure 8-11. demoDlg main window
Notice that because this script is driven by the contents of
thedialogTablemodule’s
dictionary, we can change the set of demo buttons displayed by
changing justdialogTable(we don’t need to change any
executable code indemoDlg). Also
note that the Quit button here is an attached instance of theQuitterclass of the prior section whose
frame is repacked to stretch like the other buttons as needed
here—it’s at least one bit of code that you never have to write
again.
This script’s class also takes care to pass any**optionsconstructor configuration keyword
arguments on to itsFramesuperclass. Though not used here, this allows callers to pass in
configuration options at creation time (Demo(o=v)), instead of configuring after the
fact (d.config(o=v)). This isn’t
strictly required, but it makes the demo class work just like a normal
tkinter frame widget (which is what subclassing makes it, after all).
We’ll see how this can be used to good effect later.
We’ve already seen some of the dialogs triggered by this demo
bar window’s other buttons, so I’ll just step through the new ones
here. Pressing the main window’s Query button, for example, generates
the standard pop up in
Figure 8-12
.

Figure 8-12. demoDlg query, askquestion dialog
Thisaskquestiondialog looks
like theaskyesnowe saw earlier,
but actually it returns either string"yes"or"no"(askyesnoandaskokcancelreturnTrueorFalseinstead—trivial but true). Pressing
the demo bar’s Input button generates the standardaskfloatdialog box shown in
Figure 8-13
.

Figure 8-13. demoDlg input, askfloat dialog
This dialog automatically checks the input for valid
floating-point syntax before it returns, and it is representative of a
collection of single-value input dialogs (askintegerandaskstringprompt for integer and string
inputs, too). It returns the input as a
floating
-
point
number object (not as a string)
when the OK button or Enter key is pressed, or the PythonNoneobject if the user clicks Cancel. Its
two relatives return the input as integer and string objects
instead.
When the demo bar’s Open button is pressed, we get the standard
file open dialog made by callingaskopenfilenameand captured in
Figure 8-14
. This is Windows
7’s look-and-feel; it can look radically different on Macs, Linux, and
older versions of Windows, but appropriately so.

Figure 8-14. demoDlg open, askopenfilename dialog
A similar dialog for selecting a save-as filename is produced by
callingasksaveasfilename(see theTextwidget section in
Chapter 9
for a first example). Both
file dialogs let the user navigate through the filesystem to select a
subject filename, which is returned with its full directory pathname
when Open is pressed; an empty string comes back if Cancel is pressed
instead. Both also have additional protocols not demonstrated by this
example:
They can be passed a
filetypeskeyword argument—a set of name
patterns used to select files, which appear in the pull-down list
near the bottom of the dialog.They can be passed an
initialdir(start directory),initialfile(for “File name”),title(for the dialog window),defaultextension(appended if the
selection has none), andparent(to appear as an embedded child instead of a pop-up
dialog).They can be made to remember the last directory selected by
using exported objects instead of these function calls—a hook
we’ll make use of in later longer-lived
examples
.
Another common dialog call in the tkinterfiledialogmodule,askdirectory, can be used to pop up a dialog
that allows users to choose a directory rather than a file. It
presents a tree view that users can navigate to pick the desired
directory, and it accepts keyword arguments includinginitialdirandtitle. The correspondingDirectoryobject remembers the last
directory selected and starts there the next time the dialog is
shown.
We’ll use most of these interfaces later in the book, especially
for the file dialogs in the PyEdit example in
Chapter 11
, but feel free to flip ahead for
more details now. The directory selection dialog will show up in the
PyPhoto example in
Chapter 11
and the
PyMailGUI example in
Chapter 14
; again,
skip ahead for code and screenshots.
Finally, the demo bar’s Color button triggers a standardaskcolorcall, which generates the
standard color selection dialog shown in
Figure 8-15
.

Figure 8-15. demoDlg color, askcolor dialog
If you press its OK button, it returns a data structure that
identifies the selected color, which can be used in all color contexts
in tkinter. It includes RGB values and a hexadecimal color string
(e.g.,((160, 160, 160),). More on how this tuple can be useful in a
'#a0a0a0')
moment. If you press Cancel, the script gets back a tuple containing
two nones (Nones of the Python
variety,
that is).