Programming Python (53 page)

And as if that isn’t flexible
enough, the packer also allows widgets to be positioned
within their allocated space with ananchoroption, instead of filling that space
with afill. Theanchoroption accepts tkinter constants
identifying all eight points of the compass (N,NE,NW,S, etc.) andCENTERas its value (e.g.,anchor=NW). It instructs the packer to
position the widget at the desired position within its allocated space,
if the space allocated for the widget is larger than the space needed to
display the widget.
The default anchor isCENTER,
so widgets show up in the middle of their space (the cavity side they
were given) unless they are positioned withanchoror stretched withfill. To demonstrate, changegui4to use this sort of code:
Button(win, text='Hello', command=greeting).pack(side=LEFT,anchor=N)
Label(win, text='Hello container world').pack(side=TOP)
Button(win, text='Quit', command=win.quit).pack(side=RIGHT)
The only thing new here is that the Hello button is anchored to
the north side of its space allocation. Because this button was packed
first, it got the entire left side of the parent frame. This is more
space than is needed to show the button, so it shows up in the middle of
that side by default, as in
Figure 7-15
(i.e., anchored to the center). Setting the anchor toNmoves it to the top of its side, as shown in
Figure 7-18
.
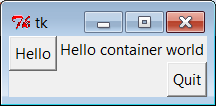
Figure 7-18. Anchoring a button to the north
Keep in mind thatfillandanchorare applied after a widget has
been allocated cavity side space by itsside, packing order, andexpandextra space request. By playing with
packing orders, sides, fills, and anchors, you can generate lots of
layout and clipping effects, and you should take a few moments to
experiment with alternatives if you haven’t already. In the original
version of this example, for instance, the label spans the entire top
side just because it is the first packed.
As we’ll see later, frames can be nested in other frames, too, in
order to make more complex layouts. In fact, because each parent
container is a distinct space cavity, this provides a sort of escape
mechanism for the packer cavity algorithm: to better control where a set
of widgets show up, simply pack them within a nested subframe and attach
the frame as a package to a larger container. A row of push buttons, for
example, might be easier laid out in a frame of its own than if mixed
with other widgets in the display directly.
Finally, also keep in mind that the widget tree created by these
examples is really an implicit one; tkinter internally records the
relationships implied by passed parent widget arguments. In OOP terms,
this is a
composition
relationship—theFramecontains aLabelandButtons. Let’s look at
inheritance
relationships
next.
[
30
]
Technically, the packing steps are just rerun again after a
window resize. But since this means that there won’t be enough space
left for widgets packed last when the window shrinks, it is as if
widgets packed first are clipped last.
You don’t have to
use OOP in tkinter scripts, but it can definitely help. As
we just saw, tkinter GUIs are built up as class-instance object trees.
Here’s another way Python’s OOP features can be applied to GUI models:
specializing widgets by inheritance.
Example 7-18
builds the
window in
Figure 7-19
.
Example 7-18. PP4E\Gui\Intro\gui5.py
from tkinter import *
class HelloButton(Button):
def __init__(self, parent=None, **config):         # add callback method
Button.__init__(self, parent, **config)        # and pack myself
self.pack()                                    # could config style too
self.config(command=self.callback)
def callback(self):                                # default press action
print('Goodbye world...')                      # replace in subclasses
self.quit()
if __name__ == '__main__':
HelloButton(text='Hello subclass world').mainloop()
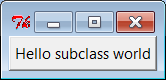
Figure 7-19. A button subclass in action
This example isn’t anything special to look at: it just displays a
single button that, when pressed, prints a message and exits. But this
time, it is a button widget we created on our own. TheHelloButtonclass inherits everything from the
tkinterButtonclass, but adds acallbackmethod and constructor logic
to set thecommandoption toself.callback, a bound method of the instance.
When the button is pressed this time, the new widget class’scallbackmethod, not a simple function, is
invoked.
The**configargument here is
assigned unmatched keyword arguments in a dictionary, so they can be
passed along to theButtonconstructor.
The**configin theButtonconstructor call unpacks the dictionary
back into keyword arguments (it’s actually optional here, because of the
old-style dictionary widget call form we met earlier, but doesn’t hurt).
We met theconfigwidget method called
inHelloButton’s constructor earlier;
it is just an alternative way to pass configuration options after the fact
(instead of passing constructor arguments).
So what’s the point of subclassing widgets like this? In short, it
allows sets of widgets made from the customized classes to look and act
the same. When coded well, we get both “for free” from Python’s OOP
model. This can be a powerful technique in larger programs.
Example 7-18
standardizes behavior—it allows
widgets to be configured by subclassing instead of by
passing in options. In fact, itsHelloButtonis a true button; we can pass in
configuration options such as itstextas usual when one is made. But we can
also specify callback handlers by overriding thecallbackmethod in subclasses, as shown in
Example 7-19
.
Example 7-19. PP4E\Gui\Intro\gui5b.py
from gui5 import HelloButton
class MyButton(HelloButton):        # subclass HelloButton
def callback(self):             # redefine press-handler method
print("Ignoring press!...")
if __name__ == '__main__':
MyButton(None, text='Hello subclass world').mainloop()
This script makes the same window; but instead of exiting, thisMyButtonbutton, when pressed,
prints tostdoutand stays up. Here
is its standard output after being pressed a few times:
C:\...\PP4E\Gui\Intro>python gui5b.pyIgnoring press!...
Ignoring press!...
Ignoring press!...
Ignoring press!...
Whether it’s simpler to customize widgets by subclassing or
passing in options is probably a matter of taste in this simple
example. But the larger point to notice is that Tk becomes truly
object oriented in Python, just because Python is object oriented—we
can specialize widget classes using normal class-based and
object-oriented techniques. In fact this applies to both widget
behavior and appearance.
For example,
although we won’t study widget configuration options
until the next chapter, a similar customized button class could
provide a standard look-and-feel
different
from tkinter’s defaults for
every instance created from it, and approach the notions of “styles”
or “themes” in some GUI toolkits:
class ThemedButton(Button):                             # config my style too
def __init__(self, parent=None, **configs):         # used for each instance
Button.__init__(self, parent, **configs)        # see chapter 8 for options
self.pack()
self.config(fg='red', bg='black', font=('courier', 12), relief=RAISED, bd=5)
B1 = ThemedButton(text='spam', command=onSpam)  # normal button widget objects
B2 = ThemedButton(text='eggs')                  # but same appearance by inheritance
B2.pack(expand=YES, fill=BOTH)
This code is something of a preview; see file
gui5b-themed.py
in the examples package for
a complete version, and watch for more on its widget configuration
options in
Chapter 8
. But it
illustrates the application of common appearance by subclassing
widgets directly—every button created from its class looks the same,
and will pick up any future changes in its configurations
automatically.
Widget subclasses are a programmer’s tool, of course, but we can
also make such configurations accessible to a GUI’s users. In larger
programs later in the book (e.g., PyEdit, PyClock, and PyMailGUI),
we’ll sometimes achieve a similar effect by importing configurations
from modules and applying them to widgets as they are built. If such
external settings are used by a customized widget subclass like ourThemedButtonabove, they will again
apply to all its instances and subclasses (for reference, the full
version of the following code is in file
gui5b-themed-user.py
):
from user_preferences import bcolor, bfont, bsize   # get user settings
class ThemedButton(Button):
def __init__(self, parent=None, **configs):
Button.__init__(self, parent, **configs)
self.pack()
self.config(bg=bcolor, font=(bfont, bsize))
ThemedButton(text='spam', command=onSpam)  # normal button widget objects
ThemedButton(text='eggs', command=onEggs)  # all inherit user preferences
class MyButton(ThemedButton):              # subclasses inherit prefs too
def __init__(self, parent=None, **configs):
ThemedButton.__init__(self, parent,  **configs)
self.config(text='subclass')
MyButton(command=onSpam)
Again, more on widget configuration in the next chapter; the big
picture to take away here is that customizing widget classes with
subclasses
allows us to tailor both their
behavior and their appearance for an entire set of widgets. The next
example provides yet another way to arrange for specialization—as
customizable and attachable widget packages,
usually known as
components
.
Larger GUI
interfaces are often built up as subclasses ofFrame, with callback handlers implemented as
methods. This structure gives us a natural place to store information
between events: instance attributes record state. It also allows us to
both specialize GUIs by overriding their methods in new subclasses and
attach them to larger GUI structures to reuse them as general components.
For instance, a GUI text editor implemented as aFramesubclass can be attached to and configured
by any number of other GUIs; if done well, we can plug such a text editor
into any user interface that needs text editing tools.
We’ll meet such a text editor component in
Chapter 11
. For now,
Example 7-20
illustrates the concept
in a simple way. The script
gui6.py
produces the
window in
Figure 7-20
.
Example 7-20. PP4E\Gui\Intro\gui6.py
from tkinter import *
class Hello(Frame):                              # an extended Frame
def __init__(self, parent=None):
Frame.__init__(self, parent)             # do superclass init
self.pack()
self.data = 42
self.make_widgets()                      # attach widgets to self
def make_widgets(self):
widget = Button(self, text='Hello frame world!', command=self.message)
widget.pack(side=LEFT)
def message(self):
self.data += 1
print('Hello frame world %s!' % self.data)
if __name__ == '__main__': Hello().mainloop()
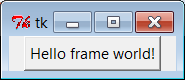
Figure 7-20. A custom Frame in action
This example pops up a single-button window. When pressed, the
button triggers theself.messagebound
method to print tostdoutagain. Here
is the output after pressing this button four times; notice howself.data(a simple counter here) retains its
state between presses:
C:\...\PP4E\Gui\Intro>python gui6.pyHello frame world 43!
Hello frame world 44!
Hello frame world 45!
Hello frame world 46!
This may seem like a roundabout way to show aButton(we did it in fewer lines in Examples
7-10
,
7-11
, and
7-12
). But theHelloclass provides an enclosing organizational
structure
for building GUIs. In the examples prior to
the last section, we made GUIs using a function-like approach: we called
widget constructors as though they were functions and hooked widgets
together manually by passing in parents to widget construction calls.
There was no notion of an enclosing context, apart from the global scope
of the module file containing the widget calls. This works for simple GUIs
but can make for brittle code when building up larger GUI
structures.
But by subclassingFrameas we’ve done here, the class becomes an enclosing context
for the GUI:
Widgets are added by attaching objects to
self, an instance of aFramecontainer subclass (e.g.,Button).Callback handlers are registered as bound methods of
self, and so are routed back to code in the
class (e.g.,self.message).State information is retained between events by assigning to
attributes ofself, visible to all
callback methods in the class (e.g.,self.data).It’s easy to make multiple copies of such a GUI component, even
within the same process, because each class instance is a distinct
namespace.Classes naturally support customization by inheritance and by
composition
attachment
.
In a sense, entire GUIs become specializedFrameobjects with extensions for an
application. Classes can also provide protocols for building widgets
(e.g., themake_widgetsmethod here), handle standard
configuration chores (like setting window manager options), and so on. In
short,Framesubclasses provide a
simple way to organize collections of other widget-class objects.
Perhaps more
importantly, subclasses ofFrameare true widgets: they can be further
extended and customized by subclassing and can be attached to enclosing
widgets. For instance, to attach the entire package of widgets that a
class builds to something else, simply create an instance of the class
with a real parent widget passed in. To illustrate, running the script
in
Example 7-21
creates the
window shown in
Figure 7-21
.
Example 7-21. PP4E\Gui\Intro\gui6b.py
from sys import exit
from tkinter import *                    # get Tk widget classes
from gui6 import Hello                   # get the subframe class
parent = Frame(None)                     # make a container widget
parent.pack()
Hello(parent).pack(side=RIGHT)           # attach Hello instead of running it
Button(parent, text='Attach', command=exit).pack(side=LEFT)
parent.mainloop()
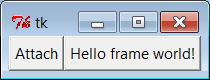
Figure 7-21. An attached class component on the right
This script just addsHello’s
button to the right side ofparent—a
containerFrame. In fact, the button
on the right in this window represents an embedded component: its button
really represents an attached Python class object. Pressing the embedded
class’s button on the right prints a message as before; pressing the new
button exits the GUI by asys.exitcall:
C:\...\PP4E\Gui\Intro>python gui6b.pyHello frame world 43!
Hello frame world 44!
Hello frame world 45!
Hello frame world 46!
In more complex GUIs, we might instead attach largeFramesubclasses to other container components
and develop each independently. For instance,
Example 7-22
is yet another
specializedFrameitself, but it
attaches an instance of the originalHelloclass in a more object-oriented fashion.
When run as a top-level program, it creates a window identical to the
one shown in
Figure 7-21
.
Example 7-22. PP4E\Gui\Intro\gui6c.py
from tkinter import *                    # get Tk widget classes
from gui6 import Hello                   # get the subframe class
class HelloContainer(Frame):
def __init__(self, parent=None):
Frame.__init__(self, parent)
self.pack()
self.makeWidgets()
def makeWidgets(self):
Hello(self).pack(side=RIGHT)     # attach a Hello to me
Button(self, text='Attach', command=self.quit).pack(side=LEFT)
if __name__ == '__main__': HelloContainer().mainloop()
This looks and works exactly likegui6bbut registers the added button’s
callback handler asself.quit, which
is just the standardquitwidget
method this class inherits fromFrame. The window this time represents two
Python classes at work—the embedded component’s widgets on the right
(the original Hello button) and the container’s
widgets
on the left.
Naturally, this is a simple example (we attached only a single
button here, after all). But in more practical user interfaces, the set
of widget class objects attached in this way can be much larger. If you
imagine replacing theHellocall in
this script with a call to attach an already coded and fully debugged
calculator object, you’ll begin to better understand the power of this
paradigm. If we code all of our GUI components as classes, they
automatically become a library of reusable widgets, which we can combine
in other applications as often as we
like.
When GUIs
are built with classes, there are a variety of ways to
reuse their code in other displays. To extendHelloinstead of attaching it, we just
override some of its methods in a new subclass (which itself becomes a
specializedFramewidget). This
technique is shown in
Example 7-23
.
Example 7-23. PP4E\Gui\Intro\gui6d.py
from tkinter import *
from gui6 import Hello
class HelloExtender(Hello):
def make_widgets(self):                       # extend method here
Hello.make_widgets(self)
Button(self, text='Extend', command=self.quit).pack(side=RIGHT)
def message(self):
print('hello', self.data)                 # redefine method here
if __name__ == '__main__': HelloExtender().mainloop()
This subclass’smake_widgetsmethod here first builds the superclass’s widgets and then adds a second
Extend button on the right, as shown in
Figure 7-22
.
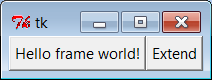
Figure 7-22. A customized class’s widgets, on the left
Because it redefines themessagemethod, pressing the original
superclass’s button on the left now prints a different string tostdout(when searching up fromself, themessageattribute is found first in this
subclass, not in the superclass):
C:\...\PP4E\Gui\Intro>python gui6d.pyhello 42
hello 42
hello 42
hello 42
But pressing the new Extend button on the right, which is added by
this subclass, exits immediately, since thequitmethod (inherited fromHello, which inherits it fromFrame) is the added button’s callback handler.
The net effect is that this class customizes the original to add a new
button and changemessage’s
behavior.
Although this example is simple, it demonstrates a technique that
can be powerful in practice: to change a GUI’s behavior, we can write a
new class that customizes its parts rather than changing the existing
GUI code in place. The main code need be debugged only once and can be
customized with subclasses as unique needs arise.
The moral of this story is that tkinter GUIs can be coded without
ever writing a single new class, but using classes to structure your GUI
code makes it much more reusable in the long run. If done well, you can
both attach already debugged components to new interfaces and specialize
their behavior in new external subclasses as needed for custom
requirements. Either way, the initial upfront investment to use classes
is bound to save coding time in the end.