Read Grow a Sustainable Diet: Planning and Growing to Feed Ourselves and the Earth Online
Authors: Cindy Conner
Tags: #Gardening, #Organic, #Techniques, #Technology & Engineering, #Agriculture, #Sustainable Agriculture
Grow a Sustainable Diet: Planning and Growing to Feed Ourselves and the Earth (13 page)

Figure 7.1. Plant/Harvest Times
My neighbor came to my rescue with tomato plants. She called me to say that she had planted out all she needed and still had plants if I wanted any, without knowing what had happened to mine. She had planted her tomato seeds in a coldframe on April 1, covered by a sheet of plastic — nothing elaborate — and they were the greenest, stockiest tomato transplants I had ever seen. I had planted mine inside under grow lights on March 1. I learned four lessons from that experience: (1) watch the weather, (2) don’t be so quick with the mulch, (3) you don’t need grow lights to have great tomato seedlings, and (4) just because someone might use Sevin on their potatoes doesn’t mean they don’t have good gardening advice (and plants) to offer. I haven’t used grow lights for years now and start everything in coldframes. My tomato seeds go into their coldframe about the last week in March.
It is not only the date on the calendar but also the temperature of the soil that you should be watching. If you have mulched your garden beds over the winter, pull the mulch off a couple weeks before planting your spring crops to let the soil warm up. You can tell a lot by just putting your hand in the ground. A bed with a crop that has winterkilled, leaving the soil ready to plant, will be warmer than one that has had mulch on it all winter.
Usually our first frost in the fall is in late October and sometimes not until early November. When growing crops for fall and winter harvest, having a date to use for planning is important. With carrots and beets, I want to have them mature by then. After that, they can stay in the ground for harvest right through winter. Once the nights begin to cool and the days are shorter, plants grow a little slower. You may need to add as much as two weeks to the days to maturity time if you are planning crops that will mature in the fall. Although it is usually later, one year we had a killing frost on October 9. I use October 15 as my first frost planning date. I harvest sweet potatoes and peanuts before then so their foliage is not damaged by frost, all the better for compost material.
Seed catalogs are a wealth of information. At the beginning of each crop listing you will find a box with information specific to that crop, such as when to plant, diseases, how many seeds per packet or ounce, and more. If you are ordering online, check the website for cultural notes. The specific varieties of the crops you choose would determine things such as days to maturity and length of harvest. The descriptions in the catalogs can be quite compelling. Unfortunately, we quickly forget just what was so special about the varieties we chose. If you are not opposed to cutting up your seed catalogs you could cut out the pictures and descriptions and put them in your garden notebook for a ready reference. Better yet, cut up last year’s seed catalogs. If you’ve ordered online, you can print off the descriptions for your notebook. Be sure to highlight what it was that made you choose that variety over the others.
After you have filled in your crops on the Plant/Harvest Times worksheet you can add the days to maturity. That’s the number of days it takes from either putting the seed in the ground, or putting the transplant in the ground, until you can expect the harvest to begin. You’ll find the days to maturity with the variety name in the catalogs and on the seed packets you might pick up at the store. If it is something that is usually transplanted, such as tomatoes and peppers, the days to maturity will be from transplanting, not from when you started the seeds in a flat. If it is from transplanting, the cultural information for that crop should say so.
If you are transplanting, you need to know how many weeks ahead to start the seeds before setting the plants out. You’ll find that in the cultural information from the seed company. Put that number in Column C. In Column D, put the date that you intend to plant in the garden. With a calendar handy, count back the weeks from Column C to determine the date to plant in the flat or coldframe for Column B. As I’ve mentioned, I start everything in coldframes these days. I find it much easier and the plants are naturally acclimated to the outdoor temperatures and amount of daylight by the time they are set out into the garden beds. Column E, the weeks in the ground until harvest, is easy since you already know the days to maturity. Divide the days to maturity by
seven to find the number of weeks to put in Column E. Add that time to Column D, the date to plant in the garden, and you have the date you can begin to expect a harvest, Column F.
If you are new at growing, you probably have no idea how many weeks of harvest you will get from a crop. You might think that you plant everything at one time in your garden, and once things are producing you can pick it until frost. Well, it’s a lot more interesting than that. Some things; such as garlic, potatoes, sweet potatoes, peanuts, and grains; will be harvested all at one time. Then the bed is ready for the next crop. Peppers will produce until frost. Frost doesn’t bother the cabbage family — in fact those crops, as well as carrots and beets, taste better after they’ve been kissed by frost. To determine the number of weeks of harvest for Column G you will find hints in the seed catalogs, but ultimately you will learn from experience. Once you estimate how long the harvest will be, you can figure the end of harvest date for Column H. There is a column for notes on the worksheet. That’s a good place to record where you got the seed from, what was so special about that variety, etc.
Learning about different varieties and how they behave in your garden makes you more connected with your land. Knowing the length of harvest ahead of time lets you know what to expect and allows you to see the whole picture for the year for your garden (and your diet). No matter what hints you’ve gotten from other sources, the learning is in the doing. Just get started and do it.
You’ll find that peas and beans are available as bush and pole varieties. The bush varieties will give you a more concentrated harvest in a shorter time. I usually plan on a two week harvest for each planting of bush beans or peas. There is a difference of about ten days to maturity between the bush and pole varieties of the sugar snap peas that I grow. I’ve sometimes put a trellis down the middle of the bed, sown the pole varieties along the trellis and, at the same time, sown the bush variety along the edge of the bed. The bush variety would be ready to harvest
first and, as those sugarsnaps are waning, the pole variety would be coming on.
When I was selling vegetables and wanted a continuous supply of green beans throughout the summer, I would plant bush beans every two weeks somewhere in the garden. Planting like that is called succession planting. As soon as one planting finished producing, the next planting was coming on strong. The bed with the previous planting could be cleaned up and planted to the next crop, which wasn’t beans. One year, for our own use, I compared my regular bean variety, Provider, with one that had purple pods. The purple podded variety produced about as many beans as Provider; but it took three weeks, not two, for that production. It was clear that it wasn’t done at the end of two weeks. These are the things you will find out from experience, your best teacher.
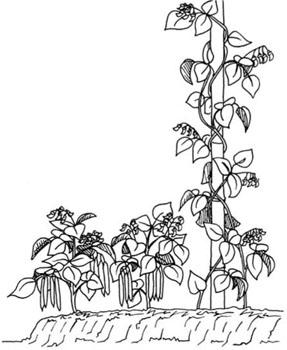
bush and pole beans
One summer, a few weeks into bean-picking, I attended a farm field day and met two men who had left corporate jobs to become farmers. This was their first year. In our conversation I mentioned picking beans and the necessity to plant every two weeks, assuming they would be doing the same thing. Unfortunately, they hadn’t grown beans in the years before they decided to sell them, and thought they just had to plant once. They had been trying to figure out why their beans, which started out so strong, weren’t doing so well. They could plant again then, but by the time those new beans produced it would be the end of the summer.
Some crops are cut-and-come-again. Collards, kale, and Swiss chard are that way. They keep coming back after they’re cut. In our hot, humid climate, it is hard to keep collards and kale through the summer, but I’ve had Swiss chard in the ground from one spring to the next by providing summer shade and winter protection. I use spring and fall plantings for collards and kale, harvesting the later planting through the winter.
Once they’ve gone through a winter, collards, kale, and chard will bolt, which means they will send up a seed stalk, flower, and produce seeds. Many people manage lettuce as cut-and-come-again. That has its limits and lettuce will begin to get bitter, particularly if you have planted it in the spring and the weather has turned hot. When I grew lettuce to sell, I grew it through the summer with shade and plenty of water, but I only cut it one time. The bed that was harvested would be amended with compost and any other organic amendments that were needed and replanted with lettuce transplants. I might get three harvests from one bed throughout the season. Lettuce wouldn’t be in that bed for the next two years. In order to have transplants each week, I would start seeds every week in an area set aside for seedling production. After three weeks they would be ready to be transplanted. I’ve had customers at the farmers market and chefs tell me that my lettuce was the best they’d ever had. I’m sure it was because it was always the first cutting. I let the lettuce plants grow out to large plants before cutting, making the most of every seed I planted.
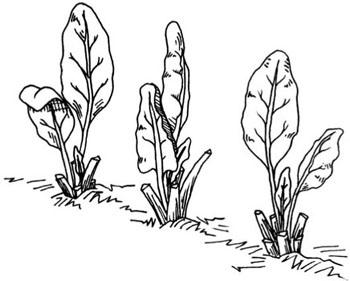
cut and come again chard
When it comes to tomatoes, you should know if the varieties you have in mind are determinate or indeterminate. In my early years as a gardener I had to look that up each year, but now I remember that determinate varieties are determined to stop early and you don’t know when the indeterminate ones will stop. The seed catalogs make that designation for tomatoes. I’m not sure if the tags on tomato plants in the garden centers indicate determinate or indeterminate, but if you are buying plants you can check the variety yourself in the catalogs or online. It can mean the difference between your plants producing for a month (determinate)
or all the way to frost (indeterminate). I use determinate varieties for the tomatoes I intend to process so that I can have a lot at one time. Of course, I want to have tomatoes in the garden into the fall, so my garden also includes indeterminate varieties. Determinate varieties generally grow shorter and bushier than indeterminate varieties.
My favorite worksheet is the Plant/Harvest Schedule. You will use the information from the Plant/Harvest Times worksheet to complete it. The numbers in the top row are the number of weeks before and after the last frost. Write the date of your last expected frost in the space below the zero. That column is for one week. Under the numbers in the blocks on either side of the zero, write the dates at two week intervals from that frost date. You could write in the dates of every week, but that gets crowded. Just know that each block in that row accounts for two weeks, except for the one with the frost date. Hint: write in the dates on one worksheet, and then get copies made. That way you only have to do it once. Since the first fall frost is important, find the week on your schedule that includes the first expected frost date in the fall and highlight it all the way down. Sometimes the timing for planting for fall and winter harvest is indicated as so many weeks before the first fall frost. With the first frost date highlighted, it is easy to determine recommended planting times.
Using the key I’ve provided, record when you will be planting and harvesting each crop. You will notice the faint gray lines dividing the columns into two weeks to help you stay organized. I’ve put “f1” and “f2” because some people plant the seeds in one flat and later transfer them to another before transplanting out. The “c” indicates that the seeds will go in the coldframe. The “p” indicates seeds planted in the bed and “t” indicates the transplant time. The “h” is for each week of harvest. There will be an h in each week that you expect a harvest. The “m” indicates that the cover crop, such as rye, was cut and left in the bed as mulch. There will be a two week delay before that bed can be transplanted into. If you don’t like my key, make up your own. This is your plan. List all the crops in each bed, then list the next group, and so on. Having all the crops from one bed together makes a difference on this worksheet. You will readily see when the bed is empty and what goes into it next. You might not know what bed everything is in yet, but in
Chapter 8
I’ll talk about rotations and how to decide which crops go where on your garden map. For each crop, put the p’s and h’s, and whatever other letters you are using, in the spaces for the weeks that coincide with the times on the Plant/Harvest Times worksheet. I enjoy color, so I color in the rows, with a different color for the time in the flat or coldframe, growing out, and harvesting. Usually it’s yellow for the flat/coldframe time, green while it’s growing in the bed, blue for the weeks of harvest, and brown for the weeks of delay when the mulch has been cut until the next crop goes in, but that’s just me. Make this plan your own.