Lights, Camera... Nude!: A Guide to Lighting the Female Nude for Photography (7 page)
Read Lights, Camera... Nude!: A Guide to Lighting the Female Nude for Photography Online
Authors: A. K. Nicholas

Shooting on location provides interesting challenges. Among them is a level of physical energy—whether it’s trekking up and down ocean cliffs, chasing the elusive combination of background and natural light, or running up and down stairs of an indoor location to ferry your light heads to the next room.
Be prepared for a lower percentage of good shots on location compared to working in-studio, due to the challenges of lighting in unfamiliar surroundings and with limited equipment. However, the shots you do get can be amazing in ways that you could not have created in the studio.
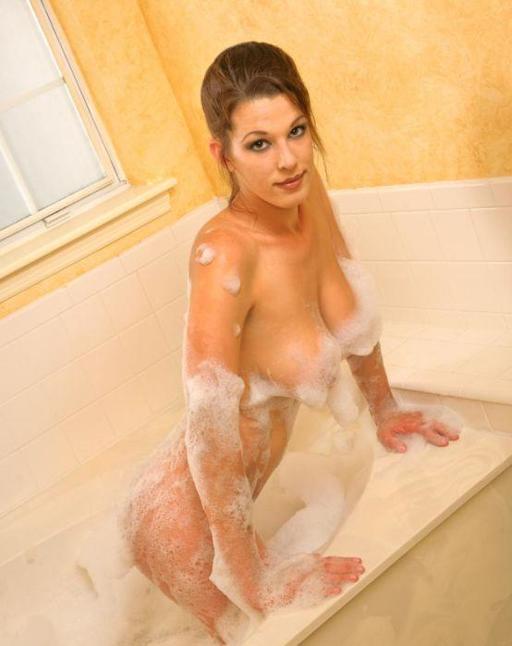
Photo 27: Bathtub and backlit window
Model: Anna F.
Lighting Setup# 1
Category: Location
Skill: Moderate
Light Kit:1
Heads:3
Model Zone: Medium
If you’re lighting a location shoot, you’ll be concerned with portability and time constraints. A beauty dish is more portable than an assembled softbox. A disassembled softbox is portable, but takes time to assemble. A monolight is more portable than a pack and head setup. Of course, using the sun, or window light, and a collapsible reflector or two are the most portable lighting system – but success depends upon having enough natural light at the destination to get the kind of results you want to create. These images were shot in a small room with a tub and window. A good deal of the warm color cast comes from light reflecting off the amber colored walls.
Photo 28: Bathtub setup lights a medium sized zone
Model: Anna F.
Model:
Anna F.
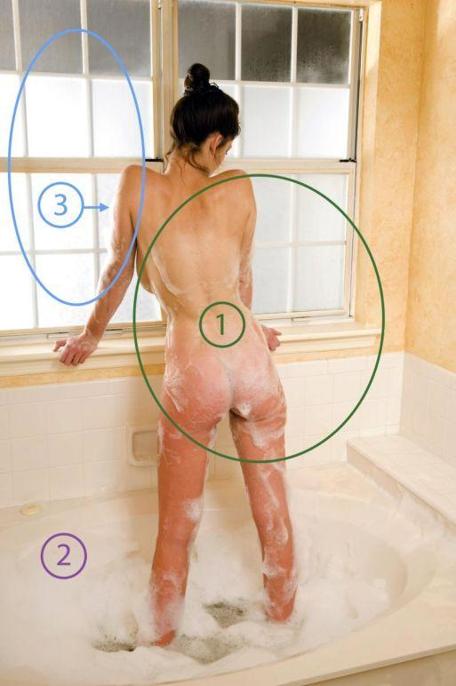
Photo 29: Bathtub, backlit window
The conventional eight-foot ceiling presented both a limitation and a benefit.
Light #
1:
The ceiling limited the height of the main light, a 600 watt second monolight with a 22-inch white beauty dish with a 40-degree grid.
Light #2:
The low ceiling was useful as a reflector to bounce fill light from a bare flash head. The fill light was about three feet from the ceiling, aimed almost 90° straight up (tilted slightly away from the model to avoid direct spill). Without the bounced light, the edges of the image would be too dim due to the falloff from the gridded main light.
The desired effect is an image that has a subtly brighter center, but not the impression of a spotlight.
Light #3:
Outside the window, a 300 watt second monolight provides the impression of light coming through the frosted window (there was no sunlight at the time of the shoot). The frosted window acts as a scrim, softening the backlight. The outdoor light creates some edge lighting (indicated by the arrow) to give the figure some more dimensionality. Notice that the top panes of glass, which are not frosted, appear dark.
Model Zone:
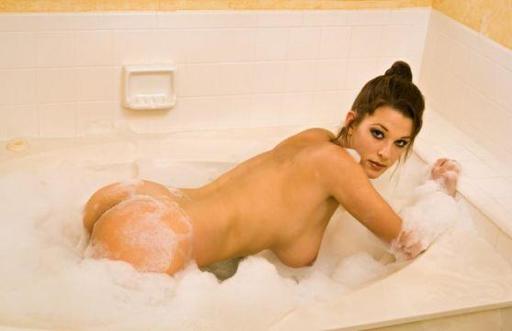
The variety of overlapping light sources allows a moderate range of motion within the lit area, as demonstrated by the three shots here. With the beauty dish close to the camera it was easy to reach over and adjust the aim of the light when the model moved from kneeling to standing.
Due to the confined space, the bounce light (#2) and the photographer were both placed on a counter top to achieve these results.
Practical Tip: In a small space you might need to climb or put equipment on furniture.
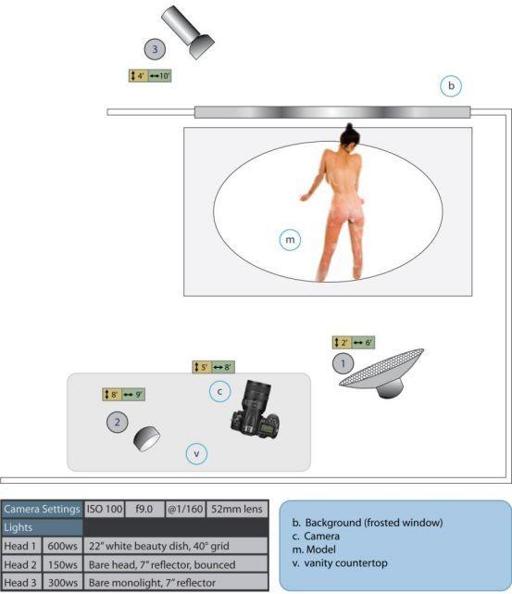
Lighting Diagram 1: Bathtub, backlit window
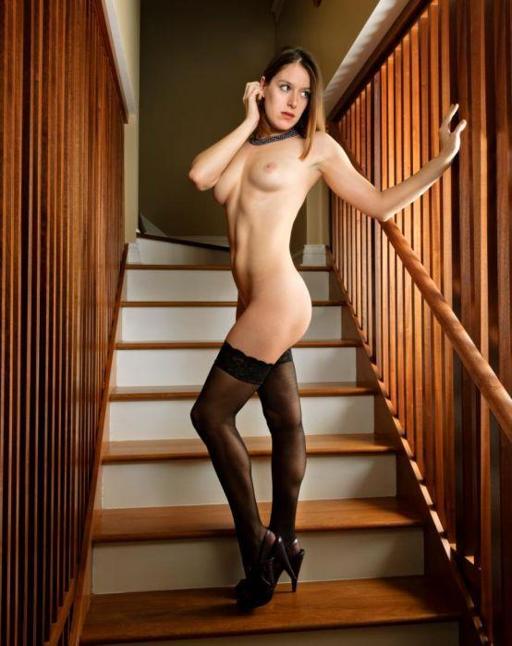
Photo 29: Stairway
Model: Sarah H.
Lighting Setup#
2
Category: Location
Skill: Moderate
Light Kit:3
Heads:3
Model Zone: Medium
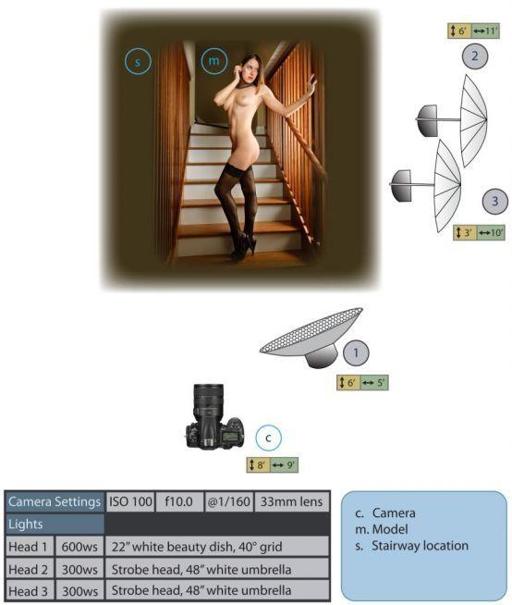
The image at the right was shot on location in confines of a custom designed, hand built, Sapele wood stairway.
The size of the model’s lit posing zone is moderate. She can sit or stand and still be lit with only an adjustment of the beauty dish required. She cannot, however, move up or down the stairs much.
Once you’ve grown accustomed to the studio, with every light going exactly where it did last time, put in for a mental workout by venturing out on location. All the same kinds of problems you solved when you first set up your studio are back again, only in less ideal circumstances. The model is ready, and you still have to figure out why the light is not looking right. Too much bounce? Can’t get the lights far enough or high enough because the room is too small? Overcoming the challenges of lighting on location is part of the fun.
I advise against using on-camera flash. On-camera flash is great for sports and news photographers. The convenience is far outweighed by the drawbacks when shooting nudes. Red-eye, unflattering light, and an almost total lack of control to name a few. There may be rare exceptions, but why stack the odds against yourself? Even if you can’t afford studio lighting, you can still have off-camera flash. For little cost and effort you can acquire a sync cord or radio remote for off-camera flash use. For outdoor photos, a reflector, even an inexpensive white cardboard reflector, is a superior alternative to on-camera fill flash
Light
#
1
:
A 22-inch white beauty dish, with a 40-degree grid is five feet in front of the model, and two feet above her head. It is angled downward at her face and upper torso. The grid contains the light to the model’s upper body, allowing her legs to maintain some contrast with the edge lights.
Light
#
2
: A strobe head with a 48-inch white bounce umbrella is ten feet to camera-right and three feet behind the model, and at the same height as her head. This light comes through the wooden stair rail slats to illuminate her upper torso. The effect of having this light behind the model can be seen in the edge lighting on the model’s extended arm.
Light
#
3
: A strobe head with a 48-inch white bounce umbrella is ten feet to camera-right of the model at the same height as her thighs.
What to Tell the Model: “Keep your face a bit away from the harsh side light.”
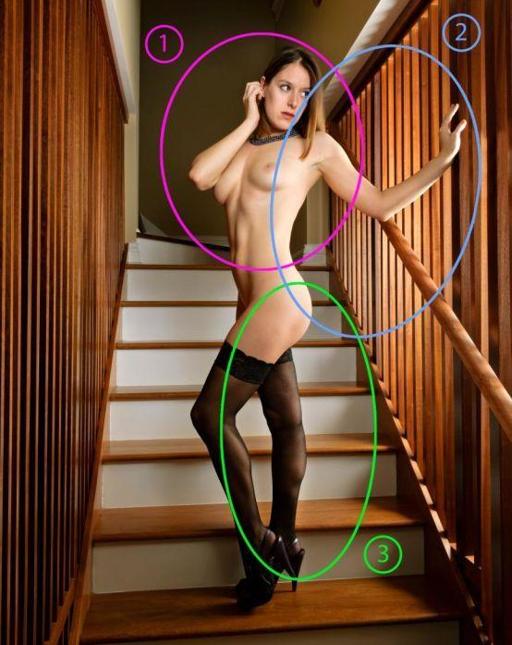
Photo 31: Stairway lighting effect
Model: Sarah H.
Bounce from the side lights (#2 & #3) is contained by the wooden scrim on the right allowing the background to remain subdued, preventing washout of the white areas and allowing some contrast with the light areas of the model’s body.
Model Zone:
The model can only move up or down a step, and from left to right. To avoid harsh features, tell your model to keep her face away from the harsh side light.
