Lights, Camera... Nude!: A Guide to Lighting the Female Nude for Photography (8 page)
Read Lights, Camera... Nude!: A Guide to Lighting the Female Nude for Photography Online
Authors: A. K. Nicholas

Lighting Diagram 2: Stairs
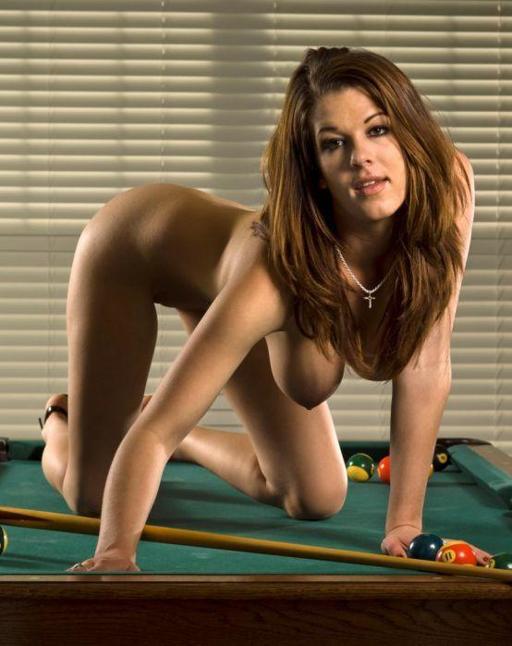
Photo 31: Pool Table
Model: Anna F.
Lighting Setup#
3
Category: Location
Skill: Moderate
Light Kit:2
Heads:4
Model Zone:
Small
Two separation lights, each fitted with a sock diffuser and 40-degree grid, are behind and to our right of the model. One points back at her hair, and the other at her body. A strip softbox provides backlight from our left of the model. The face is illuminated by a single 22-inch beauty dish fitted with a 40-degree grid.
The room containing this pool table provided some challenges and some conveniences. A low-hanging pool table light was deliberately cropped out of the image, meaning the model had to remain low. The room’s low ceiling provided a quantity of bounce, preventing total shadow darkness in all but the most recessed areas of the hair. With the camera placed outside the room, shooting through the doorway, the walls of the room provided flagging from the lights.
Light coming in from outside is enough to illuminate the window blinds, but not enough reaches the subject to affect the image.
Model
z
one:
The model zone is small. The model must stay within a few feet of the center position, but can change between seated and crouched poses. Because the lights are so close the model cannot move much from side to side without drastically changing the contrast ratio.
With this lighting arrangement there is potential for the model’s face to go into shadow if she turns it too far away from the main light.
What to Tell the Model
“Keep the beauty dish in your peripheral vision, so your face will remain lit.”
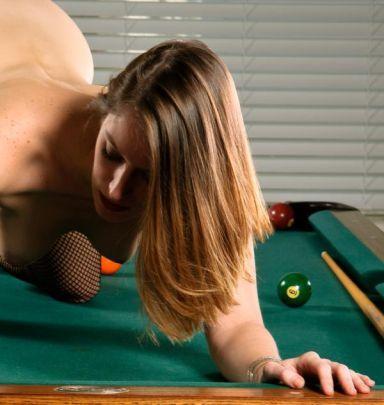
Photo 32: Shadowy face
Model: Sarah H.
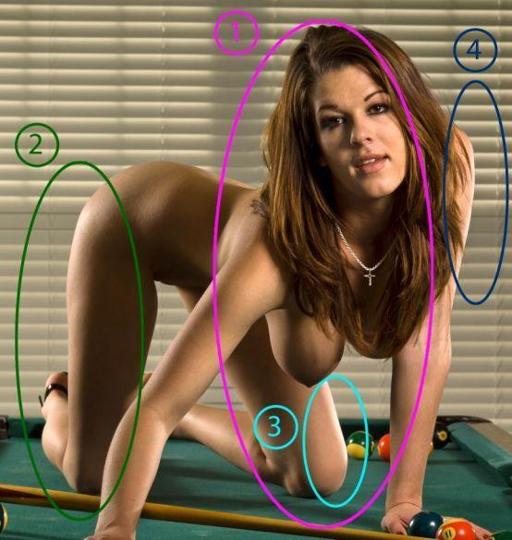
Photo 33: Pool table lighting info
Model: Anna F.
Light
#
1
:
A light modified with a 22-inch white beauty dish and 40-degree grid is positioned in front and to the side of the model (45 degrees) slightly above her head and angled down to illuminate her front. It illuminates her face, as well as the front of her arms and her closer breast.
Light
#
2
:
A strip softbox behind the model provides edge lighting to her legs and right arm (camera left) as well as the area just behind her right shoulder.
Light
#
3
:
An edge light aimed at the lower portion of the crouched model helps visually separate her arm from the green felt.
Light
#
4
:
An edge light aimed at the upper portion of the crouched model improves details in her hair and makes it stand out a bit more from the background.
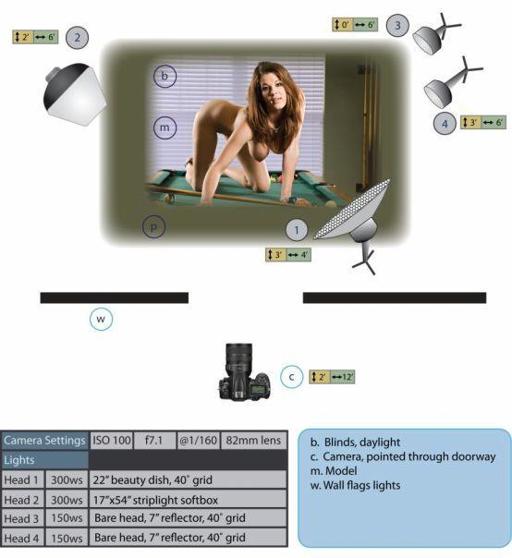
Lighting Diagram 3: Pool table
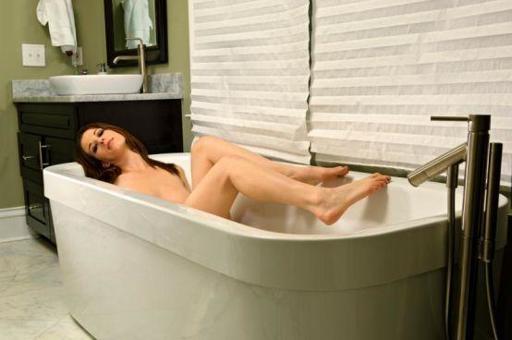 Photo 35: Oversized bathtub
Model: Anna F.
3
Category: Location
Skill:
Challenging
Light Kit:2
Heads:
Model Zone:
Small
This oversized two-person German designer bathtub presents some allure and some challenges. The smooth glossy surface is a beautiful compositional element to light; however, it will likely reflect images of you or your equipment. The small room limits light placement. I didn’t have room for separation lights or a large diffuser. I chose to light the model with two lights fitted with grids to make sure the model was brighter and has more contrast than surrounding elements. The model zone in this image is limited by the use of grid spots as well as the cramped nature of the room and props.
Light
#
1
:
A monolight, bounced off the ceiling, is placed high enough that it does not spill harsh light directly onto the model and low enough that it covers a generous area of the ceiling.
The bounced light illuminates virtually the whole scene, balancing the ambient light coming from the window.
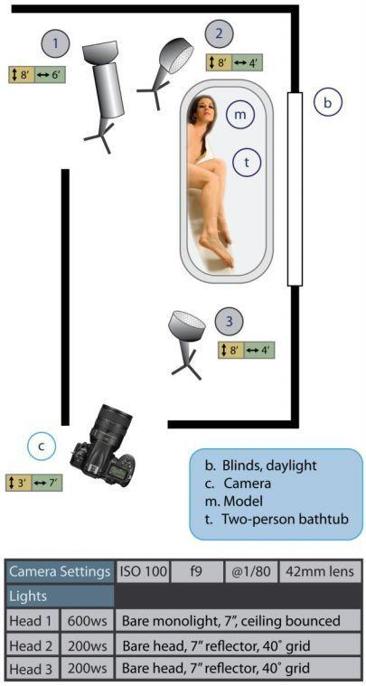
Lighting Diagram 4: Oversized bathtub
Lights
#
2
:
A seven-inch strobe head, with a 40-degree grid, is placed high and as far away from the model’s front as the room will allow. The light is directed at the model’s head and chest. This location did not allow for back or edge lighting, so this high and narrow beam of light allows for some modest contrast.
Light #3:
A seven-in strobe head, with a 40-degree grid is directed at the model’s legs.
Lighting Setup#
5
Category: Location
Skill:
Easy
Light Kit:1
Heads:1
Model Zone:
Large
Model: Michelle W.
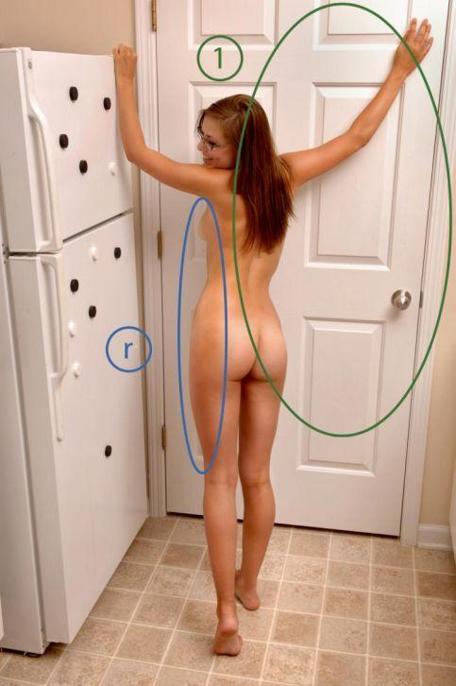
Photo 36: Lit with a single light
Model: Michelle W.
Good lighting doesn’t require an elaborate studio full of expensive equipment. You can use just one light. Often a reflector (a wall will work) is required to get enough fill light for a satisfying photograph. Using only one light is inexpensive, but there are other reasons you may want to try using a single light. A single light setup can produce quite dramatic high-contrast nudes or broadly lit bounce shots. Some professional photographers use single light techniques all the time.
This shot was lit with a single, 600 watt second, off-camera studio strobe (a monolight), bounced off the 12-foot ceiling of Michelle’s one bedroom apartment.
Light #1:
The flash had a ten-inch reflector and was aimed at the ceiling about six feet from the area directly above the model. The flash was aimed up at about 45 degrees. With the light several feet from the ceiling, this created a large, light source above and off-center from the model.
The white surfaces of the wall and refrigerator at the model’s left serve as reflectors, adding fill light.
There is sufficient fill light and diffusion that there are no harsh shadows. However, there is a bright spot at the upper right corner, closest to the light source, and a bit of light falloff at the lower left.