Just in Case (37 page)

DRAINING YOUR PIPES
The particulars of draining your plumbing system may vary depending on your equipment and setup. The following general instructions are a good starting place, but be sure to examine your own home’s unique plumbing to make sure you know how to drain it completely and safely.
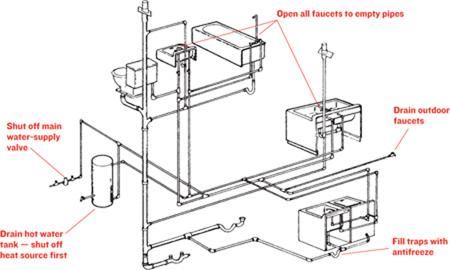
DRAINING THE PLUMBING SYSTEM
1. If you have a hot water tank, turn off its heat source. Then shut off the water supply to the tank.
2. Close the main water-supply valve.
3. Turn on all the faucets in the house; save this water if water is in short supply. Be sure that this includes the lowest faucet in your house (it might be in your basement, attached to your boiler or a laundry washing machine). Flush all the toilets, then dip out any water remaining in the tanks or bowls with sponges. Run the dishwasher and washing machine for a few minutes to drain out any water they might contain. If you have ice makers or humidifiers, drain them as well.
4. Showers, sinks, and tubs have drainage traps. Pour antifreeze (about 2 to 3 ounces; follow the recommendations on the label of the antifreeze container) into these traps to prevent that water from freezing.
5. If you have a hot water tank, you’ll need to drain it. Make sure the heat source for your water heater is turned off and the shut-off valve between the heater and your water supply is closed. When the water inside the tank has cooled, attach a rubber hose to the drain cock near the bottom of the tank, and run the hose to a floor drain or outside. (Don’t use a plastic garden hose; the heat from the water will ruin it.) Make sure a hot water faucet somewhere in the house is open. Then open the drain valve on the tank.
6. If you have a hot water heating system, which circulates heated water from a heating unit, like a boiler, through pipes and/or radiating units, you’ll need to drain it. It’s a lot like draining a hot water tank. Shut off the heat source to your boiler, and make sure the shut-off valve between the boiler and your water supply is closed. Attach a rubber hose to the lowest valve in the system, which will generally be on the boiler, and run the hose to a floor drain or outside. Then open the drainage valve at that spot. Open the drainage valve on the boiler expansion tank, if you have one; you may need to drain it with a hose separately. Also open the drainage valves on all the radiators, after positioning a pan under them to catch the water.
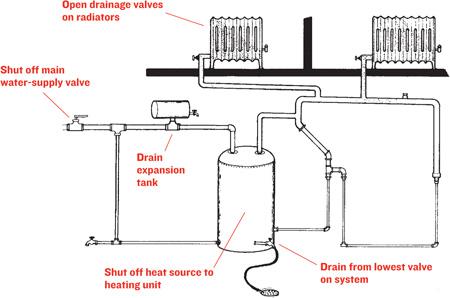
DRAINING A HOT WATER HEATING SYSTEM
There will still be water in the pipes between the main water supply shut-off valve and the boiler. Look for a drainage valve in that section of pipe, and open it.
You may not have to drain your entire system if only some pipes are in danger of freezing. This might be the case if you have heat inside the house but it’s well below freezing outdoors and some of your pipes run through an exterior wall. Take whatever steps are necessary to drain just those pipes; you may need to install special drains and shut-off valves now so that when the time comes you can isolate those pipes from the rest of your plumbing system.
Knowing how to drain your plumbing system is invaluable in the event that you have to abandon your home in cold weather. In that case you’ll want to drain the entire system so that you can be sure that you won’t face a flood resulting from broken pipes when you return home.
THAWING FROZEN PIPES
N SPITE OF
your best efforts, your pipes may freeze anyway, especially in places where they are exposed to the cold, such as uninsulated spaces or exterior walls. If this happens, shut off your main water supply, so that if any of the pipes have broken, they won’t leak when they thaw.
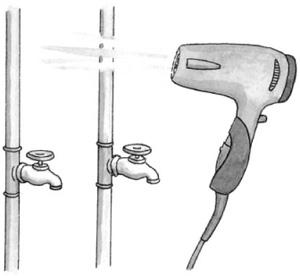
THAWING PIPES WITH A HAIR DRYER
You’ll know a pipe has frozen when you turn on a faucet and get no water. Usually pipes freeze at certain points, rather than along their entire length. To find the spot where a pipe has frozen, follow it back to a juncture with a second line. Then turn on the faucets on this second line. If they work, the frozen section is between the juncture and the first faucet. If they don’t work, the frozen section is between the juncture and your main water supply. Once you have identified the section of pipe that is the likely culprit, you can probably pinpoint the freeze-up with your hand, simply by feeling for the coldest section.
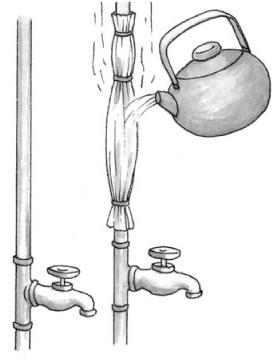
There are a couple of different ways to thaw pipes. If you have power and an electrical outlet nearby, you can heat the frozen section with a hair dryer or wrap it in a heating pad. You can also wrap rags around that section of pipe and pour hot water over them.
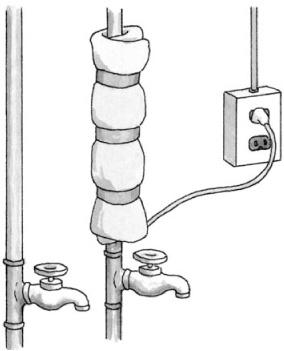
A HEATING PAD
WHEN POWER IS RESTORED
W
HEN THE POWER
is restored, you’ll need to plug in all the electric appliances you had unplugged and evaluate your refrigerated and frozen food for spoilage. You may also need to restart your heating system and hot water heater.
If you’ve drained your hot water tank, you will need to fill it with cold water before turning the heat source back on.
You’ll need to do the same if you have a boiler and hot water heating system; keep the venting valves open until water issues from the hot water faucets in the house. Then close the venting valves and restart the heater. After the system has started providing heat again, vent all the valves to release any air from the system.
You may need to relight the pilot light if you have a gas-fired boiler or water heater. Most gas appliances have instructions for this posted on a label on their front; if you’re at all unsure, ask a technician from your gas company to show you how to do this safely.
… OR HOT WATER
CHAPTER 11 FIRE IN THE HOME
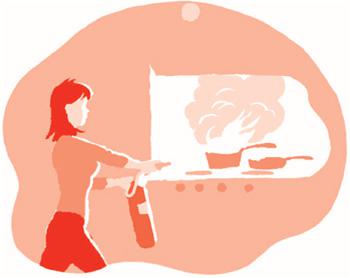
House fires kill more people every year than most natural disasters combined. Every two and a half hours someone dies in a home fire. That adds up to more than 3,500 deaths a year. Another 2,000 people are seriously injured each year. With these statistics in mind, fire safety must be a part of every family’s preparedness plan.
SAFETY EQUIPMENT
E
VERY HOME NEEDS
a few pieces of fire-safety equipment. Each floor of your home, including the basement and attic, must be equipped with both smoke and CO
2
detectors. Carefully follow the manufacturer’s instructions about where to install these detectors, as installing them in drafty spots, such as near windows, doorways, and ductwork, may render them less reliable. The ceilings outside bedroom doors and in hallways are the preferred locations. Be sure to test your smoke and CO
2
detectors every month, vacuum their surfaces every six months, replace their batteries every year, and replace the units themselves every five to ten years.
Keep extra batteries for the detectors on hand. Should the battery in a smoke or CO
2
detector run low, the unit will begin to chirp every few minutes. The sound is meant to be annoying, and it is. If you don’t have the batteries on hand, you may be tempted to remove them altogether until you shop again. It is too easy to forget about replacing the batteries, and this will leave you with a unit out of commission.
A fire extinguisher in the kitchen can be a lifesaver, but there are a few things to keep in mind before you run out and purchase one. Fire extinguishers are categorized by their ability to put out different types of fires:
• Class A fires involve ordinary combustible material such as paper and some plastics.
• Class B fires involve combustible liquids, including gasoline, kerosene, and grease.
• Class C fires involve electrical equipment, such as toasters and microwaves.
• Class D fires involve combustible metals, such as titanium and sodium.
Class D fires are unlikely to occur in the home; extinguishers capable of putting out such fires are generally found only in chemical laboratories. But class A, B, and C fires could all occur in a kitchen, so make sure you purchase a multipurpose extinguisher, rated for A, B, and C fires.