The Skinny Confidential: A Babe's Sexy, Sassy Health and Lifestyle Guide (11 page)
Read The Skinny Confidential: A Babe's Sexy, Sassy Health and Lifestyle Guide Online
Authors: Lauryn Evarts
Tags: #Health & Fitness, #Healthy Living, #Women's Health, #General

My biggest makeup tip? Mix your foundation with moisturizer.
Why?
Because it’s a total game changer. Not only does it make your skin dewy, but it also takes that cakey foundation look away. To each their own, but I like to use a dime-size amount of foundation and a quarter size of moisturizer.
Buh-bye, cake face.
It’s also helpful on the wallet. Mixing foundation with moisturizer will make your foundation last and last and last.
Moving on! You know what the crime of the century is? Buying foundation that doesn’t have SPF.
I mean, why on earth would you choose a foundation without SPF when you can choose one with it?
BEATS ME.
When you’re choosing a foundation, make sure it’s a full-coverage brand with SPF. Also, please, please, please make sure it doesn’t contain titanium dioxide. This disgusting, sick-o chemical’s known to cause cancer.
Oh. And make sure your foundation matches your skin tone. If your body is pale, then your face shouldn’t be orange. If your body is tan, your face shouldn’t look like the main character in the movie “Powder.” If your body is spray-tan orange, learn how to spray tan and then deal with foundation colors. The worst thing ever is when a girl has a thick line of foundation that looks similar to a mask.
Makeup 101: Rub your foundation (with your moisturizer mixed in) into your neck.
CAPISCE?
OK, now for the I-can’t-live-without-it-or-I’ll-die makeup tool: a foundation brush. After I’ve primed my face, I take my moisturizer, squeeze it on the top of my hand (about two small dapples) and then squeeze one dime-size dot of foundation on top. I mix the two together with my foundation brush. Then I pat the foundation on my face. Not only does this work for me, but it’s also super fun.
I like to put more foundation on the areas that need it—i.e., under-eye circles, the middle of my forehead, the tops of my cheekbones (this makes them pop) and last, but definitely not least, my eyelids.
Painting foundation on your eyelids brightens the eyes. They’ll appear cleaner and more awake. I’ve been doing this trick forever and I’m obsessed.
Trust me; you’ll be obsessed, too.
After I’ve put on my moisturizer plus foundation, I let it sit.
The biggest makeup mistake girls make is not letting their foundation sit on their skin. Seriously peeps, all I’m asking for is one minute.
After it’s done sitting, I use concealer. FYI: I skip the powder part. Powder makes my face look too cakey. And honestly? I’m more of a dewy girl. I like that beaming, dewy look that’s fresh. Pounding powder on makes me look too done up.
OK, back to the concealer. This is a bit tricky; a lot of girls abuse poor, poor concealer. Don’t give it a bad rep.
Concealer is meant to be used in small quantities and is used for covering a zit or a brown spot, not your whole face. In my opinion, a tiny bottle of concealer should last you months.
Months. Not days. Months.
I use my ring finger to pat (not rub) a few dots of concealer on any blemishes and under my eyes.
Quick tip:
Use a line of concealer to frame the outside of the nose (on the cheek area, not on the actual nose) to make your nose appear smaller.
Once your concealer is applied, grab the bronzer. Pick a bronzer that isn’t overly sparkly.
I MEAN, THIS ISN’T A KESHA CONCERT.
Let’s keep it classy. A bit of shimmer is pretty; a boatload of glitter isn’t. Save it for the slutty fairy Halloween costume.
Make sure you have a bronzer brush, not an eye shadow brush, not a foundation brush—a bronzer brush. If you decide to not use a bronzer brush, then you might as well compare it to using a curling iron to straighten your hair.
Put a bit of bronzer on the brush and apply it to your cheekbones. Where the F are your cheekbones? Try this little exercise to find them. Pretend you’re drinking out of a straw and purse your lips together. You should see two prominent cheekies sticking out. Put the bronzer on them.
Then add a dot of bronzer to the underneath portion of your bottom lip. Why?
Because.
It’s an amazing trick to make that lower lip appear bigger and poutier. FYI: If you’re Angelina Jolie, you probably can skip this part.
If you’re not Angie, then bronze on.
Add a bit more bronzer to your brush and add some bronzer to the top of your hairline, not the whole forehead.
Side note:
You want to know what drives me bat shit crazy? When people put bronzer over their whole face. Not hot. Not cool. Not fun to look at.
Anyway, you can add some bronzer to the jawline, too. This will slim the chin.
Next step:
Grab your highlighter. Here’s the fun part: Highlight the features you love. The tops of the cheekbones are fun to highlight (above the bronzer), and a little highlighter under the brow bone is sexy. If you want that Kim K. glow, add some highlighter above your lip. You know that little dip above the top lip? That’s where you want the highlighter. For a smaller nose, add it to the bone on your nose and in the middle of your forehead.
If you’re into the rosy cheek look, add some cream blush to the apples of your cheeks. Keep it soft though—no need to look like a circus clown.
NOW IT’S TIME TO BLEND!
I like to use a Kabuki brush to blend. The short stem and dense bristles will blend everything together so you don’t look like you used multicolored permanent markers on your face. Get excited! The Kabuki brush is God-sent. Honestly, it’s a game changer.
After you’ve blended your face to create a masterpiece, it’s time to fill in those brows. Because no one likes tadpole brows. Thick brows are in. Brows are sexy when they’re full and shaped properly. If you’re confused about how to shape brows, go to a waxing salon (a real waxing salon, not some weird hole in the wall). Bring pictures of what you’re envisioning for your brows.
But remember: Do what works well for your face. I put my tweezers down a long time ago. I couldn’t be trusted. I was a total over-plucker. If this sounds like you, step.away.from.the.tweezers. Leave it to the professionals, babes.
Back to filling in the brows. My favorite brow kit is made by Anastasia. It contains the perfect brow brush with colors that fit well with any hair color.
When it comes to filling in my brows, I make three, tiny lines: one at the beginning of the brow, one at the peak of the brow and one at the end.
Once they’re filled in, I use a clear mascara to brush them. Yes, peeps. You brush your hair, you brush your teeth, you brush your brows. Common sense.
Mascara time!
Mascara is my jam. After speaking with many makeup artists, I’ve found that none of them know this trick:
Prime. Curl. Prime. Curl. Mascara.
Here’s the deal: I would rather not put on makeup if I don’t have mascara primer. I’m not talking about clear, see-through primer. I’m talking about white, thick primer (I like one from Dior). White, thick primer will make your lashes five times thicker and longer than they actually are naturally.
SO. AHEM!
My favorite makeup secret works like this:
Do one eye at a time: Prime with your white, thick primer. Curl with an amazing eyelash curler (the better the curler, the better the lash looks). Prime again. Curl again (but only if it’s nighttime; once will suffice in the daytime).

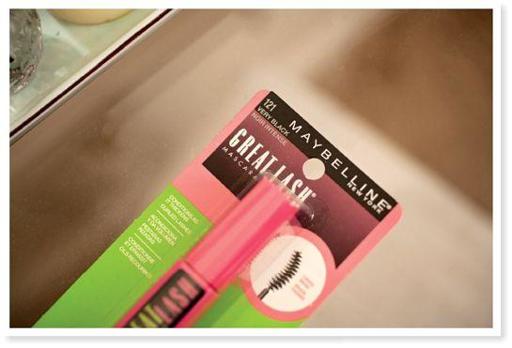
After you’ve primed twice and curled the lash twice, add your mascara. Listen: Mascara is funny. There are a million choices and each one promises different things (bigger lashes! longer lashes! volumized lashes!). Find one that works for you. My obsession is Great Lash
®
Blackest Black with a curled wand. It’s four dollars at any local drugstore. I’ve tried every mascara under the sun. If I really want to make my lashes as long as possible, I apply Benefit’s “They’re Real.” This particular product was sent from the mascara gods. It literally gives the illusion of fake lashes.
RAD.
After you’re all mascara-ed up, grab the gloss and lip liner, sex kitten.
Add a dab of shiny gloss to the middle of your upper and lower lips. This will give you the perfect pout.
As for lip liner: I’m not talking ‘90s maroon lip liner from the movie “Clueless”. My favorite liners are a nude and a tan. I use the nude on the top of my lips; it makes them pop. And the tan liner goes on the bottom.
The point is: It looks like I’m not wearing lip liner, but gives the illusion of a perf pout.
I mean, isn’t that the whole point of makeup? To look like you’re not wearing any? Keep it simple!
Anyway, there you have it. That’s my makeup application process.
TA DA!
Oh! BTW: I’m not an eye shadow wearer. I don’t like it. It looks gaudy on me and doesn’t work for my face, but do whatever floats your boat.
This may seem like a lot of work, but the whole process should never take more than ten minutes! And, if you’re going to make the effort to apply makeup every day, be sure to make the effort to take it off. The worst thing ever is waking up on a white pillow full of mixed colors.
FYI: If you’re going for a sophisticated look, clear lips are amaze. A lot of gloss is very baby doll. Add some extra blush to the apples of the cheeks, too. A thick brow is also sophisticated and chic.

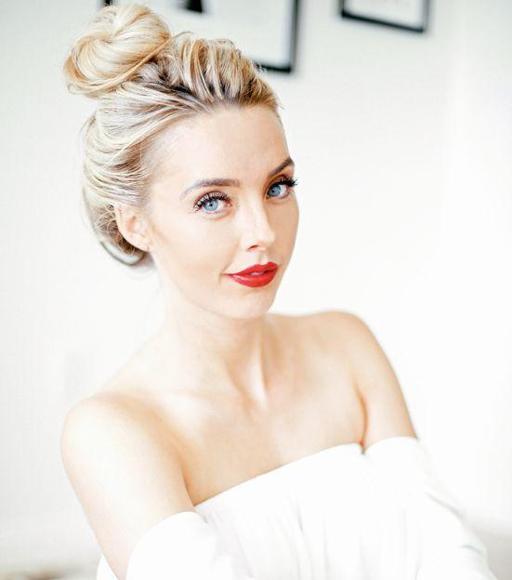
For a going-out look, I die over red, orange (yes, hot orange is fun and sassy!) and dark maroon lips. Fake eyelashes (the natural-looking ones) are always sexy to throw on for a night out on the town, too. Pull your hair back for a more dramatic look; girls who pull their hair off their faces know how to rock it. A ponytail screams confidence because you’re not using your hair as a security blanket. Also, a bun or a braid is unexpected and so much more interesting than wearing your hair down.
And lastly, if you want to include some sparkle, add a headpiece!
Overall makeup lesson: The overdone look is too much—keep it natural!

8 BUH-BYE,
PIMPLES
LET’S START WITH MY FIVE SKIN CARE RULES: