Stitch 'n Bitch: The Knitter's Handbook (57 page)
Read Stitch 'n Bitch: The Knitter's Handbook Online
Authors: Debbie Stoller

SKILLS | PAGE |
CAST ON | |
KNIT | |
INCREASE | |
DECREASE | |
BIND OFF | |
SEW SEAM |
S
IZES
Standard (Large, for cats over 12 lbs.)
Finished measurements: 14 (17)" diameter, 4" tall
M
ATERIALS
Lion Brand Yarn
Wool-Ease
(80% acrylic/20% wool; 85g/197 yds)
MC:
1 skein #100 White
CC:
2 skeins #137 Fuchsia
Lion Brand Yarn
Fun Fur
(100% polyester; 50g/60 yds)
A:
2 (3) skeins #100 White
B:
4 (5) skeins #195 Hot Pink
US 10½ (6.5mm) knitting needles, or size needed to obtain gauge
Sprayable catnip (optional)
G
AUGE
13–14 sts 4" in garter st with 1 strand each
Wool-Ease
and
Fun Fur
held tog.
D
IRECTIONS
BASE
With one strand each of MC and A held tog, CO 20 (22) sts.
Working in garter st, inc 1 st each side of the next 7 (9) rows—34 (40) sts.
Beg with a RS row, inc 1 st each side of next row and foll 6 (8) RS rows—48 (58) sts.
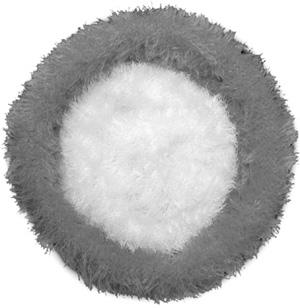
Work even until piece measures 10½ (12)" from beg, end with a WS row.
Time-saving tip:
If you run out of the
Fun Fur
while you’re knitting, just tie the end of the new skein to the end of the previous skein with a good strong square knot, and trim the loose ends to match the length of the fur. The knot won’t show (honest), and that’s one fewer end you’ll have to weave in when you’re done knitting!
Dec 1 st each side of next row and foll 6 (8) RS rows—34 (40) sts.
Dec 1 st each side of next 7 (9) rows—20(22)sts.
BO all sts.
SIDES
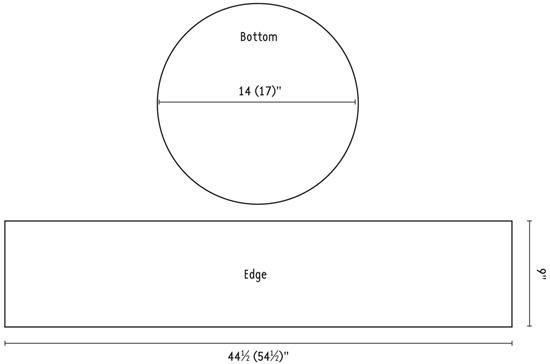
Measure around the edge of the base (the circumference). Write that number down—it should be approx 44 (54)".
With 1 strand each of CC and B held tog, CO 30 sts.
Work in garter st until the length of the side piece meas the same as the number you just wrote down (the circumference of the base) plus ½" for seam allowance.
BO all sts.
FINISHING
With a single strand of CC, sew the short ends of the side piece tog.
Divide the length of the side piece into 4 equal parts and mark each fourth with a pin, placing the first pin at the seam.
Now divide the edge of the base into 4 equal parts and mark each fourth with a pin (imagine it’s a clock face and put pins at 12:00, 3:00, 6:00, and 9:00).
With the seam of the side piece facing out, match up the 4 pins in the side piece to the 4 pins in the base and pin together; then match up the rest of the side piece to the edge of the base and pin all the way around, aligning the 2 edges as closely as possible.
With a single strand of either MC or CC, sew the 2 pieces tog.
Weave all ends into the seams.
Now you should have what looks like a giant furry hat!
With all seams facing out, place your cat bed on a flat surface and fold the side piece in half lengthwise to the outside. The side should stand up pretty well on its own and form a cozy all-around wall for your cat bed, but you’ll want to make it a little sturdier so it stands up to heavy-duty cat nuzzling.
To do that, use a single strand of leftover B and a yarn needle to sew a single st through both layers of the folded-over side piece, about halfway up from the bottom. Tie the ends of your st into a knot and trim.
Rep all the way around the wall of the cat bed, placing the sts approx 3" apart.
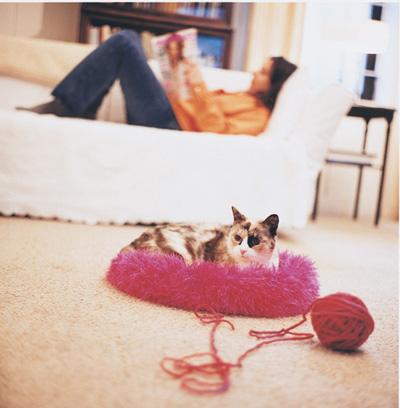
Now comes the really fun part: Since your cats are probably as well-behaved as mine (ahem) and stay as far away from your knitting as possible (ahem), they may be wary of their new bed at first. To let them know you made it especially for them, spray a little catnip on the bed, let it dry for a few minutes, and put the bed in their favorite napping spot. If your cats are anything like mine, they’ll be zonked out in their new bed and having naughty kitty dreams in a matter of minutes.
CLEANING
You don’t need to wash cat beds often, because cats actually prefer to have their scent on their stuff. If the bed gets dirty, wipe the spot with a sponge and mild soap and water. If it needs deeper cleaning than that (we cat owners know accidents do happen), wash by hand in cold water and lay flat—folded in half—to dry.
ABOUT BRENDA

I’d been a knitter for more than twenty years, but after spending way too many of those years knitting by myself, I decided to come out of the yarn closet in October of 2000 and form Stitch ’n Bitch Chicago (inspired by Debbie’s group in New York City). Almost three years, four hundred members, and a cable access show later, the group is still going strong. The other members are by far my biggest source of inspiration and motivation. Props to my SnB homies for their input on this pattern, and love to my orange tabby Lucy for being the world’s best cat bed tester.
HILDA ERB AND VICKIE HOWELL
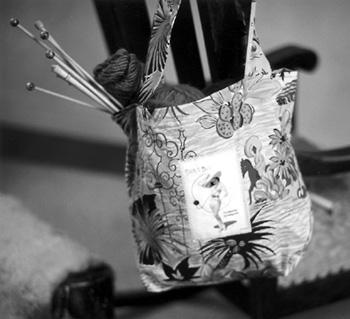
So you want a knitting bag but feel like you’re about three decades too young to be carrying the kind they sell at your local yarn shop? You want something hip, cute, and unique that doesn’t use up too much of your precious yarn money? Well, my knitting friend, why not use your craftiness to make a homemade tote with your very own patch? It’s easy, it’s cheap, and I promise you’ll be the envy of everyone at your Stitch ’n Bitch.
M
ATERIALS
FOR THE BAG
About ¾ yd fabric; we used Tapatio Floral 100% cotton from Reprodepot Fabrics
Sewing needle or sewing machine
Sewing thread to match fabric
Iron
Pins
FOR THE PATCH
Computer, scanner, and color printer
Iron
Computer-ready iron-on transfer paper
Piece of muslin or other light-colored fabric a bit larger than you want your patch to be
D
IRECTIONS
FOR HILDA’S TOTE BAG
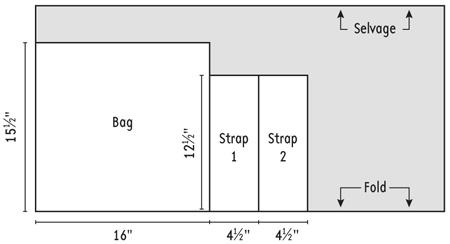
Cut 1 piece of fabric 16" × 31" for the bag, and 2 strips of matching or coordinating fabric, each 4½" by 25", for the handles.
You may use the pattern layout below for cutting out these pieces:
RS tog, fold the larger piece of fabric in half so that the fold forms the bottom and the bag meas 16" × 15½". Stitch up the sides using a
⅝
" seam
(figure 1)
.
