Making It: Radical Home Ec for a Post-Consumer World (41 page)
Read Making It: Radical Home Ec for a Post-Consumer World Online
Authors: Kelly Coyne,Erik Knutzen

If necessary, fence off the hive area to protect pets or small children from their own curiosity. We’ve got low fencing set up about 3 feet away from the hive entrance to keep our dog from nosing around where he should not. Some dogs are bee wise, others are incorrigible.
CATCH YOUR BEES
There are three ways to catch feral bees. First, you can capture a swarm. Second, you can cut an established hive up and move it into your own box. This is called a cutout. Or third, you can rig up an established hive so that bees can exit the hive but can’t return. Then you lure the homeless bees into a box. This is called a trap-out. We’re not going to cover trap-outs, because you need brood comb from an existing hive. Brood comb is a bee nursery, a comb filled with infant bees. The presence of needy brood convinces the worker bees to move into the box. We assume that as a beginner, you won’t have access to brood comb, so the next two projects focus on the other two techniques. Of the two, we’d recommend capturing a swarm as the easiest method for the novice bee handler.
67>
Bee Acquisition Method 1: Swarm Capture

PREPARATION:
10-30 min
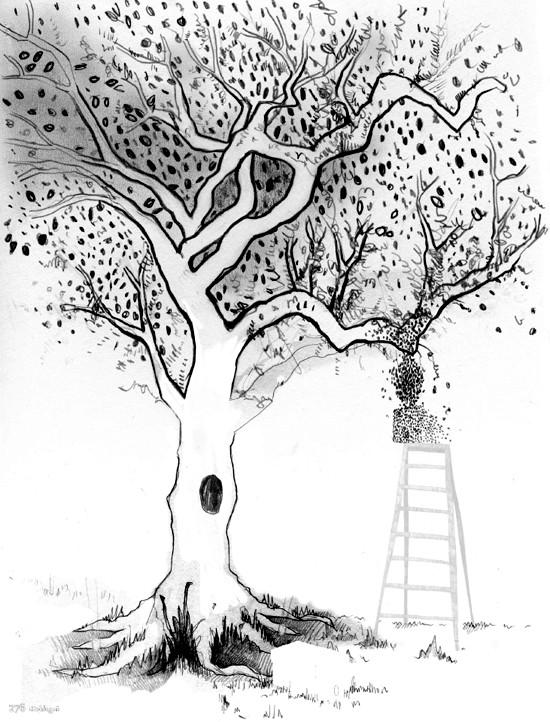
You may have seen a swarm: clouds of bees flying past or congregating in piñata-like clusters in trees or on light poles or clinging to yard furniture. A bee swarm can cause a panic at a picnic, but the truth is that bees are never less dangerous than they are when swarming.
Swarms are the mechanism by which a bee colony reproduces itself. When conditions in the hive get crowded, the colony raises a new queen, and either the new queen or the old queen leaves the hive with a substantial number of the workers to search for new digs. They can’t survive long without a hive, so a swarm is a temporary entity. They either find a place to live, or they all die. While they’re homeless, they have nothing to protect—no honey, no brood, no hive. As a result, they’re very mellow. They’re really just trying to get by.
To capture a swarm you have to be ready, since they often just settle down for a few hours. If you’re in the market for bees, it pays to have your swarm-capture gear ready at all times. In temperate climates, springtime is swarm time. In warmer climates, swarms can happen anytime, but spring is still the busiest swarm season.
YOU’LL NEED
BASIC PROTECTIVE GEAR:
A veil and gloves at minimum, a bee suit for the most protection. Show-off beekeepers capture swarms with their bare hands, because they know they’re unlikely to be stung.
A NUC BOX:
This is a temporary beehive, a box about as big as a filing box.
(Nuc
is short for nucleus, but they’re never called nucleus boxes.) They’re sold by beekeeping suppliers. Get a cardboard rather than a wooden nuc box, because they’re easier to heft around and they’re cheaper. The nuc box has a circular hole on one side for the bees to come in and out of. The hole comes with a plug to block the entrance during transport. If it’s very hot when you’re hunting swarms, consider cutting out a window on the lid of the nuc box and duct-taping some screen over the opening so that the bees will have more air, minimizing the chance that they will overheat when you transport them. For a really big swarm, you may need more than one box. In a pinch, you could improvise a nuc box with any sturdy cardboard box.
Note:
You don’t have to use a nuc box. You can use an empty wooden hive box, if it’s convenient. The advantage of the nuc box is its light weight and portability. If you can manage to capture the swarm in your wooden hive box, you’ll have less to do later.
You’ll also need:
- 5 empty frames fit with starter strips. A standard nuc box will hold 5 frames.
- Spray bottle filled with a dissolved 50/50 mix of sugar and water
- Ladder
- Coil of rope
- Roll of duct tape
- Pair of pruning shears and/or small saw
- Bee brush
BRIBERY HELPS
When you first bring home your bees, open the top of the nuc box and drizzle a couple of lines of honey over the tops of the frames. Use just enough to make lines, not so much that lots of excess honey drips into the depths of the box. This gives the bees a little food to sustain them. It might also make them more willing to stay. Check back in a few days and see if they’ve cleaned up the honey. If so, add a little more. Once you transfer the frames to the permanent hive box, you can continue to feed them using a spacer frame and bags of sugar water, as described in the next project on cutouts.
PUTTING IT TOGETHER
DON YOUR GEAR AND APPROACH THE SWARM TO ASSESS THE SITUATION.
How big is the swarm? Will it fit in one box? How high is it? Will you need a ladder? Check to see if there is any comb visible. If there is, they’re building a hive, they’re not a swarm anymore. To move them, you’ll have to do a cutout. See the next project.
MIST THE CLUSTER OF BEES WITH THE SUGAR WATER.
This will keep the bees preoccupied cleaning themselves and they’ll be less likely to fly off.
MAKE A PLAN.
Basically, you have to move that cluster of bees into the box. That’s not as hard as it might seem. Two basic rules of bee behavior will help you. This first rule is that where the queen goes, the rest follow. The queen is guaranteed to be somewhere in the heart of the swarm. The second rule is that bees prefer dark places and are naturally attracted to the confines of the nuc box (or a proper hive box, if that’s what you’re using) as well as the familiar scent of the wax on the frames. If you put the box beneath the swarm (if it’s hanging) or on the ground in front of them (if they’ve clustered somewhere low) and step back to give them some room, they might move into it on their own. They often do, and it’s an amazing sight. The entire swarm will flow into the entrance of the nuc box on its own accord. If the swarm is way up high, you can hoist the box beneath it on rope or balance the box on a ladder. Scouts will check out the box, and if they give the all-clear, they’ll all move in.
If they don’t move in on their own, you can be more aggressive in your approach. Do remember to spray them with sugar water before you do any of this! If they’re hanging on foliage, cut the branch above the swarm and lower it into the box. If you can’t do that, you might be able to give the branch (or table or whatever) a hard thump or shake, and the swarm will fall into the box. Or you can use a bee brush or your hands to gently brush them into the box. As long as the queen lands in the box, the rest will follow, even if they’re disturbed and flying around. Just give them a chance.
In either case, there might be some stragglers hanging out on the front of the box. If they show no sign of moving in, and you need to go, just sweep them into a dustpan and dump them into the top of the box.
The worst thing that can happen is that you’ll lose the swarm. If the queen doesn’t make it into the box, they’ll follow her elsewhere. Even if she lands in the box, she might decide she doesn’t like the box, and they’ll all flow out. There’s nothing you can do to stop her from leaving. All you can do is try again another day.
ONCE THE SWARM IS IN THE BOX,
tape down the lid to secure it during transport. Be sure to secure the plug in front, too, and tape up the corners of the box. You don’t want a car full of bees! Make sure that the bees have plenty of ventilation—they need to breathe just like we do.
GET THEM TO THEIR NEW HOME AS FAST AS POSSIBLE.
Set the nuc box
on top
of the hive you hope they’ll inhabit one day. That hive should be all set up and ready to go. The legs should be set in oil cans so it’s ant proof. You’re putting the nuc box on top of it because it’s a safe place, and because they’ll orient to that particular location as “home.” Unplug the central opening (wear your gear when you do this). The bees will come out and look around. It’s possible they might all fly away in a huff, but it’s more likely they’ll opt to stay, at least overnight. There’s no predicting if they’ll stay or go over the next couple of days. They’ll probably fly around the hive and hang out on the front of it while they make their decision. If they stay, you’ll start to see more orderly bee behaviors, like workers flying busily in and out of the box. If they leave, don’t take it personally. You’ll find another swarm.
AFTER THEY’VE SETTLED IN FOR ABOUT 2 WEEKS,
suit up and visit the box midday on a nice, sunny day, when most of the workers are out. Watch the bees coming and going. If you see any with pollen on their hind legs, that’s a sign they’re building comb and raising young. To confirm, suit up and lift out the frames and check for signs of comb building. Once you see comb, you know they mean to stay, and the bees should be transferred to the permanent hive. Move the frames from the cardboard nuc box to the permanent hive box. Work very gently and carefully, trying not to squish any bees in the process—you don’t want to kill the queen. Tilt the nuc box over the open hive box and spill in any bees that remain after the frames are transferred. As before, if the queen is on one of those frames you just moved, everyone should move into the hive to be with her. Cross your fingers and hope they don’t get mad and leave. If they stay, you’ve got bees!
Baiting with Swarm Lure
A more passive way to capture a swarm is to make the swarm come to you. This method only works in about one out of seven attempts, but it’s worth trying, especially if you don’t have time to chase swarms around.
During the swarm season (springtime, when the fruit trees are blossoming), bait a nuc box with a scented pheromone called swarm lure. Swarm lure contains something called Nasonov scent, the smell that says “home” to a bee. You can purchase swarm lure from beekeeping suppliers. It usually comes as a small vial in a paper envelope. Refrigerate the lure until you’re ready to use it. Tape the envelope to the bottom of the lid inside of the nuc box. You don’t need to open the envelope or the vial.
Bees usually congregate up high, so position the nuc box in a tree, about 10 feet up. Choose a tree that bees like. We know someone who captured a swam by wedging her box in a blooming peach tree. The lid should be on, but the hole in the front (the “door”) should be open. Swarm lure is good for about 4 to 6 weeks, so leave the box out that long and hope for the best. If you’re lucky, a scout from a swarm will fly by and catch the scent.
Once you see activity in the box—bees flying in and out—you’ll know you have guests. Put on your bee gear and go to fetch the nuc box at dusk, when all the bees are sure to be inside. Tape the lid down, shut the front door, and take the box home.
Some people have had luck putting the Nasanov scent in an empty backyard hive as an invitation to passing swarms. The advantage of this is that you don’t have to transfer the bees, but the chances of their taking the bait are fairly low. Still, there’s not a lot to be lost by trying this, other than a few bucks for the lure.
68>
Bee Acquisition Method 2: Cutout
PREPARATION:
3-8 hours
A cutout is a technique used to capture and relocate an established hive. Feral bees take up residence in the darndest places. They invade walls and roofs, dead logs and stumps, birdhouses and dollhouses, suitcases, barbecue grills, and even hot tubs. Our own bees had taken up residence in an abandoned shop vacuum. More often than not, a feral hive is under a death sentence. Homeowners and city agencies will send an exterminator after them. If you’re there first, you can save them.
We’re not going to say that a cutout is easy. We’d rate it up there with chicken slaughtering as one of the most intense projects in this book. It’s hard work, and the bees will be angry. If you can capture a swarm instead, do that. But saving a feral hive from the exterminator is extremely satisfying, and unlike swarms, which are flighty, bees taken in a cutout are less likely to abandon the hive
(abscond),
because your hive box will be holding their food supplies and their young. They have a lot of incentive to settle down. This isn’t to say they
won’t
abscond—they might, but it is less likely.
Every cutout is different, depending on where the bees are living. The easiest cutouts are those where the bees are in something no one cares about—like a suitcase or broken shop vacuum. The most difficult are hives imbedded in architecture. Those involve sawing open walls. If you do this at someone else’s house, make sure they know that there will be a mess afterward, and agree in advance who will make the repairs.
YOU’LL NEED
- Nuc box or hive box, complete with empty frames that have been fitted with wax starter strips (perhaps more than one box, depending on size of the hive)
- Box of short nails or flat-headed thumbtacks
- Hammer for the nails
- Ball of thin cotton twine, like kitchen twine or kite string
- Assembled spacer frame (see the instructions on page
282
) - Box of gallon or ½-gallon zipper-lock bags
- 2 pounds white sugar
- Smoker
- Full protective gear: hat, veil, suit, and gloves
- Long, sharp knife, like a kitchen knife
- 2 (5-gallon) buckets with lids, or 2 trash bags
- Spray bottle filled with a 50/50 mix of white sugar and water
- Bee brush and dustpan
- Crowbar, screwdrivers, saws, utility knives—anything needed to get at the hive
PUTTING IT TOGETHER
Before you begin the actual cutout, there’s some preparation to do, so that you have everything handy when you need it.
STRING THE FRAMES
During a cutout, the existing comb in the feral hive is cut out in chunks and secured in the frames with string. This way, the bees don’t lose their comb—which contains their young and their food. Over time, they’ll repair the broken pieces of comb to fill the frames. When they’re done, they’ll chew away the string and drag it out of the hive. All you’ve got to do is set up a temporary framework to hold the comb in place.
Weave string across one side of each frame by putting four or five nails or tacks across the top bar of the frame. Place another set of nails or tacks across the bottom. Offset the spacing of the two rows slightly. Don’t push the nails or tacks all the way in. Weave the string in a zigzag pattern from upper nail to matching lower nail, up and down across the frame. At each nail or tack, wrap the string around once or twice to secure it, then push the nail or tack in.
Reverse the frame and install nails or tacks in the same way on the opposite side, pushing them only halfway in. On-site, after you cut out the comb and put it in the frames, you’ll wind the string around this side, securing the comb in the frame.
How many frames you prepare really depends on the size of the hive you’re targeting. A hive cut out of a birdhouse would be tiny, and you might only need three frames. A big one might take 10 or more. It doesn’t hurt to prepare more than you need, just in case.
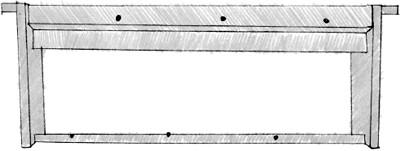
BUILD A SPACER FRAME
A spacer frame is a shallow, bottomless box that matches the dimensions of your hive. You’ll need one for this project. It sits on the top of the hive, between the topmost box and the lid, to provide space for supplemental feeding when the hive needs the support after a cutout. In general, we don’t feed the bees, because the food they find in nature is so much better than what we can provide. This is an exception.
To make the spacer box, take a 6-foot length of 1x3 lumber (any kind of wood is fine as long as it’s untreated) and cut it into four pieces total: two pieces measuring 16 inches and two pieces measuring 20 inches. The size of a standard medium-size hive box is 16 x 20 inches. If your hive is not this size, adjust the size of your frame accordingly. Nail or screw the corners together, using two nails or screws in each corner. Don’t sand it or paint it.
MIX UP A BAG OF SUGAR WATER
Fill a half-gallon or gallon zipper-lock bag halfway up with the white sugar, then fill it the rest of the way with water. Shake to dissolve. Put it aside until the end of the cutout. This will be used to feed the bees after their trauma. Use only white sugar. Less processed sugars, like unbleached or brown sugar, can make bees sick.
PRACTICE WITH THE SMOKER
If you’ve never used a bee smoker before, take it outside and give it a test run. Put some wads of newspaper in the bottom. Put a handful of small, dry twigs in, then more newspaper. Light the tinder, let it catch fire well, then close the lid of the smoker. When you pump the bellows of the smoker, smoke should come out the spout in big puffs. A smoker can be left to smolder for a bit, but you may have to refuel it or relight it if you’re going to use it several times over the length of the cutout. Practicing ahead of time will give you a feel for using the smoker without the distraction of thousands of bees swarming around your head.
KIDNAP THE BEES, IF POSSIBLE
If the bees are in something portable, it’s best to take the hive home and do this in your own backyard, near your hive boxes. Approach the feral hive at dusk, after the bees have come home for the night. They won’t be sleeping. In fact, they’re extra cranky when disturbed at night, but this way you won’t lose all the worker bees who are out foraging during the day. Put your gear on and quickly and quietly block the entrances to the hive. Tape old window screening over the entrances with duct tape. Make sure you seal all the openings (but do use screening on the big openings, so the bees don’t suffocate). Transport the hive to its final location, put it next to your empty hive—on top of it would be best, if it will fit—and take off the screen and tape. The next morning, they’ll come out, reorient themselves, and start working. You don’t have to do the cutout immediately. It’s good to let them settle down a bit, actually, a day or two, or until the next weekend, when you have time to move them. Don’t leave it too long, though, and be sure the hive is protected from ants and critters in the meanwhile.
MAKE THE CUTOUT
Choose a nice sunny day for the cutout, and work midday, when the workers are afield. That way you’ll have fewer angry bees to deal with.
Whether you’ve brought the bees home or are working on-site because the bees are in something immovable, the basics of the cutout are the same. You should have the following things set up in your work area:
- Your hive box or a cardboard nuc box
- Empty frames, fitted with starter strips and prestrung on one side
- String and tacks or nails ready to go to finish stringing the frames. (Rubber bands make a good backup system—we don’t like the idea of bees chewing on them, cotton string is better, but they’re really handy if you’re in a rush and the string is giving you trouble.)
- 2 lidded buckets or plastic bags ready to go (one for garbage; the other for honeycomb)
- Smoker filled with newspaper and twigs, and something to light it with
- Sharp knife
- Bee brush and dustpan
- Spray bottle of sugar water
- Premixed bag of sugar water
- Assembled spacer for feeding
- Whatever implements of destruction you need to open up the hive
- A work surface would be a handy thing, like a picnic table, or a board on horses. Cover it with something, because there will be honey everywhere.
- A brave friend or two, also in bee suits. You really don’t want to do this alone. It’s too much work.
Put on your gear and take a deep breath. Try to relax and stay relaxed and focused. Cutouts are intense. The bees will be angry, and they’re good at intimidating invaders. You need to keep calm and clear. Keep your movement slow and deliberate. Remember, your gear will protect you, and the smoke will pacify them. But be extra careful with your gear in this situation. Make sure everything is zipped up tight. Tuck your pants into your socks and your sleeves into your gloves.
The very first thing you should do is light the smoker and send a few puffs into the hive by poking the nose of the smoker into any available opening. Smoke tells them there’s an emergency at hand, and in response, they run to eat honey. When they’re stuffed with honey, they’re less aggressive. So give them a few puffs, then wait about 10 minutes for them to calm down. Smoking is vital to this process. Throughout the cutout, give them more puffs if their aggression level rises. Don’t overdo it, though. You don’t want to suffocate them. They just have to smell the smoke.
If the colony is in a wall, carefully remove the siding, using a knife to cut the comb away from the siding if it’s attached. You don’t want to tear apart their comb. The hive is warm—you’ll be able to find its outlines from the outside by touch. If the hive is in something portable, open it up as best you can, trying not to harm the comb. The idea in both cases is to expose the comb so you can remove it.
When you can see the comb, take out your long knife. You have to be ruthless here. You’re going to cut up their beautiful home, and some bees are going to die because they won’t move for the knife. Remember, this is better than extermination, which is the fate of most feral beehives. The hive is an entity in itself, a living mind. The individuals are not as important as the welfare of the hive as a whole, and you are ensuring its survival as best you can.
Every comb arrangement is different in the wild, but it is formed in bulbous individual sheets. Try to cut out those sheets at their attachment points, keeping them as whole as possible. They will be crawling with bees. You are looking for brood comb, the cells where the larvae are being raised. If you hold the comb up to the light, you can see little ricelike larvae tucked into the cells. This is the heart of the hive. You must get this comb into the new hive. Also, the queen is likely to be in this area, laying eggs in empty cells. She’s noticeably larger than the other bees, but you may not spot her in the chaos. Cross your fingers and pray to the bee gods that you don’t kill her accidentally. If you do, they’ll make a new queen, but they’ll be aggressive and unsettled until a new queen has hatched and taken the throne.