Just in Case (24 page)

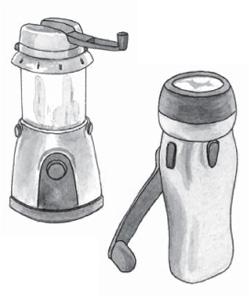
HAND CRANKED LANTERN AND FLASHLIGHT
If you do use battery-powered lighting, you will need to have a supply of fresh batteries on hand. Although more expensive initially, rechargeable batteries are better environmentally and economically over the long run, but they need electricity to recharge and they run down faster. A good battery organizer will keep your batteries accessible, and most have a check port so you can test the amount of power left in a battery and not risk thinking it’s bad and throwing it out when it’s the appliance that’s not working.
Chemical light sticks are also handy to have on hand. An easy snap breaks the interior glass cylinder, allowing chemicals to combine in a tough plastic tube to provide twelve hours of surprisingly bright, although tinted, light. These sticks are especially handy for children. They are very safe to use, and frightened children may feel calmer when allowed to carry their own light source. I buy my light sticks by the case from a novelty toy catalog. I keep them tucked all over. In a pinch, a couple of light sticks can substitute for an emergency road flare.
COOKING
I
T’S POSSIBLE TO
eat without cooking, but peanut butter and jelly and cereal with powdered milk are going to wear pretty thin after a day or two. In cold weather, hot food raises your spirits as well as your body temperature. A cup of tea or hot chocolate is welcome when you wake to a cold, dark house. Figuring out how to cook when the power is out is an integral part of family preparedness.
OUTDOOR COOKING
Many of us already have some outdoor cooking gear, such as a backyard grill or a camp stove. If your grill or stove runs on propane, be sure to have on hand an extra, full propane tank, or fill your existing propane tank when it is half empty, and you will have a way to cook many things. If you don’t own a camp stove, look for one at tag and garage sales, where you can often pick one up for under ten dollars. In inclement weather you will probably want to cook under cover, but these stoves cannot be used indoors. For the short term, you could convert a portion of a garage (with the door opened to provide fresh air) or porch to a semi-outdoor kitchen and make use of these cooking options.
If you choose to use fuel canisters such as propane tanks, be sure to store fuel in approved containers well away from food, kids, and pets. (This is sound advice for all energy sources.) If your grill runs on charcoal briquettes, store them in a dry space, such as in the garage in a trashcan. Be sure also to store lighter fluid to get them started. A few briquettes will produce a good amount of heat for cooking.
Outdoor cooking generally means “stovetop” cooking, whether on a grill or an outdoor stove. But baking is possible, too, with the right equipment. Camping supply stores offer box ovens that fit on top of burners. You will want to use a medium-weight pan for this sort of baking, as lightweight ones will likely be damaged by the open flame and cast iron takes a long time to heat up, which wastes fuel.
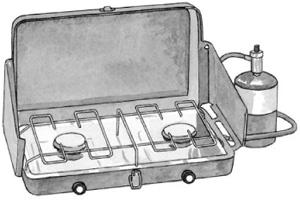
CAMP STOVE
MAKE-YOUR-OWN CHARCOAL
Charcoal is easy to make. You must set good, dry wood to burn and then cover it so it will smolder in the absence of oxygen. The easiest way to do this would be to dig a long trench and burn the wood in it. As soon as the wood is burning well, cover the trench with metal sheeting, such as corrugated roofing material, and cover that with a layer of soil. It will take a couple of strong people with shovels to accomplish this. It’s certainly a lot less work to buy and store the charcoal, but it never hurts to know how things are made.
It is possible to cook on outdoor fireplaces and campfires, but a storm would make that impossible. These are not reliable options for nonelectric cooking.
In a pinch, any metal container can be converted to use as a stove. Line it with aluminum foil and add a grill and you have a cooking surface. I have seen cookstoves made from barrels, roasting pans, large and heavy cans, and even the drum of a washing machine. None of these homemade stoves should be used indoors. And the time to take on a project like this is when the lights are on and you have the resources to experiment. When the house is cold and dark and your stomach is growling, you may be motivated to find a cooking solution, but any job you tackle will be a lot harder.
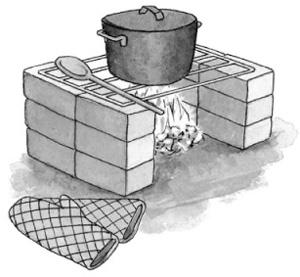
COOKING OVER AN OPEN FLAME
INDOOR COOKING
If you have an indoor fireplace, you may think your cooking dilemma is solved. But cooking over an open flame is harder than it looks, and you will need special equipment to make it possible. If you expect to cook more than hot dogs on a stick you will want some sort of fixed metal bar or swinging crane to hang a pot from, tongs and other long-handled utensils, heavy-duty pot holders, and Castiron pots, including a Dutch oven. You can make a cooking surface by supporting a grate from your oven or grill over the fire on a couple of bricks or concrete blocks.
Flat-fold stoves are another option. They are heavy metal, one-burner grills with foldout legs. When folded they take up little space, about seven square inches, which makes them ideal for slipping into an evacuation pack or car kit. When open, these stoves are sturdy enough to support a pot of stew. They run on heat cell fuel canisters, available from camping stores. One canister will burn at 400°F for up to five hours.
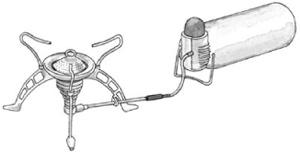
FLAT-FOLD STOVE
Wood- and coal-burning stoves are an excellent option for nonelectric indoor cooking, and they double as a source of heat. For several years I did all of my cooking on a Majesty cookstove. I cherish the memories of those days when we grew what we ate and cooked what we grew. We cut, hauled, and seasoned the wood ourselves. It probably sounds more romantic than it actually was. I know it was hard work, especially in the early morning dark when I stumbled to the cold kitchen, hoping enough embers remained from the banked fire of the night before to stir up a blaze. Bruce would come up from the barn with a basket of eggs, cold and ready for breakfast. I liked to greet him with a warm kitchen and a cup of coffee. I wish I still had that Majesty, but it stayed with the farm. I make do with a propane parlor stove that is a lot easier to use and a lot cleaner, but still leaves me at the mercy of a gas company. Not all progress is a good thing.
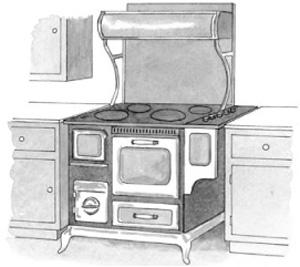
COOKSTOVE
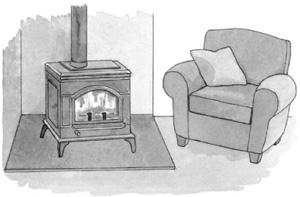
BOX STOVE
CAUTION
Never
use a barbecue grill, hibachi, propane camp stove, or any cookstove not approved for interior use inside your house. These stoves replace oxygen in the air with carbon monoxide. When used in a closed space, the results can be fatal.
Although not as versatile as a good cookstove, which has an oven, a large cooking surface, and often a hot water reservoir, a wood- or coal-burning box stove has enough top surface to keep you in hot water and meals. These are the stoves often put in living rooms to provide backup heat for a house with a traditional furnace. Coal burns hotter than wood, so you can burn wood in a coal stove but not coal in a woodstove or you will burn out the bottom.
CAUTION
Teach your children to respect any stove. If they are too young to understand the concept of no running or roughhousing near it, then block it off with a secure gate.
SOLAR COOKING
Solar cooking has come a very long way from my Girl Scout days, when I made my first solar cookstove. The newest plans are so easy to make and so efficient to use that I believe every family interested in preparedness and/or limiting their carbon footprint should have one.
A solar cooker is basically a sealed box that absorbs and magnifies the power of sunlight. Its interior temperature usually reaches about 200°F, though some commercially manufactured cookers can get hotter. While a solar cooker will not work in the midst of a storm or even on an overcast day, on a sunny day it is possible to use one to simmer soup or bake bread, cookies, or a casserole. With some experimenting, you will be able to turn out an entirely solar-cooked meal with little more trouble than preheating your oven.
Cooking with a solar oven requires some practice. So much depends on conditions in your particular location. I had to fool around with recipes and pans to come up with some meals that I could reliably produce in my solar cooker, and here’s what I learned: