DIY Projects for the Self-Sufficient Homeowner: 25 Ways to Build a Self-Reliant Lifestyle (10 page)
Authors: Betsy Matheson
Tags: #Non-Fiction

 Companion Planting
The old adage is true—some vegetables do actually get along “like peas and carrots.” Some species of vegetables are natural partners that benefit from each other when planted close. On the other hand, some combinations are troublesome, and one plant will inhibit the growth of another. You can plant these antagonists in the same garden—even in the same raised garden bed—just don’t place them side by side. Use the table on p. 34 to help you plan out your raised garden beds to ensure that your plants grow healthy, strong, and bear plentiful fruit.
 Start with Healthy Soil
The success or failure of any gardening effort generally lies beneath the surface. Soil is the support system for all plants—it provides a balanced meal of the nutrients that plants’ roots need to grow deep and strong. If you plan to fill your raised beds with soil from your property, it’s a good idea to have the soil tested first to assess its quality. Take a sample of your soil and submit it to a local agricultural extension service—a basic lab test will cost you between $15 and $25 and will give you detailed information about the nutrients available in your property’s soil. Mixing soil from your property with compost, potting soil, or other additives is a smart and inexpensive way to improve its quality. After you’ve filled your beds with soil, add a three-inch layer of mulch to the top to lock in moisture and keep your good soil from blowing away in strong winds. Lawn clippings, wood, or bark chips, hay and straw, leaves, compost, and shredded newspaper all work well as mulch materials.
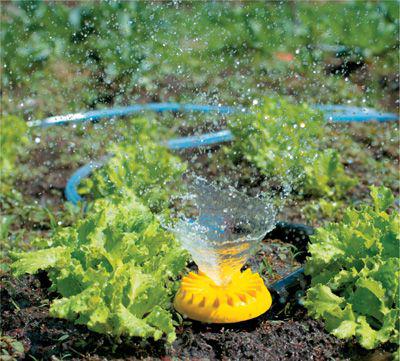
Sprinklers with high
, arching spray patterns are afflicted by excess water evaporation, but if you choose a small, controllable sprinkler with a water pattern that stays low to the ground you can deliver water to your raised bed with minimal loss.
How to Build a Raised Bed
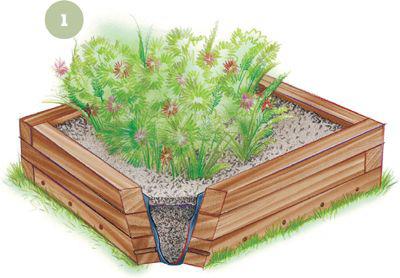
1 This basic but very sturdy
raised bed is made with 4 × 4 landscape timbers stacked with their ends staggered in classic log-cabin style. The corners are pinned together with 6" galvanized spikes (or, you can use timber screws). It is lined with landscape fabric and includes several weep holes in the bottom course for drainage. Consider adding a 2 × 8 ledge on the top row. Corner finials improve the appearance and provide hose guides to protect the plants in the bed.
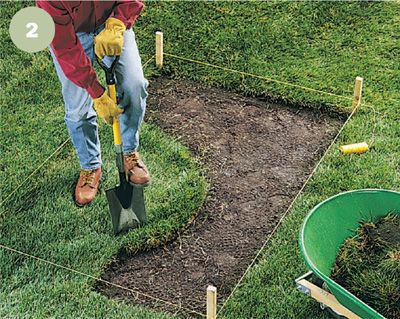
2 Create an outline
around your garden bed by tying mason’s string to the stakes. Use a shovel to remove the grass inside the outline, then dig a 4"-wide trench for the first row of timbers around the perimeter. Lay the bottom course of timbers in the trenches. Where possible, add or remove soil as needed to bring the timbers to level—a level bed frame always looks better than a sloped one. If you do have a significant slope to address, terrace the beds.

3 Add the second layer,
staggering the joints. Drill pilot holes at the corners and drive 6" galvanized spikes (or 6" to 8" timber screws) through the holes—use at least two per joint. Continue to build up layers in this fashion, until your bed reaches the desired height.
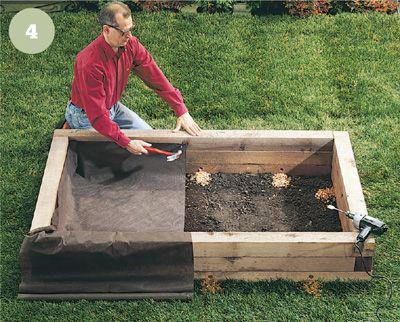
4 Line the bed
with landscape fabric to contain the soil and help keep weeds out of the bed. Tack the fabric to the lower part of the top course with roofing nails. Some gardeners recommend drilling 1"-dia. weep holes in the bottom timber course at 2-ft. intervals. Fill with a blend of soil, peat moss, and fertilizer (if desired) to within 2 or 3" of the top.
How to Build a Raised Bed from a Kit
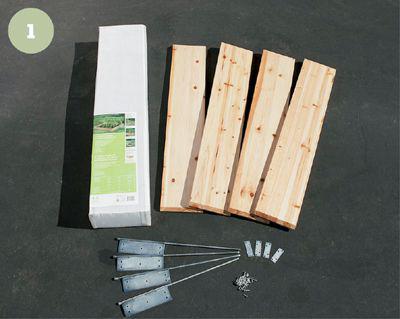
1 Raised garden bed kits
come in many styles. Some have modular plastic or composite panels that fit together with grooves or with hardware. Others feature wood panels and metal corner hardware. Most kits can be stacked to increase bed height.
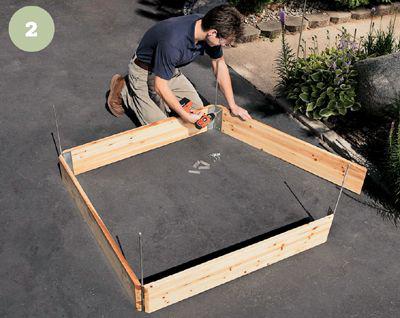
2 On a flat surface,
assemble the panels and corner brackets (or hinge brackets) using the included hardware. Follow the kit instructions, making sure all corners are square.
