Authors: Betsy Matheson
Tags: #Non-Fiction
DIY Projects for the Self-Sufficient Homeowner: 25 Ways to Build a Self-Reliant Lifestyle (8 page)

Greens:
Grass clippings, kitchen fruit and vegetable scraps, green leaves, and manure
Note:
If you use chemical lawn care products on your lawn, do not include grass clippings in your compost pile.

Building a Compost Bin
CUTTING LIST

Also need:
1/2" galvanized hardware cloth 36" by 12 ft.
U-nails (fence staples)
2 pairs 2 × 2" butt hinges
2-1/2" deck screws
Exterior wood glue
Galvanized finish screws
Exterior wood sealant

A compost bin
can be very plain, or it can have just enough decorative appeal to improve the appearance of a utility area.
How to Build a Compost Bin

1 Prepare the wood stock.
At most building centers and lumber yards, you can buy cedar sanded on all four sides, or with one face left rough. The dimensions in this project are sanded on all four sides. Prepare the wood by ripping some of the stock into 1-3/4"-wide strips (do this by ripping 2 × 4s down the middle on a tablesaw or with a circular saw and cutting guide).

2 Cut the parts
to length with a power miter saw or a circular saw. For uniform results, set up a stop block and cut all similar parts at once.

3 Assemble the door frames.
Apply exterior-rated wood glue to the mating parts and clamp them together with pipe or bar clamps. Reinforce the top joints with 3" countersunk deck screws (two per joint). Reinforce the bottom joints by drilling a pair of 3/8"-dia. × 1" deep clearance holes up through the bottom edges of the bottom rails and then driving 3" deck screws through these holes up into the stiles.
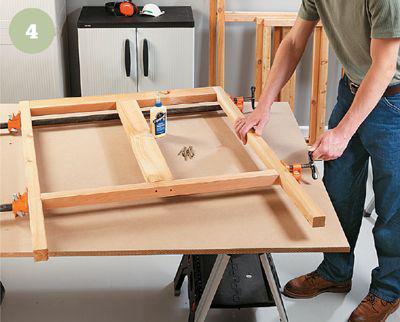
4 Assemble the side and back panels.
Clamp and glue the posts and rails for each frame, making sure the joints are square. Then, reinforce the joints with countersunk 3" deck screws.
5 Hang the door frames.
With the posts cut to length and oriented correctly, attach a door frame to each post with a pair of galvanized butt hinges. The bottoms of the door frames should be slightly higher than the bottoms of the posts. Temporarily tack a 1 × 4 brace across both door bottom rails to keep the doors from swinging during construction.

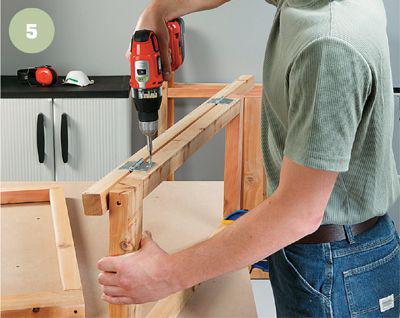
6 Join the panels
and the door assembly by gluing and clamping the parts together and then driving 2-1/2" countersunk deck screws to reinforce the joints. To stabilize the assembly, fasten the 2 × 4 front spreader between the front, bottom edges of the side panels. Make sure the spreader will not interfere with door operation.

7 Make the grids
for the panel infill areas. Use 1 × 2 cedar to make all parts. Use exterior glue and galvanized finish nails to connect the horizontal filler strips to the vertical infill pieces. Vary the heights and spacing of the filler for visual interest and to make the ends accessible for nailing.
