Vegan Yum Yum (21 page)

Decorating
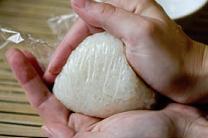
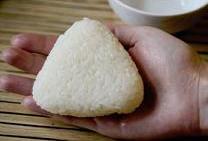
Decorating serves two purposes. Most obviously, it makes the onigiri look nice. However, the decorations also make the surface of the rice (or a portion of it) less sticky for easier handling while eating. They also provide a little bit of flavor.
Nori-wrapped Onigiri:
step 1
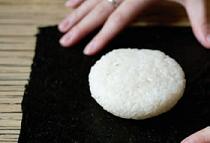
Place a sheet of nori, shiny side down, on a flat surface. Lightly rub or spray it with salty water until just dampâit will absorb the water almost immediately. You're not trying to soak the seaweed; you just want to soften it so that it doesn't crack when folding.
step 2
Place the onigiri in the center of your nori.
step 3
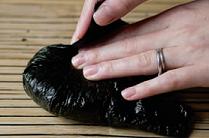
Draw the edges into the center, pulling it taut as you go.
step 4
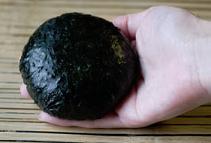
Place the onigiri seam side down when finished. It should dry slightly and not unwrap when handled. You can also wrap the shapes in strips of moistened nori.
Sesame Onigiri:
Black sesame seeds look great on white rice. You can use just a few or coat the entire surface.
Yaki Onigiri:
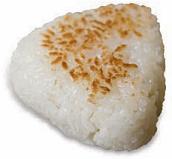
This one is my favorite! I prefer the broiler method, but the stove top will work, too.
Broiler method:
Place the onigiri on oiled foil and broil until top is lightly browned. Flip and repeat. Brush soy sauce on the top, then broil for another minute or two. Flip, brush remaining side with soy sauce, broil, and serve.
Stove-top method:
Place the onigiri in an oiled pan and fry until bottom is lightly browned. Brown both sides, then add soy sauce to each side and brown again. Each will have fried twice, once for initial browning and once after basting with soy sauce. Serve immediately.
Sesame Ginger Seitan Dumplings
D
umplings seem difficult, but there's no reason you can't enjoy them at home. I've kept the filling simple for two reasons: One, food doesn't need to be complicated to be awesome, and two, you're going to be filling the things by hand, so why take more time than you need to? With only a small amount of practice, I can fill ten of these in five minutes, without rushing through any beat-the-clock test. If you stay organized, these are really fun to make! Once you make dumplings the first time, I promise you'll be dreaming up new fillings of your own and making them again and again.
These make a great presentation for dinner parties if you serve them in a bamboo steamer with ginger and sesame oil. My bamboo steamer only cost $15 at a local Asian market, but a regular steamer will work just fine. You can also boil or braise your dumplings.
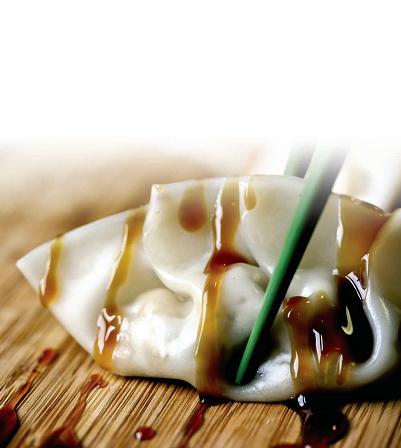
Sesame Ginger Seitan Dumplings
Makes approximately 40 dumplings
Prepare the filling:
step 1
Remove the outer leaves of the cabbage and discard. Then remove enough leaves to line your steamer. Line the steamer and lightly oil the leaves to provide a nonstick surface for your dumplings.
step 2
Shred the remaining cabbage in the bowl of a food processor to make 2½ cups total.
step 3
Chop the seitan roughly and add to the processor. Pulse until only small chunks of seitan and cabbage remain. Scrape out into a mixing bowl. If the mixture is wet from the cabbage, squeeze out the excess liquid.
step 4
Add the mirin, tamari, sesame oil, and ginger to the cabbage/seitan mixture and combine well. Set aside to let the flavors incorporate and then prepare the sauce.
The sauce:
Combine the soy sauce, lemon juice, rice vinegar, and water. The sauce may be served like this if a traditional dipping sauce is needed. If a thicker sauce is preferred (as shown in the main photo), add the cornstarch and water mixture and heat over medium heat in a small saucepan, whisking until thickened and no longer milky. Set aside to cool.
Ingredients
Filling:
2½ cups shredded Napa cabbage
8 ounces seitan
(about 1½ cups)
1 teaspoon mirin
1 teaspoon reduced-sodium tamari
1 teaspoon toasted sesame oil
1 teaspoon fresh grated ginger
Sauce:
¼ cup soy sauce
2 teaspoons lemon juice
2 teaspoons seasoned rice vinegar
2 teaspoons water
3 teaspoon water plus 1 teaspoon cornstarch
(thick sauce option only)
Dumplings:
1 package dumpling skins
1 small bowl of water
Cooking oil or oil spray
4 moistened paper towels, or two damp kitchen towels
Fill the dumplings:
step 1
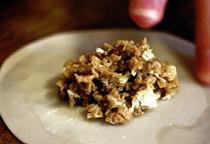
Place 1½ to 2 teaspoons of filling in the middle of your dumpling skin. Dip your finger in the bowl of water and wet the edges of the skin.
step 2
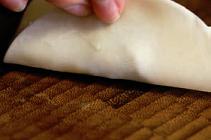
Gently fold the skin up to form a semicircle, sealing the edges by pressing with your fingers.
step 3
Make one fold in the middle and press to seal. Make two more folds, one to either side of the first fold. Press to seal both. You can push the bottom of the dumpling on the table to create a flat base so the dumpling can sit upright.
step 4
Repeat until all of the filling has been used. Keep the completed dumplings under moist paper towels or kitchen towels and the stack of skins under another to prevent them from drying out while you are working.
