Sew What! Bags: 18 Pattern-Free Projects You Can Customize to Fit Your Needs (20 page)
Read Sew What! Bags: 18 Pattern-Free Projects You Can Customize to Fit Your Needs Online
Authors: Lexie Barnes

1.
DECIDE YOUR SIZE
. Use our dimensions, or figure out what size bag you want to make and how long your straps will be. The tote we made is sized for magazines, but you can adapt yours to hold anything: a longer rectangle, a horizontal rectangle for your yarn, or a simple square tote for everyday. Be sure to play with the strap length before making your bag. You don’t want your bag to hit you in an uncomfortable way or to drag on the ground. Once you find a length you like, keep the measurements listed somewhere so you can use them again. (
See page
110
.)
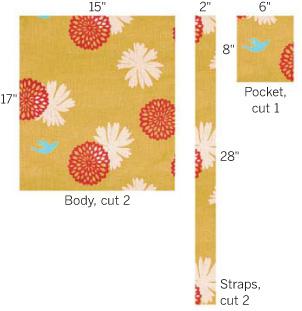
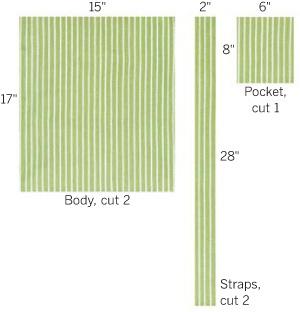
CUT YOUR FABRIC
2.
CUT YOUR FABRIC
. On the wrong side of the fabrics, draw the outlines of the pieces and cut out identical pieces from both of the fabrics:
two rectangles for the body
SHORTCUT
Draw the pieces on one of the fabrics, then lay it on top of the reverse fabric and cut the pieces from both fabrics at the same time.
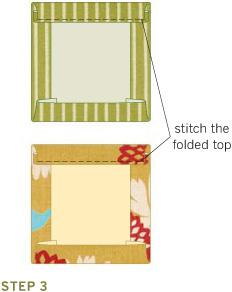
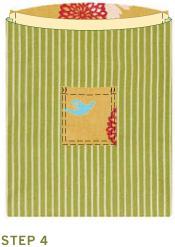
3.
MAKE AND ATTACH THE POCKETS
. On the sides and bottom of a pocket, press under ½". Press under the top edge ¼", then press under ½". Edgestitch the top fold in place as shown. (
See page
43
.) Pin the fabric A pocket onto a fabric B body panel, both with right sides facing out. Edgestitch around three sides of the pocket and backtack. Topstitch another line ¼" away from the first line and backtack. Repeat for the other pocket.
4.
STITCH THE BAG
. With right sides facing, pin matching body panels together for each fabric. Stitch the sides and bottom, using a ½" seam allowance. Trim excess seam allowance, and clip corners diagonally (
see page
41
). Leave the top unstitched for now. You will have two bags; turn one of them right side out, press the edges, and place the other bag inside it.
5.
MAKE THE STRAPS
. With right sides together, pin a fabric A strap to a fabric B strap. Stitch along one long side with a ½" seam allowance and press the seam open. Press under the raw edges on the sides ½". Fold the strap along the seam, match the folded edges, and edgestitch. Repeat with the second set of straps.

6.
ATTACH THE STRAPS
. While the bags are still nesting, press under 1" at top of each bag, and pin down. Matching a fabric A strap front with a fabric B panel, insert the strap ends between the top edges of both bags by about 1" and pin. Edgestitch the tops of the bags together. You might want to run an extra line of stitching to secure the straps.

HOKEY POKEY
Here’s a tip: When tucking one bag into the other, use a chopstick to poke the corners out!
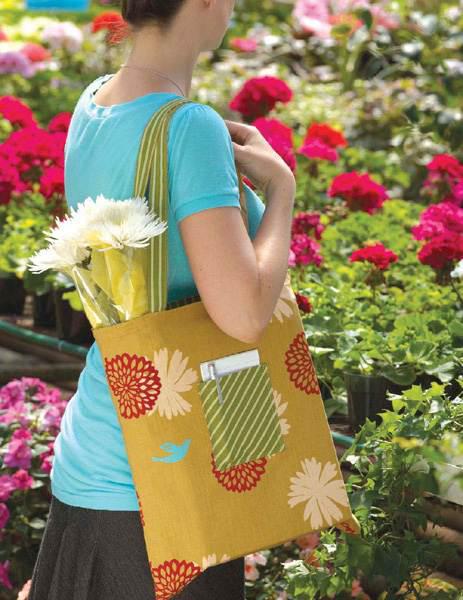
TAILOR-MADE TOTES
You can make your tote with short handles or long straps — it’s up to you. For beginners, I’d suggest starting out at about 12" for short handles and about 30" for longer shoulder straps. Play with different lengths to find your favorites. Be sure to add 1" to 2" for tweaking and attaching the handles or straps.