The Mad, Mad, Mad, Mad Sixties Cookbook (30 page)
Read The Mad, Mad, Mad, Mad Sixties Cookbook Online
Authors: Rick Rodgers

2.
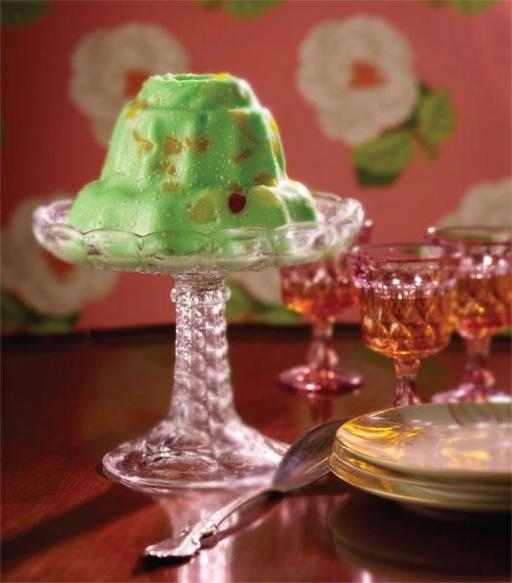
Place the bowl in a larger bowl of iced water. Let stand, stirring occasionally, until the mixture has the consistency of unbeaten egg whites and is firm enough to support the fruit, about 20 minutes. Fold in the fruit. Transfer to the oiled mold.
3.
Cover with plastic wrap. Refrigerate until the mold is chilled and set, at least 4 hours or overnight.
4.
Run a dinner knife around the inside of the mold to break the seal. Dip the outside of the mold in a large bowl of warm water for 10 seconds. Dry with outside of the mold with a kitchen towel. Place a serving plate over the mold. Invert the mold and plate together and give them a sharp shake. Lift up and remove the mold. Serve the salad chilled for dessert, or in true Sixties fashion, as a salad.

MAKES 8 SERVINGS
Hawaii isn’t the only new state that inspired midcentury cooks. While various combinations of baked ice cream and custard existed as early as Thomas Jefferson’s time, Alaska became the forty-ninth state, and baked Alaska became the dessert of the new decade. The dessert can be made well ahead of time, leaving you just a touch of last-minute decorating. And yes, you get to light it on fire! Choose your favorite ice cream, preferably one with an attractive color to contrast the pale meringue and cake. Better yet, layer two compatible flavors.
1 store-bought pound cake
1½ quarts ice cream, preferably pistachio, lightly softened at room temperature
6 large egg whites
¾ cup sugar, preferably superfine
1 egg shell half, carefully washed and dried
2 tablespoons brandy or Cognac, warmed, as needed
1.
Line an 8½-by-4½-inch loaf pan with 2 overlapping sheets of plastic wrap, letting the excess wrap hang over the sides. (It is frustrating to try and use a single sheet to fit inside the pan, so just use 2 sheets to avoid using profanity.)
2.
Cut the pound cake lengthwise into ½-inch slices. Cutting the cake to fit, line the bottom of the cake with cake slices. Spread the ice cream evenly and smoothly over the cake. Top the ice cream with more cake slices, cut to fit the pan. Cover the loaf pan with the plastic wrap. Freeze until solid, at least 4 hours or overnight. (The ice cream loaf can be prepared up to 2 days ahead.)
3.
Position a rack in the center of the oven and preheat the oven to 500°F. (Give the oven at least 30 minutes to reach this temperature.) Cut a piece of brown or parchment paper a little larger than the top of the loaf pan. Place the paper on a baking sheet.
4.
Whisk the egg whites and sugar together in the top part of a double boiler. Place over simmering water and whisk until the sugar is completely dissolved and the egg white mixture is opaque, foamy, and hot to the touch, about 2 minutes. Be sure that the egg whites do not begin to cook—the mixture should remain fluid. Use an electric hand mixer at high speed to whip the egg whites into stiff, shiny peaks.
5.
Unwrap the top of the loaf and invert onto a work surface. Remove the plastic wrap. Transfer the loaf to the brown paper on the baking sheet. Transfer the tepid meringue (it will have cooled a bit) to a pastry bag fitted
with a 12-inch star tip. Pipe the meringue all over the top and sides of the loaf, masking it entirely. Do not pipe the meringue onto the baking sheet. Insert the egg shell, open side up, in the center of the top of the meringue.
6.
Bake until the meringue is very lightly browned, 2 to 3 minutes. Use a wide spatula to transfer the loaf, on the paper, to a serving platter.
7.
To serve, have a tall glass of hot water nearby. Pour enough brandy into the egg shell to fill it halfway. Dim the lights in the dining room, ignite the brandy with a long match, and make your entrance, sharing the spotlight with the baked Alaska. Let the brandy burn out of its own accord. Use a sharp, thin knife dipped in the water to slice the loaf crosswise. Transfer to dessert plates and serve immediately.
Light My Fire
Technically any dessert and almost any food, even ice cream and soup, can be flambéed. A few tips for perfect (and perfectly safe) pyrotechnics:
• Never pour flammable liquid onto a lit fire or hot pan, as flames could travel up the stream of alcohol and set the entire bottle on fire.
• The liquor should be warm in order to flame properly. Warm it gently, just until barely hot to the touch in saucepan or microwave oven.
• Use a long match to light the fire.
• Make sure your food is in a flame-proof container (metal good, Styrofoam bad).
• The only liquor or liqueur you should use for flambéing are those that are 80 proof; brandy, cognac, and rum are good choices. Beer, wine, and champagne are bad choices. Anything 120 proof or over is downright dangerous.
• If you’re pouring liquor over food to flambé, ignite it quickly so the alcohol doesn’t soak into the food.
• You can contain the flames—and any residual liquor flavoring—by keeping them inside a “food cup”: either half of an eggshell (carefully washed and dried), or half of a lemon (pulp removed). Press the cup into the center of your dessert, fill with warm alcohol, and ignite.
• For longer-lasting flames, soak sugar cubes in cognac or brandy. Ignite.
• If you wish, you can substitute an appropriate juice or nonalcoholic beverage for the liquor, but these cannot be flamed. Orange juice works well as a stand-in for orange liqueur, and apple juice is a good replacement for rum. You can also use juice with a dash of brandy or rum extract, although these usually contain alcohol.
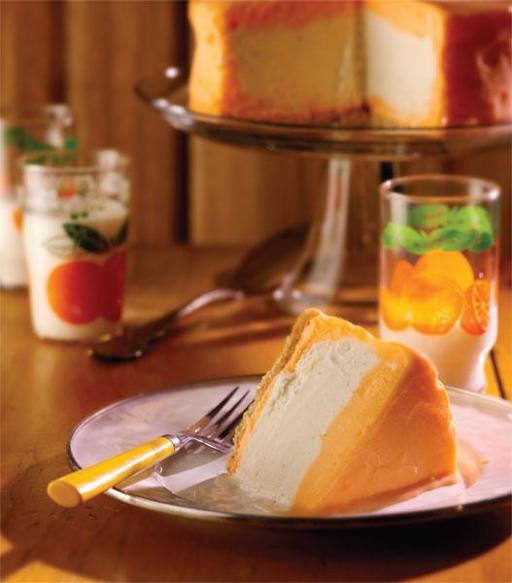
CREAMSICLE ORANGE AND VANILLA CAKE
MAKES 8 SERVINGS
This two-tone frozen dessert was inspired by our favorite ice pop, the orange and vanilla Creamsicle. Bake it. Take it. Share it. Love it.
Vegetable oil, for the pan
1 cup vanilla wafer cookie crumbs
3 tablespoons unsalted butter, melted
1 tablespoons sugar
1½ quarts orange sherbet; divided
1½ pints vanilla ice cream, as needed
1.
Position a rack in the center of the oven and preheat the oven to 350°F. Lightly oil an 8-inch springform pan.
2.
Mix the vanilla cookie crumbs, butter, and sugar together in a medium bowl. Press the mixture firmly and evenly into the bottom of the pan. Bake until the crust is set and smells toasty and sweet, about 10 minutes. Transfer to a wire cake rack and let cool completely.
3.
Spoon about ⅔ of the sherbet into the cooled springform pan. Using your fingers (which will slightly soften the sherbet and make it easier to shape), spread it in the bottom and up the sides of the pan in a thick, even layer. Cover with plastic wrap and freeze until frozen again, about 1 hour.
4.
Fill the center of the sherbet shell with the vanilla ice cream, again using your fingers, stopping about ½ inch from the top of the shell. Cover and freeze until firm, about 1 hour.
5.
Using your fingers, spread the remaining sherbet on top of the ice cream. Smooth it with a metal icing spatula, making the sherbet flush with the top of the springform pan. Cover loosely with plastic wrap and freeze until firm, at least 2 hours or overnight. (The cake can be made up to 2 days ahead, covered and frozen.)
6.
Let the cake stand at room temperature for 5 minutes. Remove the sides of the pan. Transfer the cake to a serving platter. Using a sharp, thin-bladed knife dipped into hot water between cuts, slice the cake into wedges and serve frozen.

SECRET INGREDIENT TWO-CHIP COOKIES
MAKES 2 DOZEN
These cookies pack a one-two punch. Mini chocolate kisses are the obvious star of these sweet-salty-crunchy-chewy cookies, but it’s the crushed potato chips in the dough that will have you licking the bottom of the cookie jar.
1 cup plus 2 tablespoons all-purpose flour
½ teaspoon baking soda
¼ teaspoon salt
½ cup (1 stick) unsalted butter, at room temperature
¾ cup packed light or dark brown sugar
1 large egg, beaten
1 teaspoon vanilla extract
¾ cup crushed potato chips
¾ cup miniature semisweet chocolate chips
1.
Position racks in the top third and center of the oven and preheat the oven to 375°F.
2.
Sift together the flour, baking soda, and salt. Beat the butter in a medium bowl with an electric mixer until creamy, about 1 minute. Gradually beat in the brown sugar, and beat, occasionally scraping down the sides of the bowl with a rubber spatula, until combined, about 1 minute. Do not overbeat. Beat in the egg, then the vanilla. Gradually stir in the flour mixture with a wooden spoon. Stir in the potato chips and chocolate chips.
3.
Using a tablespoon of dough for each, roll into 24 balls. Arrange on 2 large ungreased baking sheets about 1½ inches apart. Bake, switching the positions of the sheets from top to bottom and front to back after 6 minutes, until the cookies are barely beginning to brown around the edges, about 12 minutes. Do not overbake.
4.
Let the cookies stand on the baking sheets for 5 minutes. Transfer to a wire cake rack and cool completely. (The cookies can be stored in an airtight container at room temperature for up to 5 days.)
MAKES 6 SERVINGS