So, You Want to Live in a Yurt? (7 page)
Read So, You Want to Live in a Yurt? Online
Authors: Erin Kelly

Yurt itself:
Real windows? Vinyl? Bathroom inside or in a nearby bathhouse? What size yurt do you need? Tinted dome, or no (I recommend
YES!
)? Lofted or no? On top of a stick built structure? Have fun with this part, it’s
why
you’re going through all of this work!

STEP TWO: ACTION
Land:
Do you have your land lease signed or have you closed on your new land? No? Get back up there to step one. Pronto! Yes? Congrats! Now comes the fun part. Choose your yurt site. While many people choose to put yurts on steep hillsides (part of the attraction really, they can go virtually anywhere), we choose a flat spot of land on the property. It was a tad boring, or so we thought. But we knew the inspector wouldn’t have an issue with it. And in fact, we had him out to make
SURE
he wouldn’t. You don’t want to start building and then find that you have to start all over again. If you don’t have your sewage/water/electric figured out, now is the time. Expect it to take at least a month and a half longer than expected - whether you’re putting in your own septic tank or just dropping a new electric line from the pole to the yurt site. Your electrician (or you) will need to put up a electric box for the electric company to run service to. Again, this is simple but if you are depending on someone else, expect it to take longer than planned. If you are putting your yurt on a plot with city water/electric/sewage service, count yourself lucky, it shouldn’t be too complicated. But start talking to the utility companies NOW to find out what you need to do to be in compliance.
IMPORTANT:
Make friends with your county inspector, you won’t regret it.
Yurt companies:
Have you picked out your favorite? Spoken with a representative? Gotten a quote on your dream yurt? What about a estimated date of delivery? Do they help you set up the yurt or are you on your own? Are there added costs for delivery? If you have a difficult building site, see if they charge extra for that as well.
Floor plan:
Plan it out, you’ll probably need it for your building permit (we did), and it’s helpful to have, especially if you’re putting interior walls in your yurt. Also helps for planning out appliance dimensions.
Building permit:
Once you have your deposit down on a yurt (or have decided on the yurt company/size/deck plans), apply for a building permit from your county inspection office. We were lucky, the assistant at the office was quick, friendly and helpful. PS. This will cost you money. They will want to see a floor plan, engineering documents (get from your yurt company), deck specifics, septic/well certificates (if you don’t have city sewage/water), contact information for your contractor/plumber/electrician, and an estimate for the project cost.

Contractors or DIY:
Get in touch with your contractor of choice, or if you’re DIYing your deck, start talking to yourself. It’s going to be a lot of hard work. If you’re doing this yourself, enlist some friends for work weekends (try setting up a work share with them, with each friend getting a different date for their projects… or just offer beer or food, worked for us!). Order your materials, and start clearing your site, if you haven’t already. You can’t technically start building until you have an approved building permit, but you can do everything up to that first nail! If you aren’t living on the property yet, think about how you will store your tools and materials, you don’t want them to walk off!
Yurt itself:
OK, so you’re committed. Have you put down your deposit? You’re just waiting on your permit now, so get the yurt ball rolling if you haven’t already. We were working with a smaller company, so they were able to get our yurt in and out within a month. That might not be the case for larger companies with more customers, or perhaps they can get it done even faster since they have more employees! Hopefully you have the answer to that for your own project, and have timed it out accordingly.
Furnishings & Appliances:
Start shopping deals and promotions. If you have a place to store your appliances, you might consider getting them now. One issue with ordering too far in advance - if your appliance doesn’t fit or work in the yurt for some reason, if you ordered too far ahead, you might have missed your return window. We had to return two items, both because they wouldn’t work in the yurt plumbing plan. A plan we only had in the last month of building. No way we could have known those items wouldn’t work.
STEP THREE: BUILDING
Land:
How’s it going? Do you have electricity at your site now? If you don’t have a well or septic, is it being dug and laid in yet?
Building permit:
Do you have it yet? No? Start following up, politely! Let the inspectors office know about your timeline and any deadlines you’re hoping to meet. Remember -
BE NICE
!
If you do have it, congrats…let the building commence!!
Building:
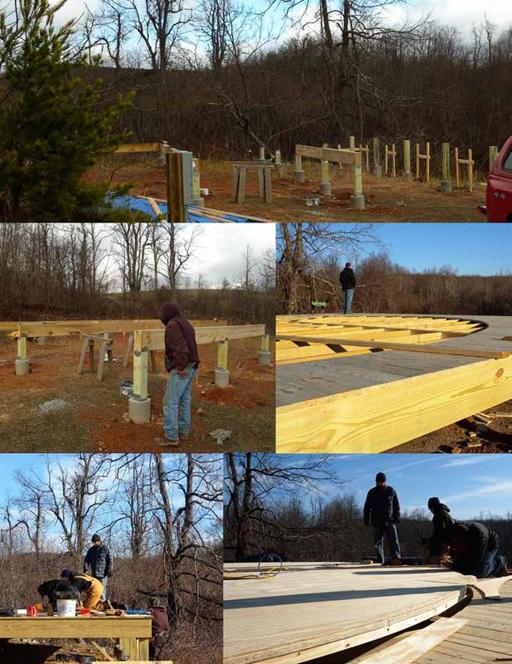
Get your contractor going, or if you’re DIYing the deck, get yourself pumped. As soon as this deck is up, you can get the yurt on it! And then it’s only a few small steps before you’ll be
LIVING
in a yurt. The boring part is just about done, now comes the hard work part. So, build build build! Use every spare second and make use of good weather.
Yurt:
Have your scheduled delivery date yet? Follow up with the yurt company, make sure they give you an estimate. If the building isn’t coming along as quickly as you hoped (which is what happened to us, by several months, but our deck is
SOLID
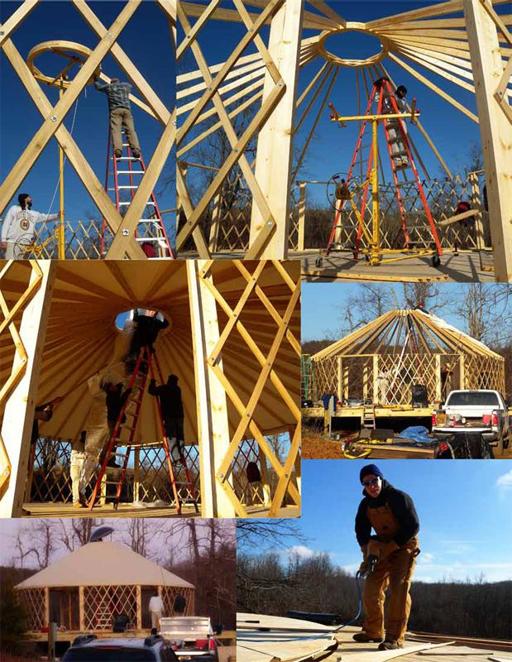
, so it’s worth it), make sure they’ll hold the yurt. If not, figure out storage for the yurt. Once the deck starts to LOOK like a deck, plan a yurt raising party with friends and family. Having a few extra people around on yurt raising day is not only helpful, it’s fun!
Flooring:
It’s easiest to put this down
RIGHT
BEFORE
you raise your yurt. But beware of scratches, dings, dirt and more. We used smooth, high quality plywood for our “finished” floor, with one coat of poly. They’ve gotten filthy since the interior wall took longer than planned (
noticing a trend???
), and we were building during a wet winter. You should have
seen
the mud we dealt with on moving weekend. Suffice to say, this probably won’t end up being our final flooring choice - but who knows, in the spring, we might be able to sand and poly a few more times and have it be beautiful.

Furnishings & Appliances:
If you haven’t already, start ordering your appliances. We had to buy
ALL
of ours since this is our first home. It ain’t cheap. We bought ours from Lowes and Home Depot mainly, and sprung for delivery on anything we could. Again, we were short on time, but these choices blew our budget into smithereens. Craigslist, friends/family that are getting rid of appliances, etc are great second hand options.

STEP FOUR: YURT RAISING!!!!!

STEP FIVE: INTERIORS
Land:
You should be full steam ahead with all of your utilities at this point. If you’re not, start hassling people. You can’t have your final inspection till you have working utilities, so don’t let this slip.
Mail:
Time to get your mailbox up! Check with your local post office for their mailbox placement preferences. This is something we put off doing because we had so many other “to dos” on our list. But when we finally stuck our mailbox in the ground, it felt
AMAZING
. Makes this dream called
Yurt
seem much more real. Consider forwarding mail from your old address around this time.
Building:
The deck should be done, and the yurt up! If you’re leaving your yurt completely open inside, without any walls, then you’re about done. If you’re running electric/plumbing, that’ll take some time, but the rough stuff is over. If you’re building walls, get going! The electric and plumbing can’t happen till at least the rough in structure is up! If you’re using propane for heating or cooking, schedule your propane tank drop off now. If your electrician can run the line (he’ll need to be certified to work with propane), he can do that now; otherwise, the propane company will just add that to the bill.
Inspections:
Our contractor had the building inspector out several times before he did the final certificate of occupancy. I highly recommend this. He’ll bring up potential issues, and be familiar with your project. So when he walks through for the final inspection, there shouldn’t be any surprises…which is what you want at that point!
Furnishings & Appliances: