Chinese Healing Exercises (22 page)
Read Chinese Healing Exercises Online
Authors: Steven Cardoza
Tags: #Taiji, #Qi Gong, #Daoist yoga, #Chinese Healing, #Health, #medicine, #remedy, #energy

Figures 7.3A and 7.3B (Crane)
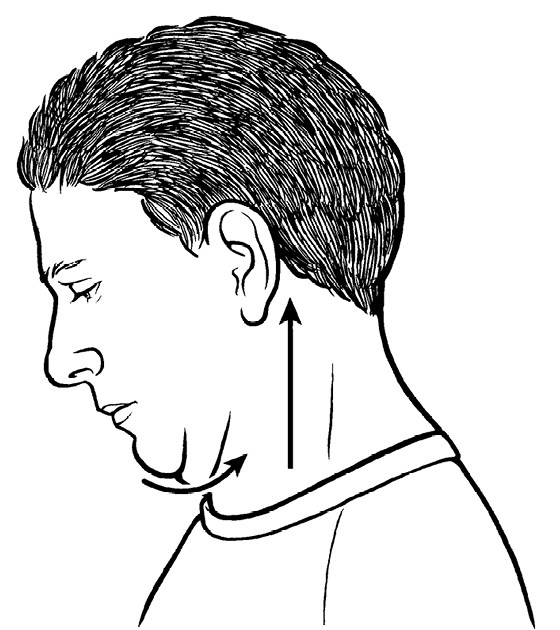 Figure 7.3C (Crane)
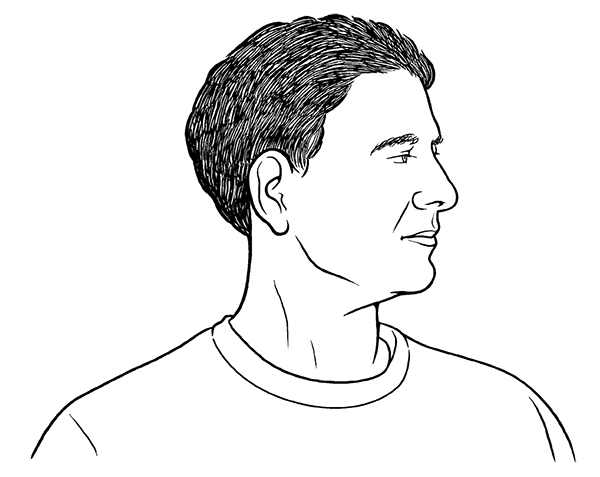 Figure 7.4 (Side to Side)
4. Side to Side
This is the first neck exercise to include a side-to-side motion. If we liken the Flex and Extend exercise to nodding yes, this exercise is like shaking your head no.
Begin with your head fully upright and facing forward. Keep your jaw parallel to the ground, and turn your head slowly to the left, moving your chin toward your left shoulder. Keep your neck straight up, fully lengthened and perpendicular to the ground
(
Fig 7.4
).
At the end point of the turn, it's common for people to want to tilt their head a little, moving it rearward to get a sense of an increased stretch. It's also common to allow your left shoulder to move rearward, as that will allow you to turn farther and give you the illusion that you're turning your neck more. You want to avoid both those possibilities, to do the stretch honestly and accurately, in order to get the best result from this exercise.
Then turn straight forward to your starting position, and continue the turn in the opposite direction, moving your chin toward your right shoulder this time. Repeat the left and right turn ten to twelve times.
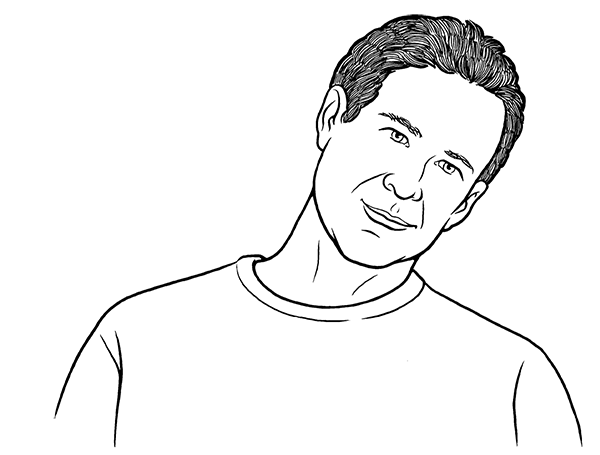 Figure 7.5 (Lateral Flexion)
5. Lateral Flexion
In this second side-to-side neck exercise, your head stays facing straight forward throughout.
Begin with your head fully upright and facing forward. Tilt your head to the left so that your left ear moves toward your left shoulder
(
Fig 7.5
).
It's common to
turn
your head to the left when doing this, so do your best to avoid that, keeping your head facing straight forward. A little trickier, try to lengthen your neck at the same time. To help with that, imagine that someone has their hand placed lightly at the top of your head, tracking your movement while you try to push the top of your head into their hand as you move your head to the left. In addition to stretching the right side of your neck better, opening the vertebrae at the right side of your neck, this neck lengthening also opens the left side of your neck some, keeping space there to minimize any excess compression or bone-on-bone contact on that side of your neck.
Then return your head to its starting position and repeat, tilting your head to the right so that your right ear moves toward your right shoulder this time. Do your best to keep your neck lengthened as you slowly move your head side to side ten to twelve times.
Once you sense your neck is lengthened, you can add a held stretch after the last sideways tilt in each direction. To do that, with your head tilted left, reach over the top of your head with your left hand, and place your palm on your head so that your left fingertips are close to your right ear. Let the weight of your left arm alone slightly increase the stretch, taking care not to actively pull your head to the left. Keep your neck lengthened so that the left sides of your cervical vertebrae do not grind on each other. In this held stretch, you can add focused breathing, inhaling into any tight or uncomfortable area, and releasing tension with each exhalation. Breathe five to ten times, then repeat the held stretch in the same way on the other side of your neck, head tilted to the right.
6. Chin to Chest Neck Rotation
This is a variation of the more well-known full neck rotation, one that provides as much benefit without the danger of grinding the bones of the cervical vertebrae.
Drop your chin to your chest, as in the beginning of the Flex and Extend exercise earlier
(
Fig 7.6A
on next page
).
Keeping your chin as close to your body as possible, your
neck fully flexed, imagine that you are drawing a line on your chest with the tip of your
chin toward your left shoulder as your rotate your neck to the left. Your chin will rise as it approaches your shoulder. When turned as far to the left as your neck allows, look slightly downward over the back of your left shoulder if possible, to maximize the stretch
(
Fig 7.6B
on next page
)
.
Then draw the imaginary line with the tip of your chin back to your starting position at the center of your chest, and continue turning your head to the right until you reach the end of your stretch and look slightly downward over the back of your right shoulder. Keep your movement smooth, slow, and deliberate. There is no particular breathing pattern used here, but remember to keep your breath smooth, full, and even, with no held breath at any point. Repeat this side-to-side rotation ten to twelve times.
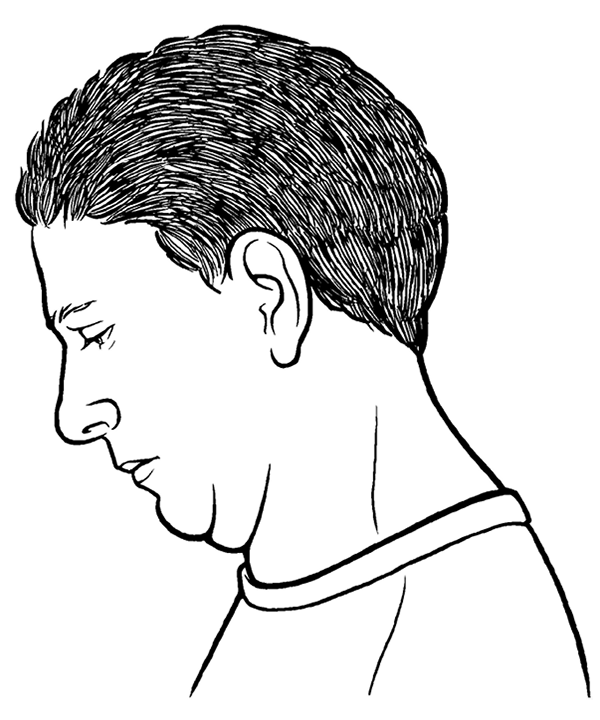
Figures 7.6A and 7.6B (Chin to Chest Neck Rotation)
You may feel or hear crunching or popping noises, but that is normal, an indication of crepitus as described earlier, not bone grinding on bone.
7. Thumb Massage to Back of Neck
In this exercise, you will massage two or three parallel lines up the back of your neck. This self-massage is taken from Chinese Anmo and Tuina massage practices, which contain the physical therapy of standard massage and the energetic components of acupressure. Close to your spine, you will be accessing and benefiting the qi of the Urinary Bladder; slightly farther out, the Gall Bladder. The Sanjiao meridian intersects those diagonally. You may also access the qi of the small intestine, farther to the sides of your neck. That might be missed in this practice, but it is addressed in others in this section.
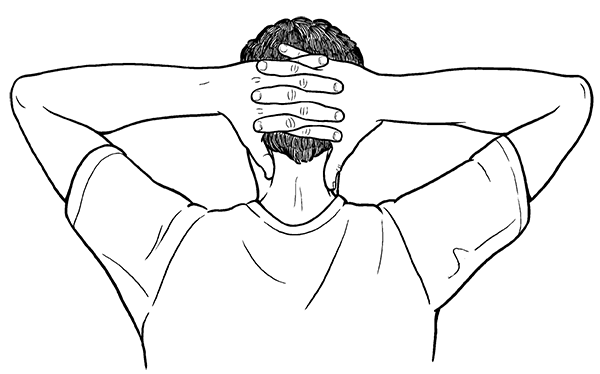 Figure 7.7 (Thumb Massage to Back of Neck)
Interlock your fingers and place your hands at the back of your head, cradling the base of your skull. Point your thumbs downward toward the top of your shoulders
(
Fig 7.7
).
You may need to slide your hands a little lower, letting your thumbs touch your neck where it joins your back. Your interlocked fingers will allow you to use more force with your thumbs than you might otherwise be able. Using pressure comfortable to both your thumbs and neck, press into your neck with your thumb tips at the base of your neck. You may want to incline your head some to open the back of your neck for easier access. Make circling movements with your thumbs, massaging into your neck muscles. Start slightly wider on your neck, near the sides of your neck, and gradually move your circling thumbs upward in a relatively straight line until you reach the base of your skull. Then massage back down along the same line. Move your thumbs inward slightly, closer to your vertebrae, and repeat the circling massage up and down your neck. If there is room for you to move your thumbs closer still (without placing them directly on the center of the vertebrae), repeat the circling massage for a third and final time, up to the base of the skull and back down.
Wherever you may feel tension or tenderness, at any point on any of the three lines along the back of your neck, stay on those spots a bit longer. Massage long enough to feel some of the tension dissipate and the muscles soften. This may feel a little sore, but in a “good hurt” way. With practice over time that soreness will lessen and vanish.
8. Resistance Exercises
All the previous neck exercises are loosening, opening, stretching, and mobilizing practices. These final exercises are not Chinese, to the best of my knowledge, but are isometric strengthening exercises for the neck. Muscle strengthening exercises are useful for the entire body, of course, but the neck is a special case in that it works nonstop throughout the day to hold up the weight of your head, and weak neck muscles are a contributing factor to many causes of neck pain. A strong neck is more stable (better able to hold the improvements from the previous exercises), less prone to injury, and will help to minimize or reverse degenerative changes.
1. Forward Resistance.
With your head fully upright and facing forward, place the palm of your strongest hand on your forehead. Push your forehead into your hand as hard as you can without strain
(
Fig 7.8A
).
Feel the muscles at the front of your neck work as you use your hand to resist and hold it in place. Push for about ten seconds, and then relax. Repeat three times.